|
Home
Why an RV?
Choices
Search
Empennage
Empennage Attach
QB Wings
Bulkheads
Aft/Center Fuselage
Forward Fuselage
Cockpit 1
Cockpit 2
Cockpit 3
Tip up Canopy 1
Tip up Canopy 2
Tip up Canopy 3
Avionics/Panel 1
Avionics/Panel 2
Avionics/Panel 3
Avionics/Panel 4
Firewall
Tricycle Gear
Engine/Prop 1
Engine/Prop 2
Cowling 1
Cowling 2
Baffling
Ram Air
Last 10 Percent
Last 5 Percent
Last 3 Percent
Last 1 Percent
Phase 1
Phase 1 pg. 2
Phase 2
P-Mag Install
Videos
EFIS Flight Logs
Tips & Mods
Links
Fine Living
Avionics Manuals
N447RV Documents
Helpful Builder Docs
FAA Documents
Contact Information
The Boo
| |
Last 3 Percent
| 4/30/05 |
Last 3 percent, who am I kidding...Might as well
call it "not even started page". As much as I hate to
say it, things are going to slow down on this build tremendously now.
Since the plane is at CNO, it's darn near impossible for me to get to the
airport during the week. That means weekend gigs only for the remainder of
the build. Do yourself a favor, keep your build in your garage/home as
long as you possibly can. I did, but I'm finding that I still could have
done much more at home.
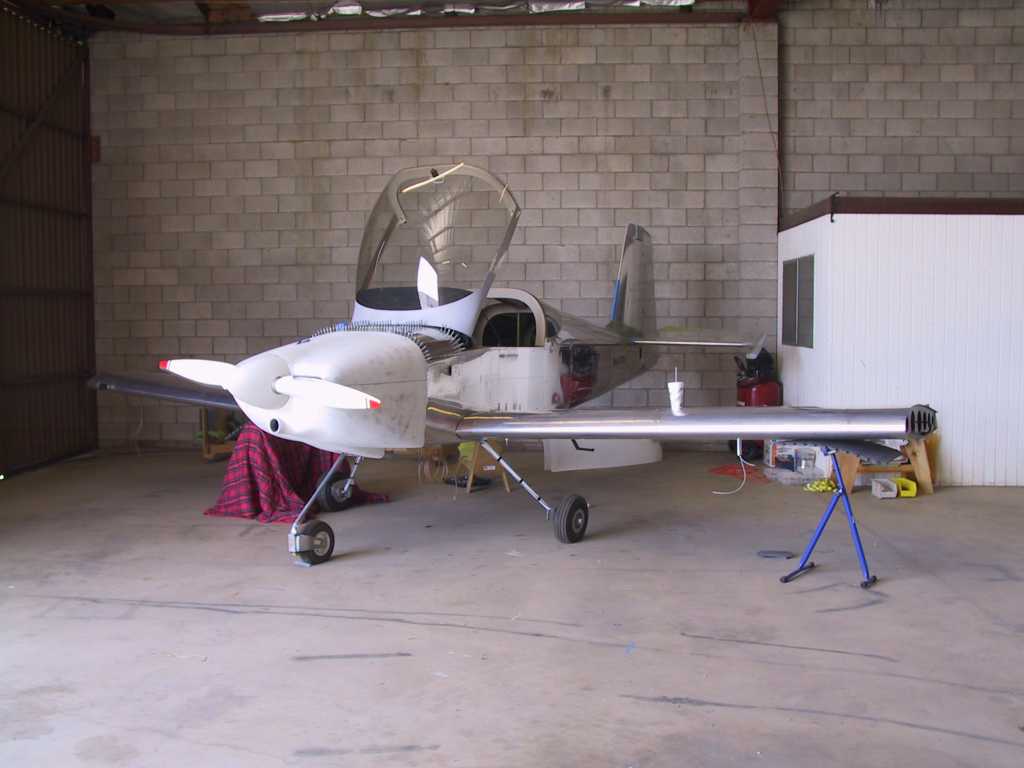
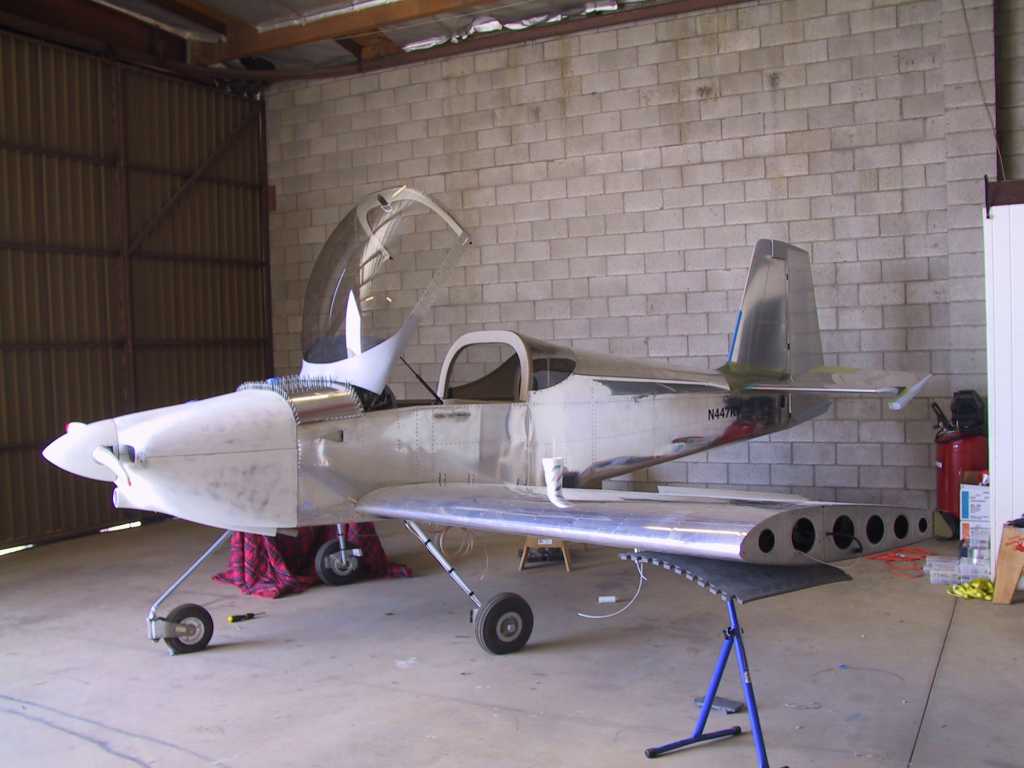
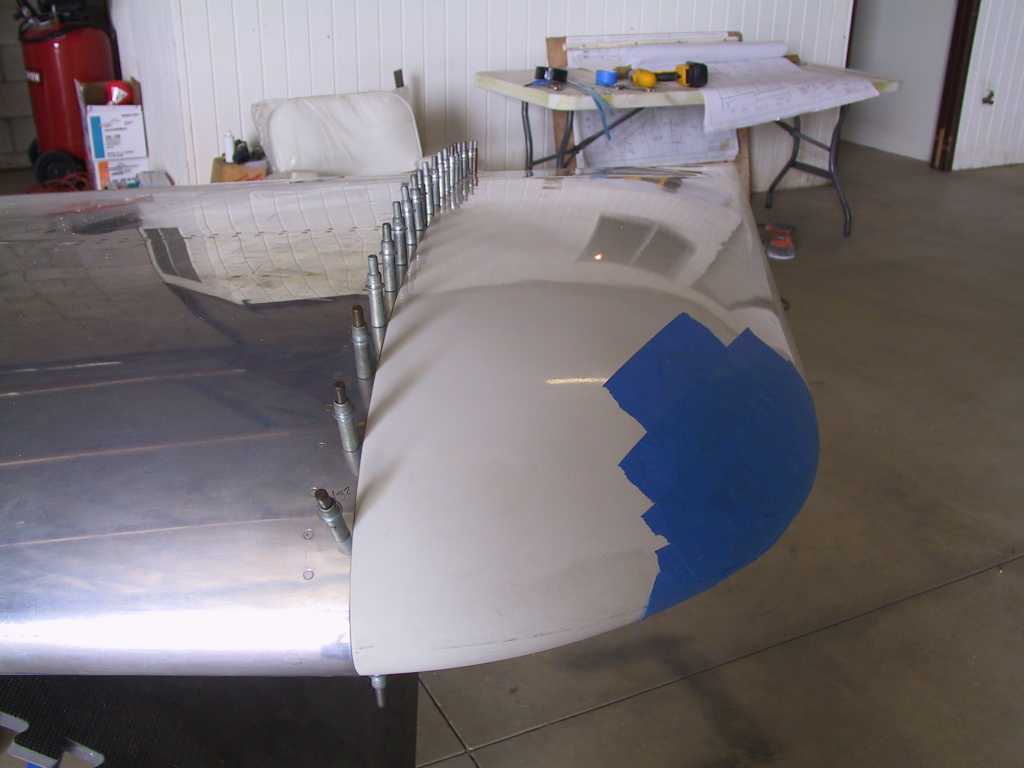
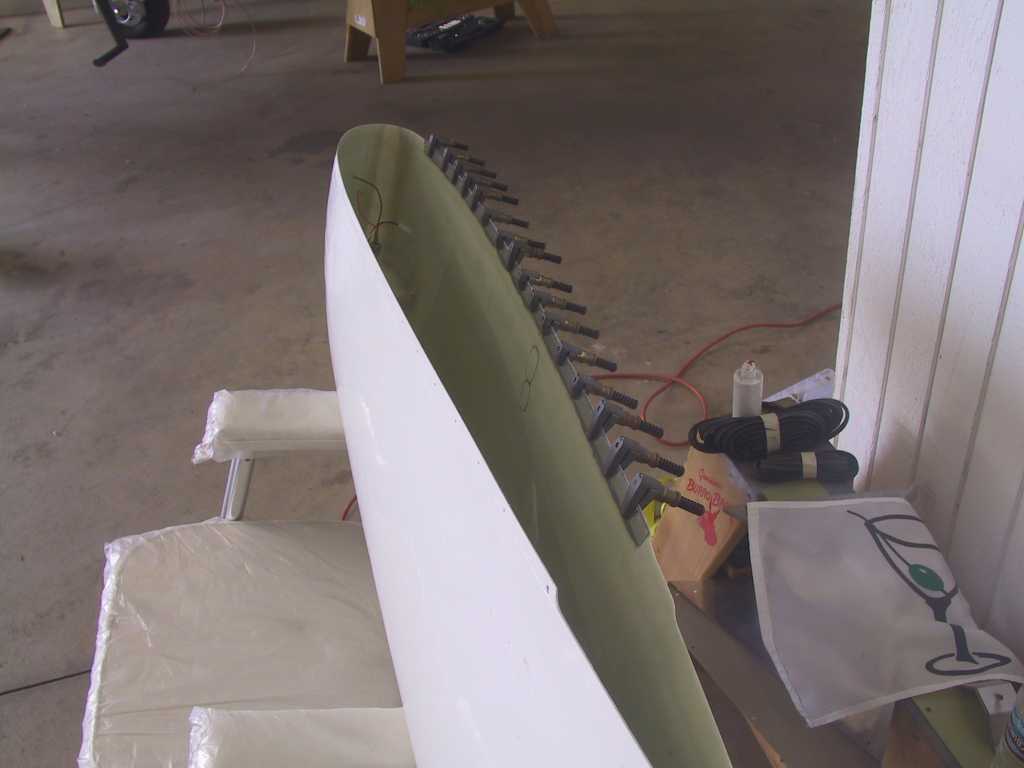
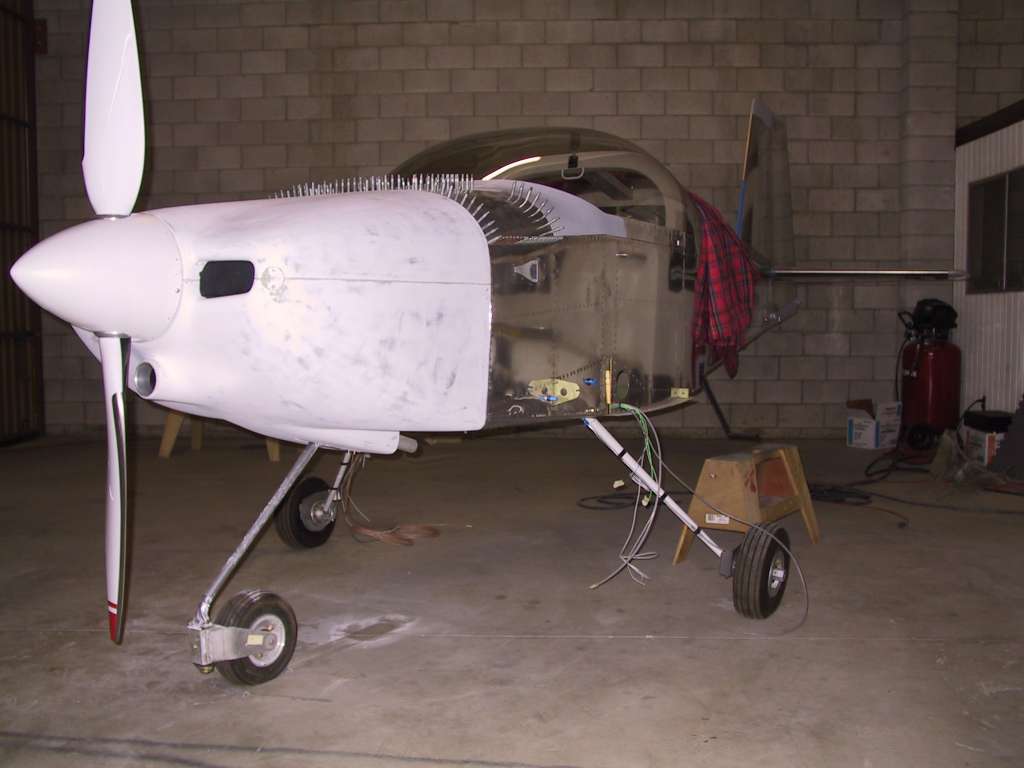
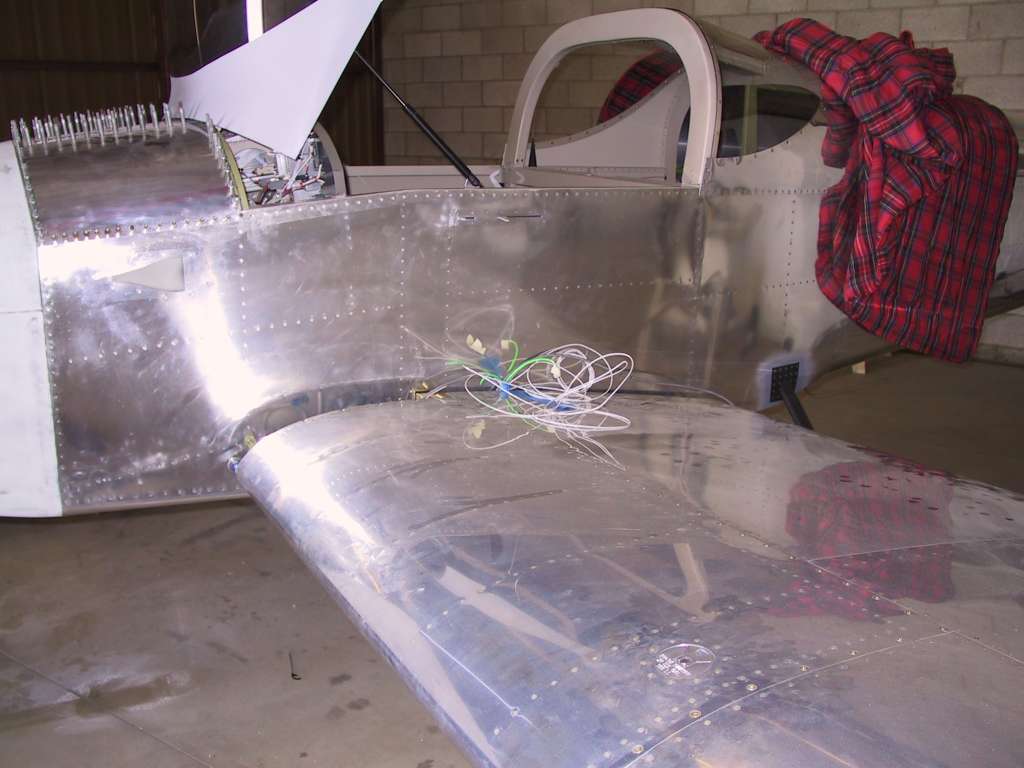
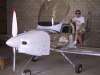
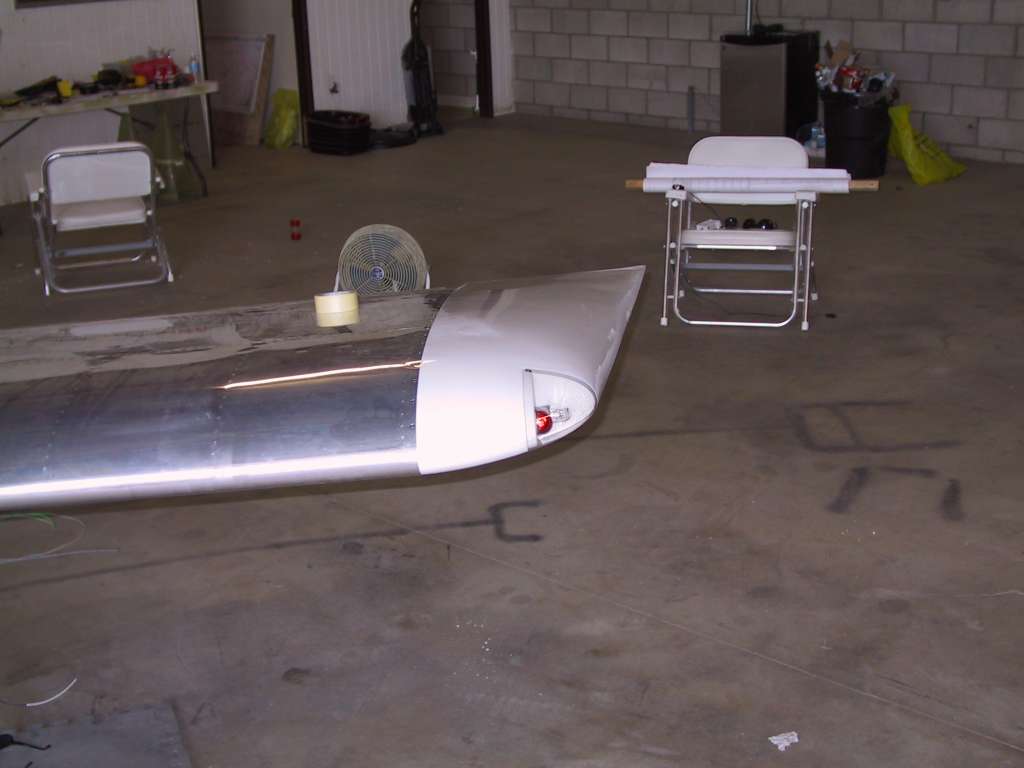
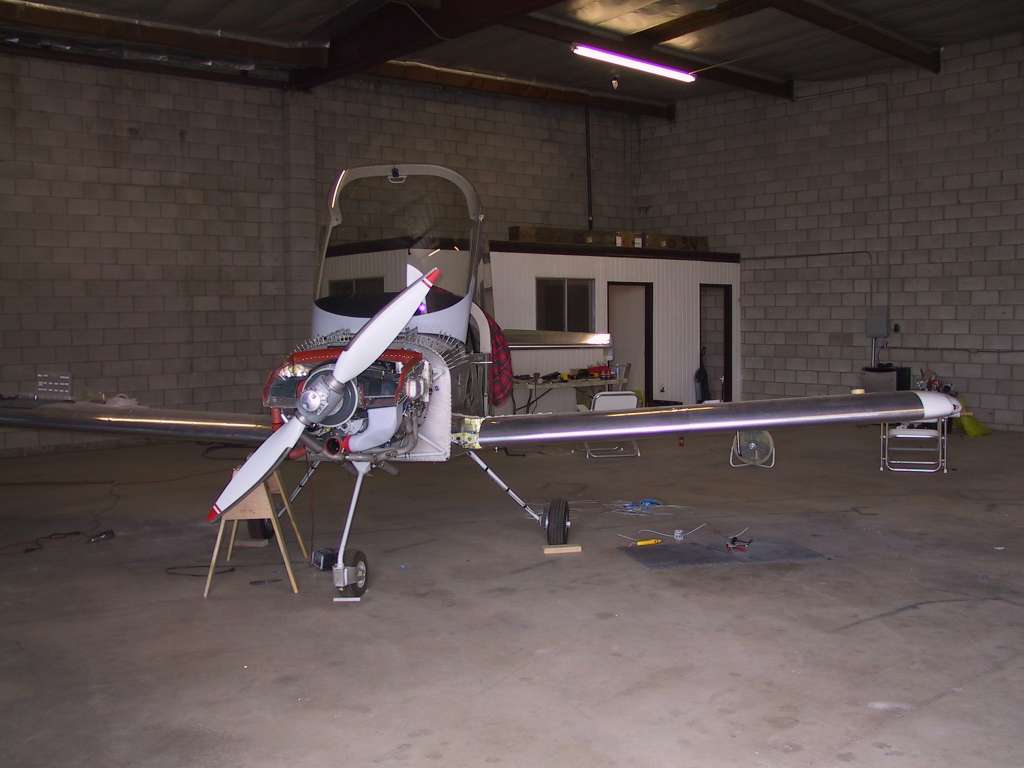
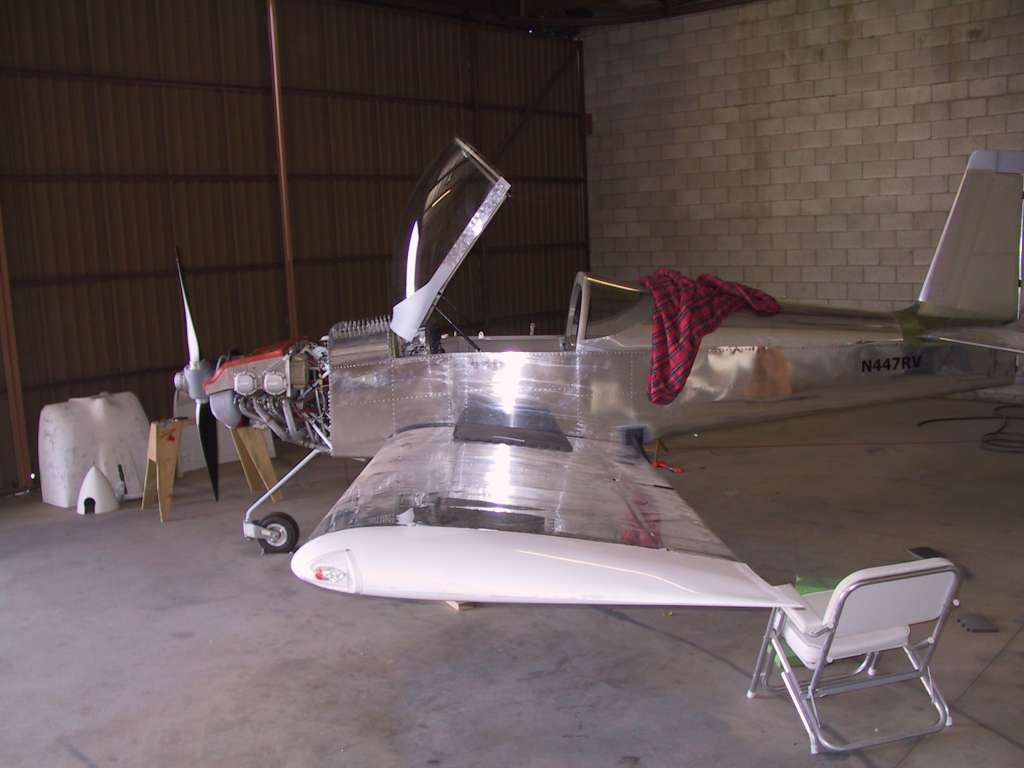
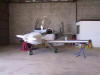
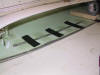
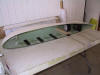
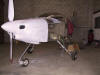
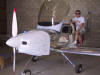
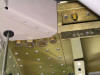
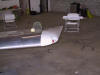
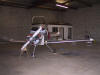
First weekend at the hangar. I got some help from David
and Mike Holland, an on-field RV-9A builder who's about as far along as I am,
and got the wings mated, temporarily, so I can get the wing root fairings match
drilled. This is how she looks now, in the corner of the hangar.
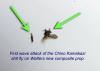
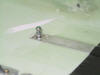
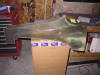
Here's a good picture of one of Chino's most notorious, sent to
me by David. This guy really wanted to have first dibs. He paid the
usual price for hitting a moving RV; death by lethal prop ingestion.
 |
| 5/1/05 |
Another long (1 hr) painful drive to the airport
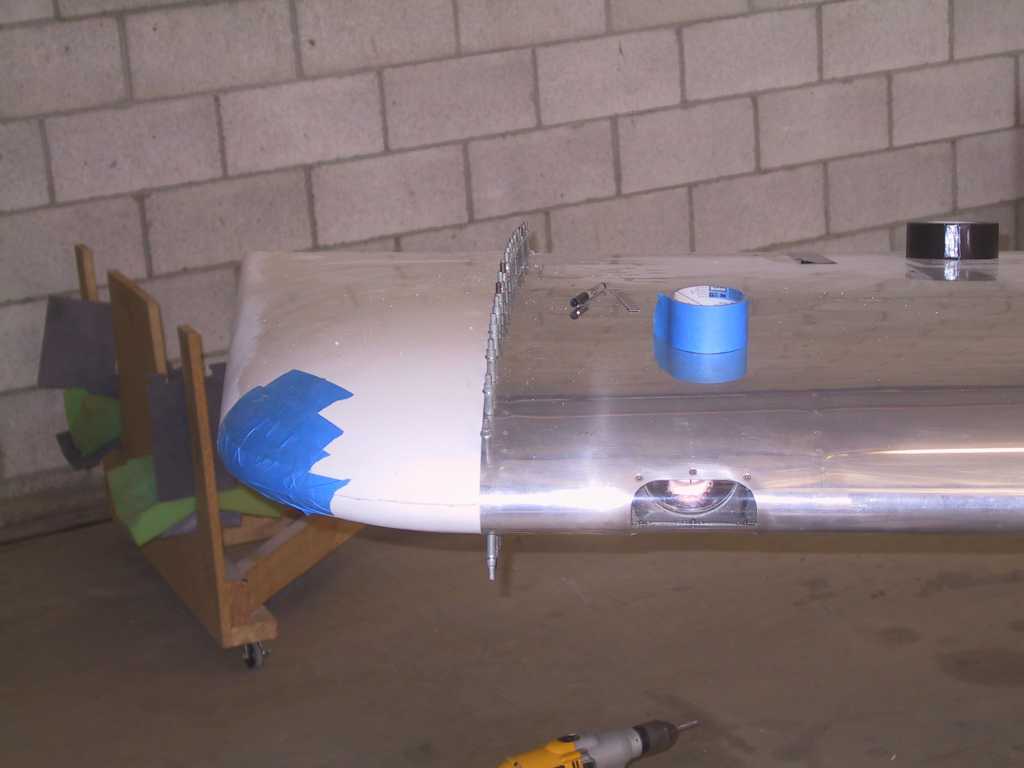
and today I worked on the wingtips. First I trimmed them and then match
drilled the holes. I plan to keep them removable with #6 Torx screws.
Some people are having issues with the fit but mine came out
darn near perfect with the exception of the trailing portion where there is a
slight gap. The screws will tighten this down and with some heat from the
sun, they'll stay nicely in place with no visible gaps.
The trailing edge will need to be trimmed. No sweat, I
love fiberglass.

Time for the old JB weld trick.
 |
| 5/7/05 |
Well I'm getting a bit more free time during the
week. That's the understatement of the month. I feel like I'm
crawling on my knees now with the bird at the airport. Anyway, expect only
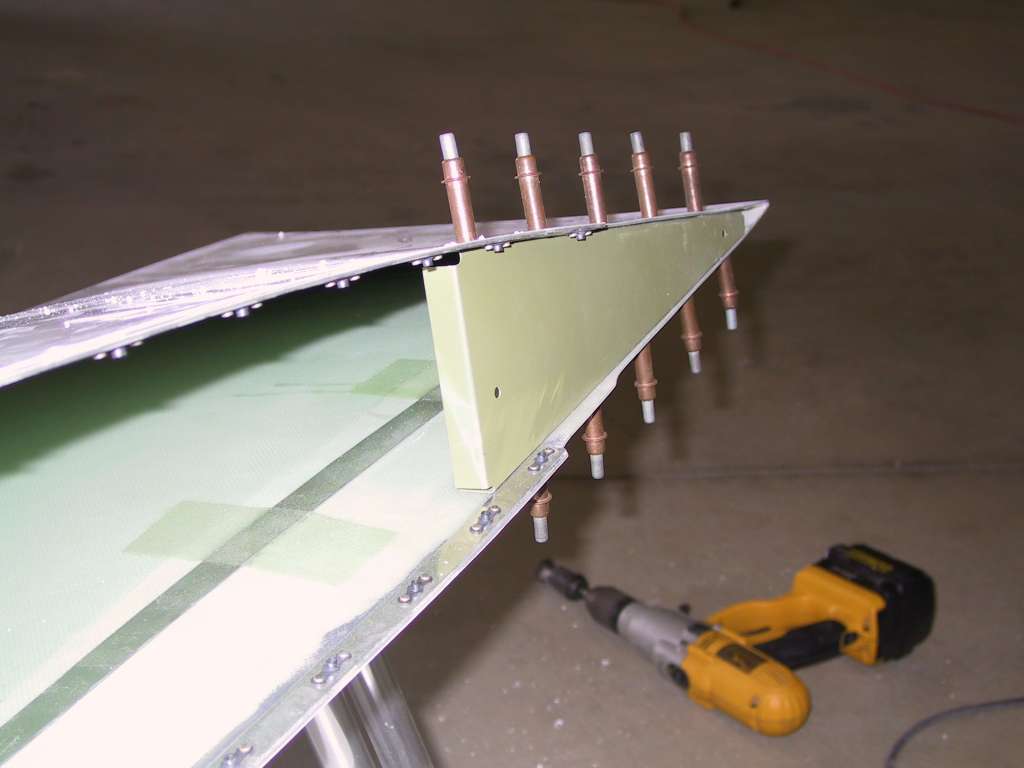
weekly updates from this point forward... Today was
wingtip day. I drilled the 80 or so holes for the wing tip attach and the
160 or so holes for the nutplates. Then countersunk them. Just when
you though your drilling days were over...
    |
| 5/8/05 |
And just when you though your time working on the
plane couldn't get any less, You realize that you are at an airport, with
airport people, and RV builders everywhere, and they want to stop and have a
look, and chat, and... Yep, that's right, even less time than you wished
for to get this puppy done. Actually, I'm really enjoying all the visits,
these folks at CNO are awesome. For instance, today I was short of
K1000-06 nutplates. Well It's Sunday and AS was closed. So hop on
down to Mike's hangar and see if he has any work to swap for some nutplates.
Nope, but he did need some proseal and I happened to have some. Good swap,
and now I can finish the wingtips. Thanks Mike!
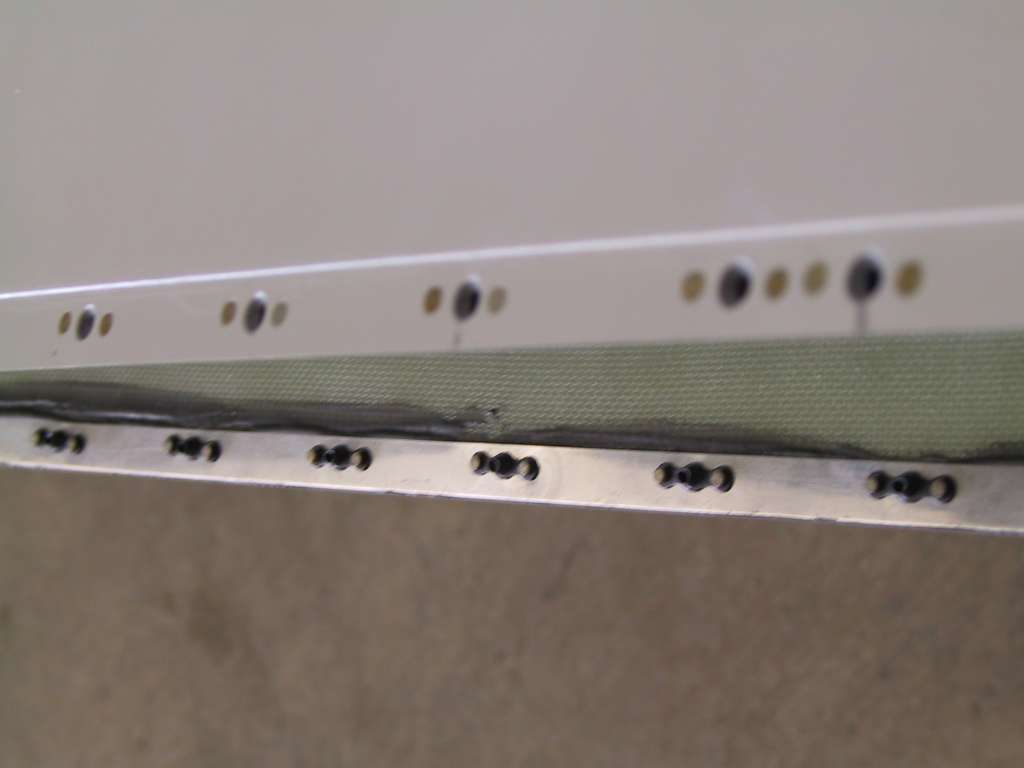
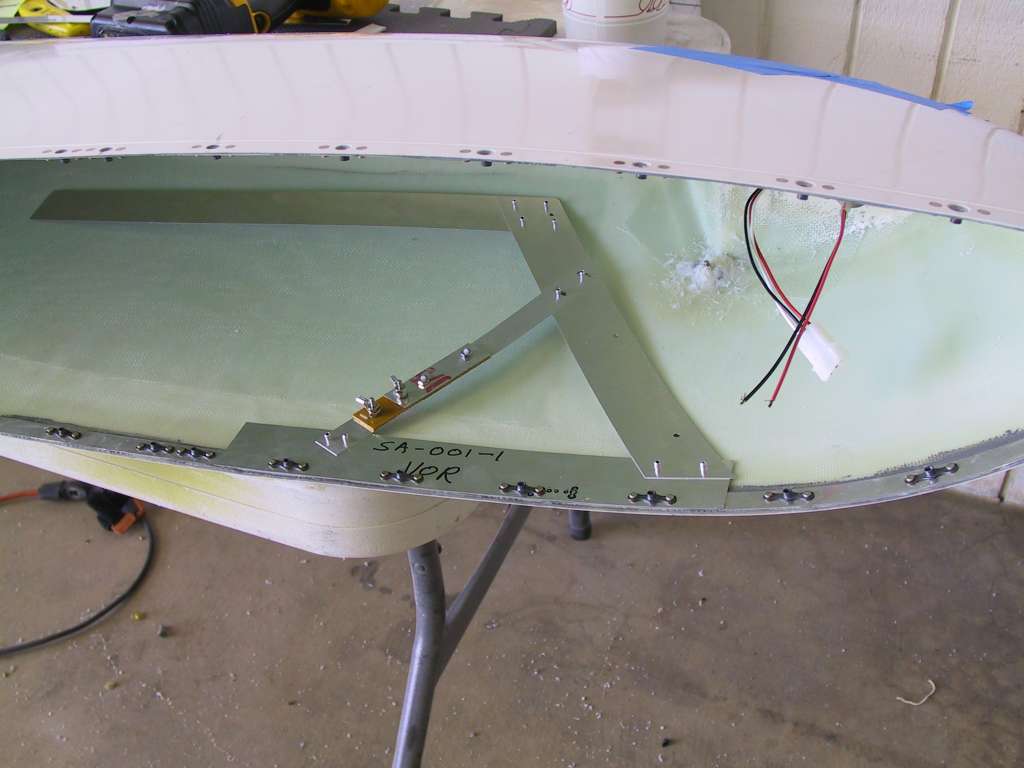
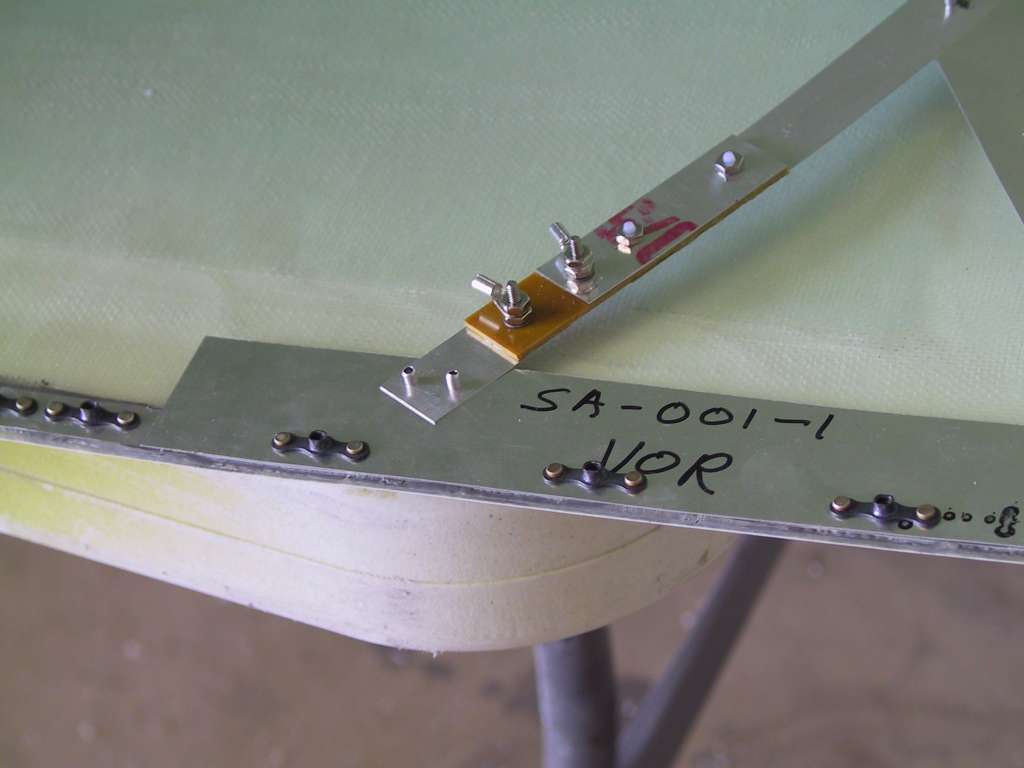
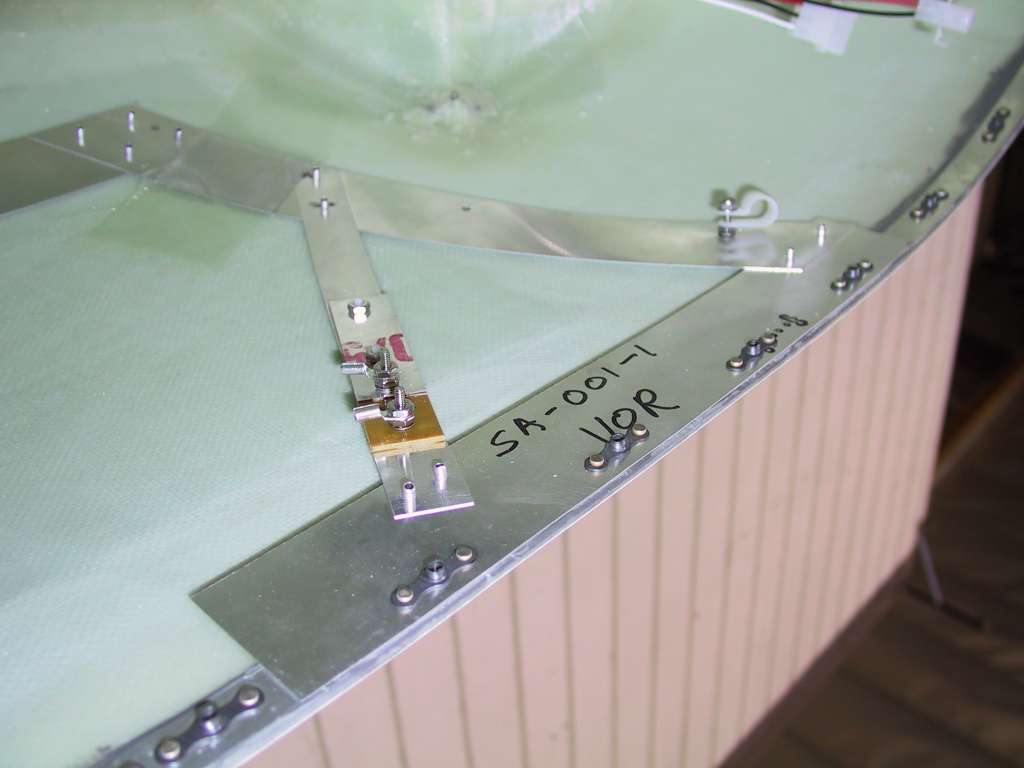
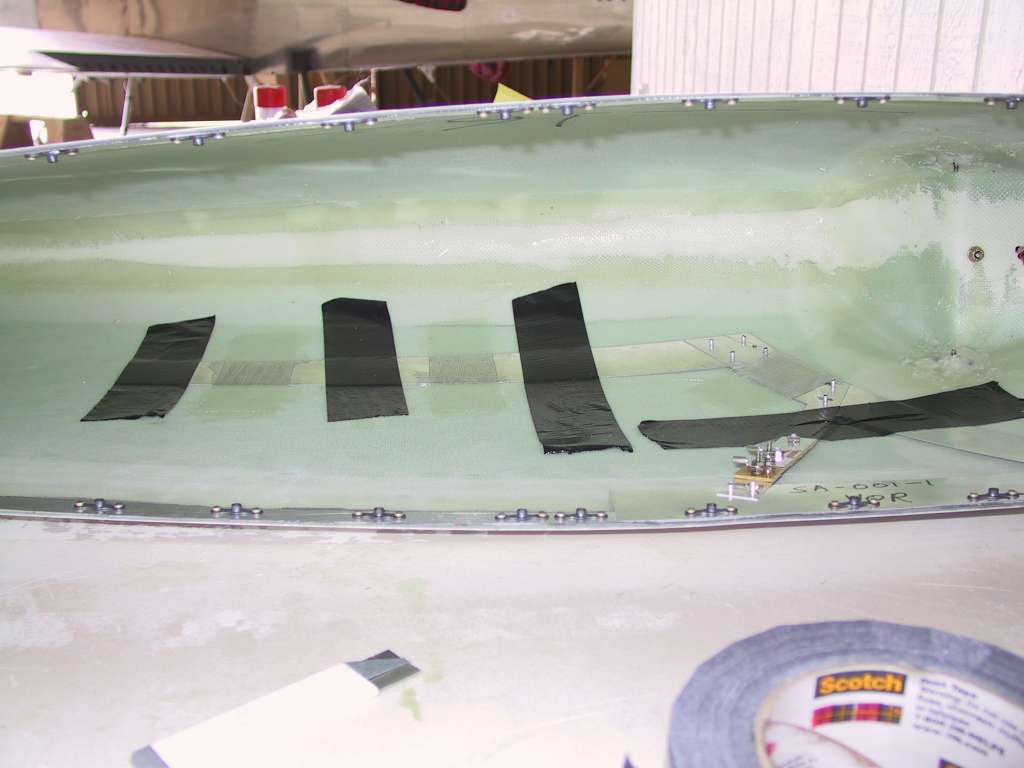
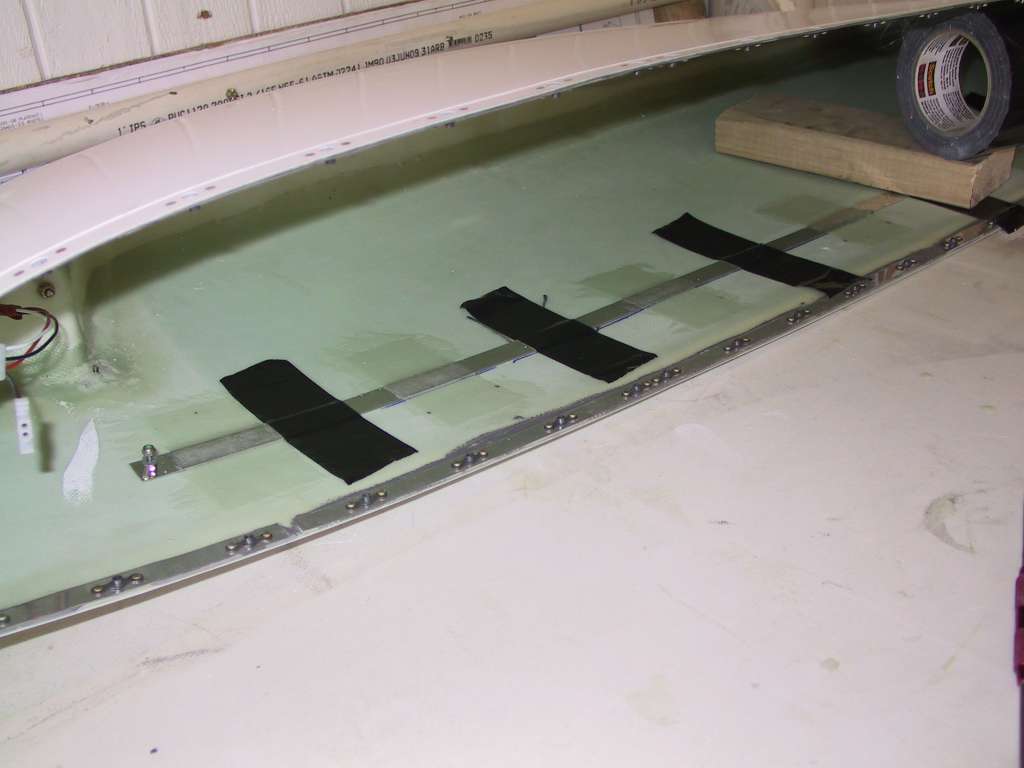
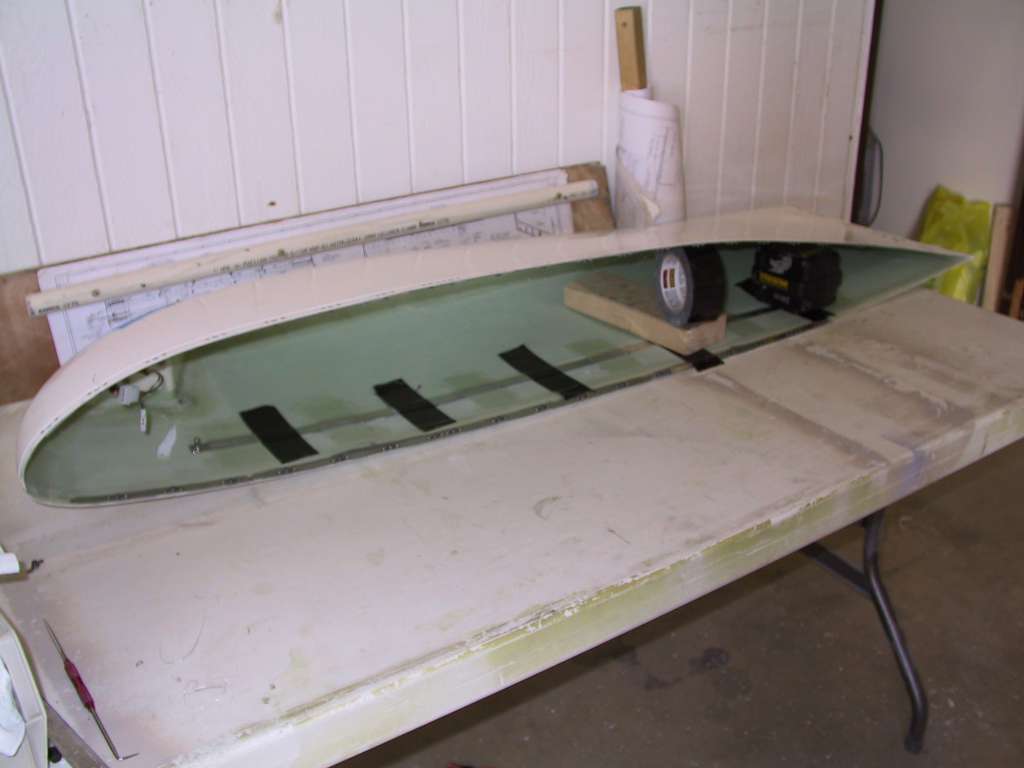
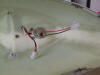
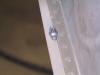
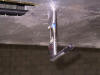
Installed the Archer VOR antenna in the right wingtip. It shares 4
nutplates and the bonding strip on the ground side. The VOR antenna is
mounted on the top side of the wingtip. I then fibreglassed it into place.
The black duck taps is just holding it down until the epoxy cures.
 
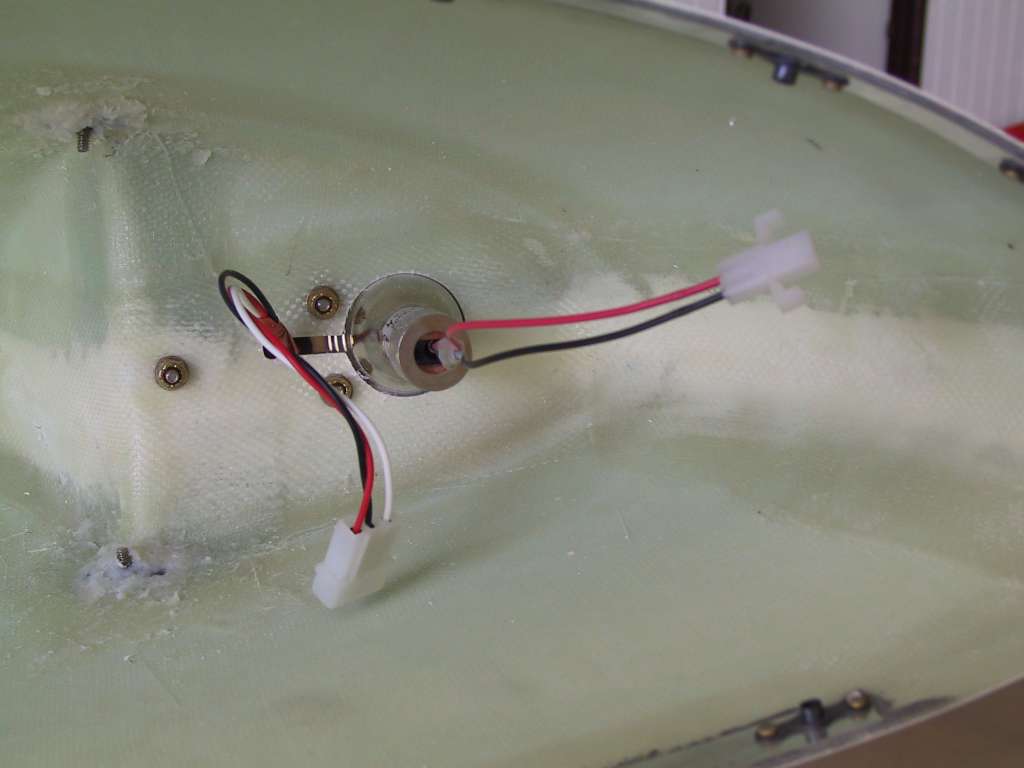
Added a molex connector for the nav lights on both wings.
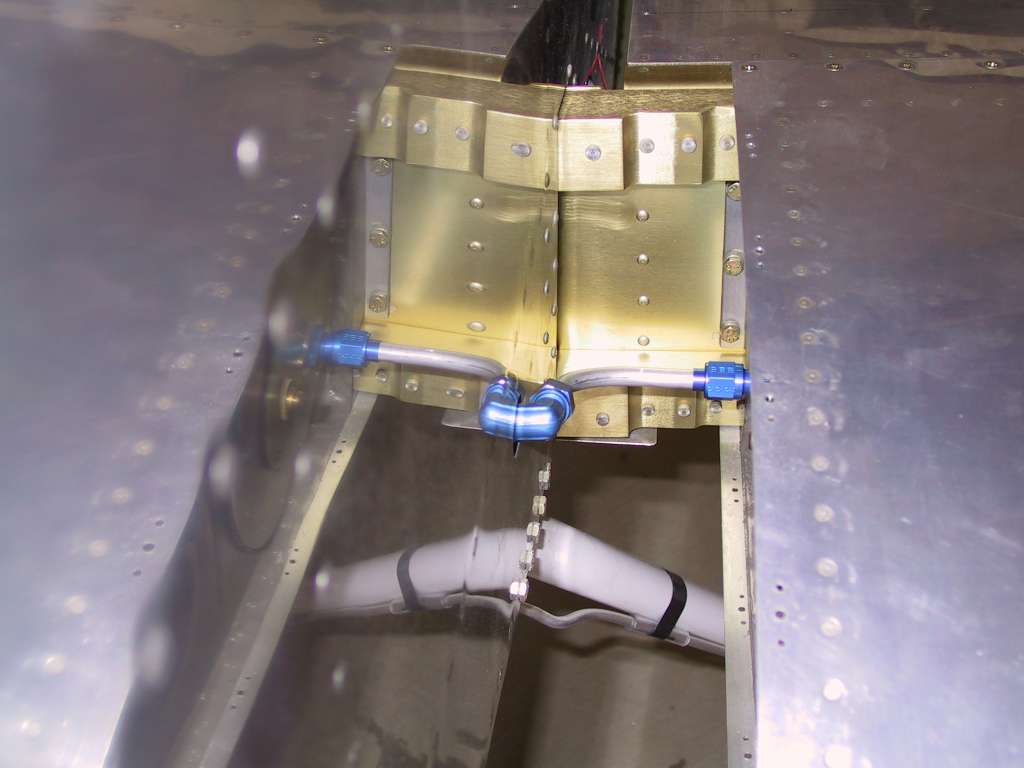
Made the last two fuel hose connections from the fuselage to
the wings.
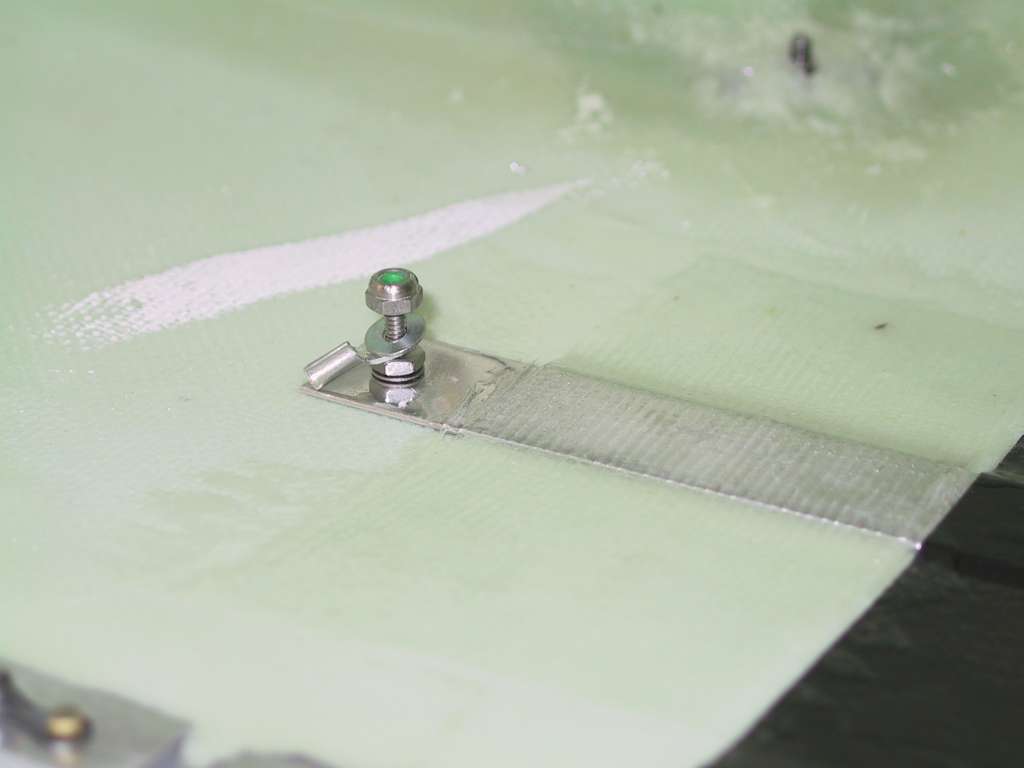
Made the Marker Beacon antenna by cutting a 1/2" piece of
aluminum 40" long. Attached a screw, lockwasher and nut to one end.
This will receive the center conductor of the MB antenna. Then glassed it
into the wing 3 inches from the end of the metal wing and on the bottom of the
wingtip, under the NAV antenna.
   |
| 5/9/05 |
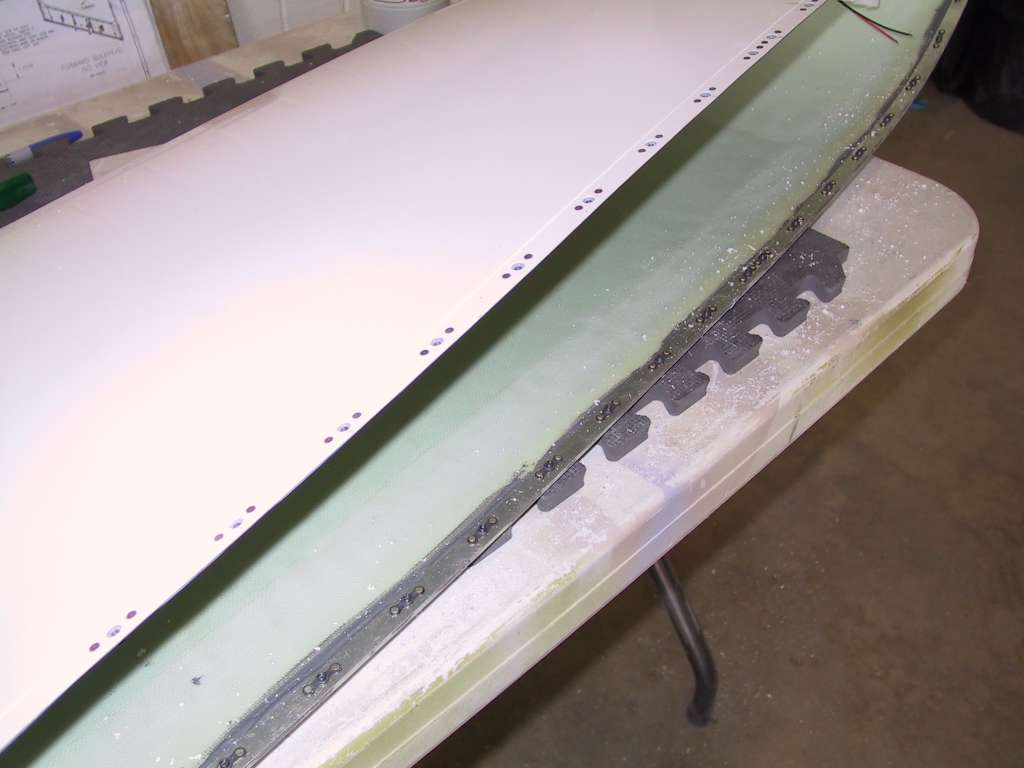
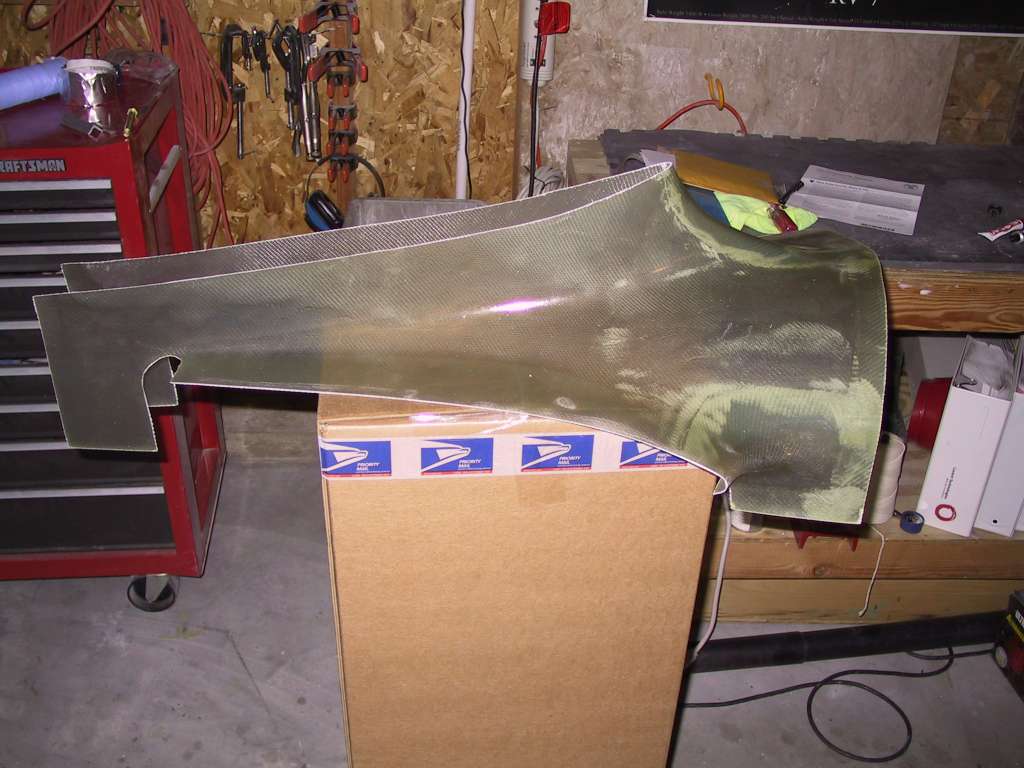
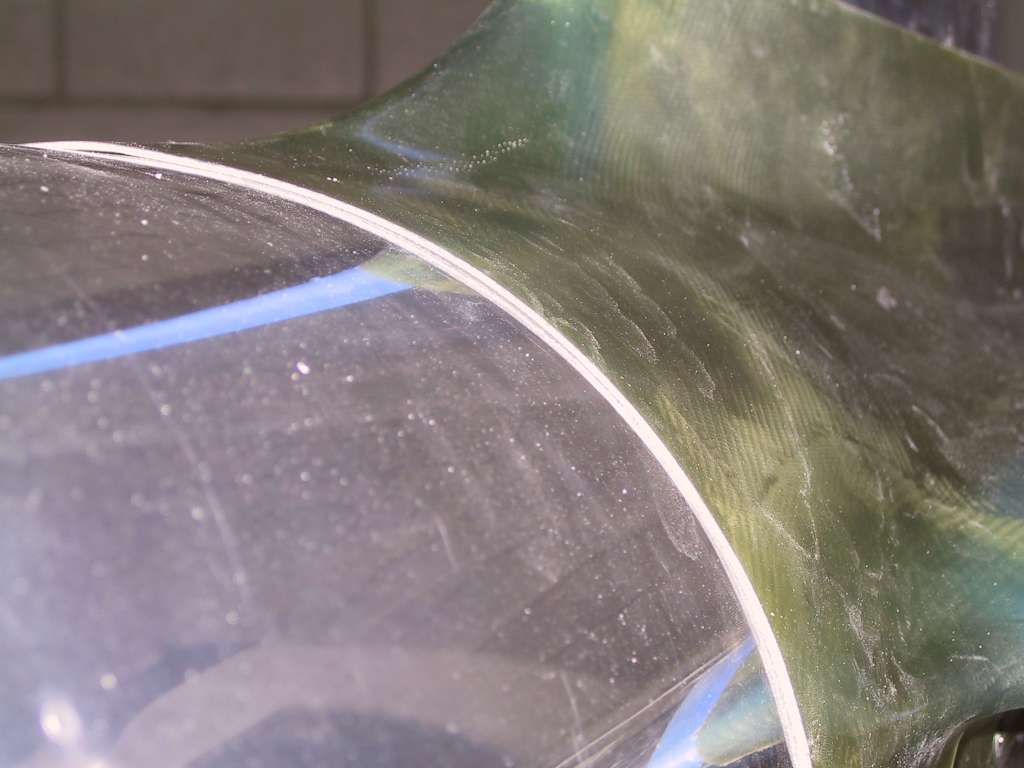
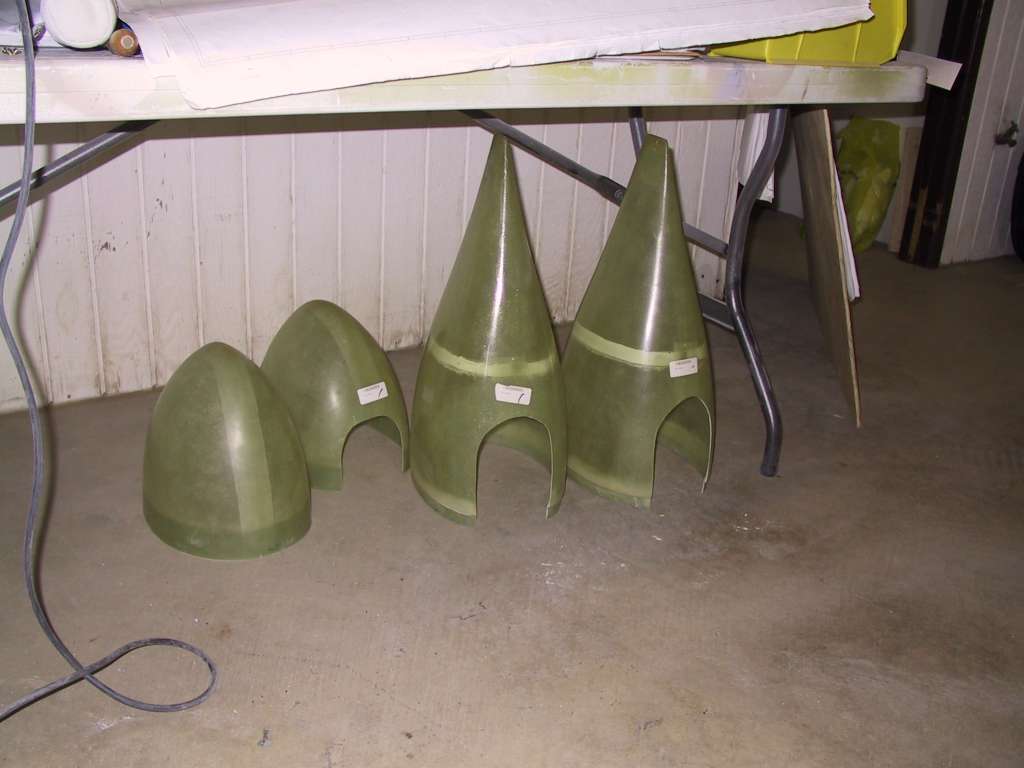
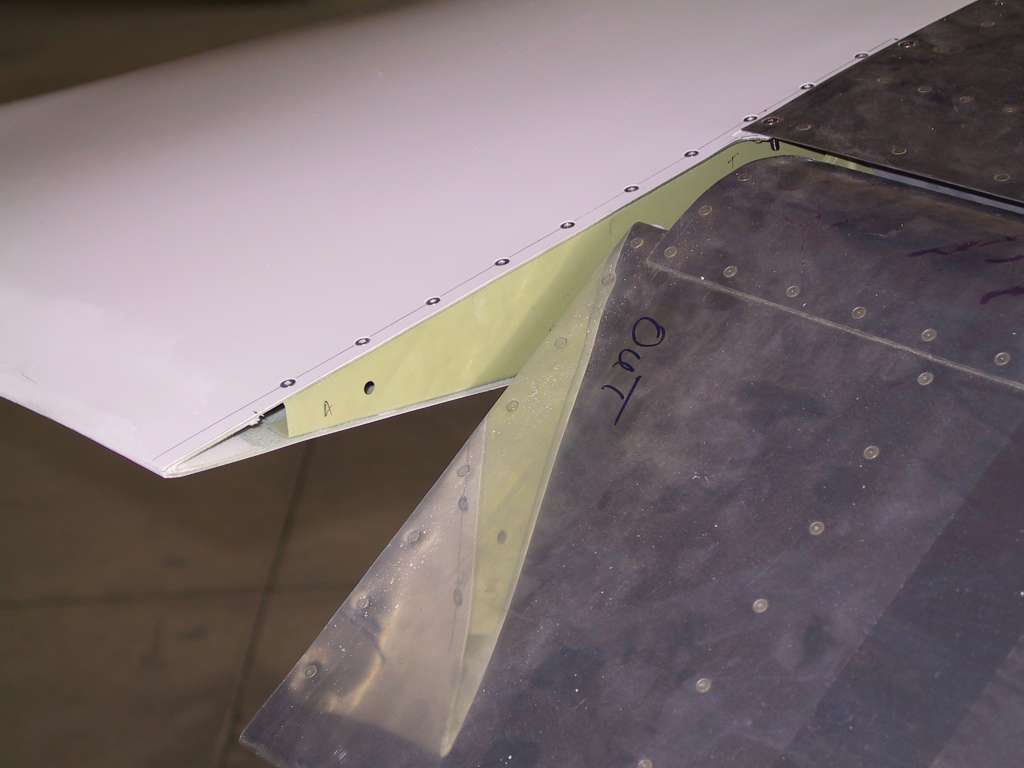
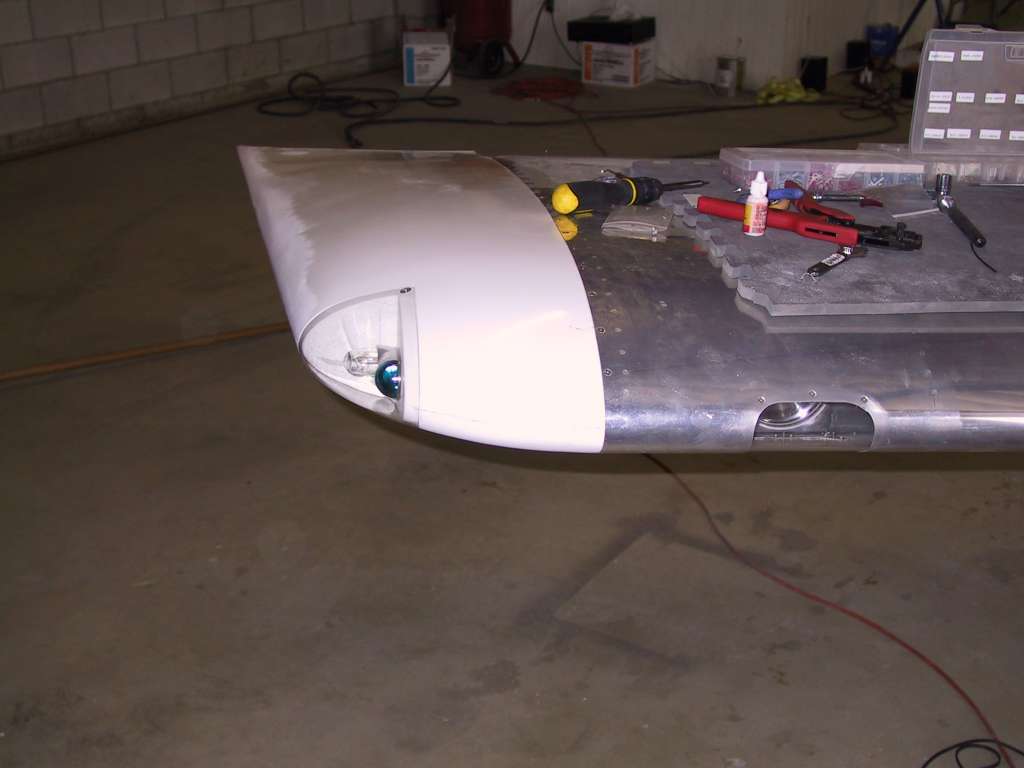
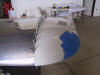
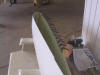
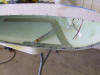
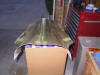
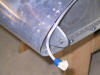
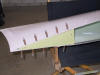
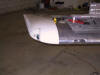
The last fairing I had from Bob at Fairings Etc.
had a problem with the fitment around the fuselage and at the front sides.
I spoke with Bob and he said he would send me a new one. If it fits the
same as the old one then I'll send it back. If it fits better, well then,
Bob is a hell of a nice guy to do business with! Here's the new one.
It certainly looks better in those areas.
  |
|
5/14/05 |
The usual. Drive an hour to chino so I can
smell the cow crap wafting through the hangar... Yuuuuuummy.
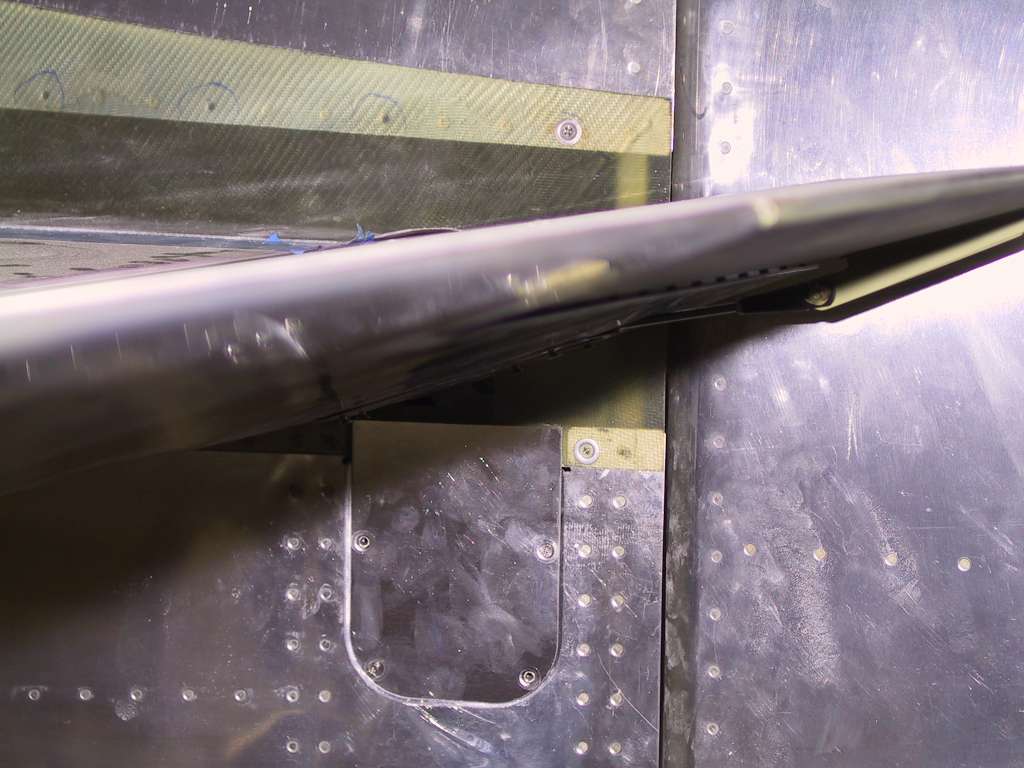
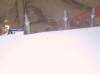
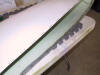
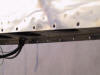
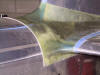
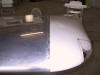
Today I worked on the empennage fairing. The new one fits
like a glove! There are only two screws on the front bottom and two at the
back. Not bad looking. All I had to do was trim the vs top to get it
to line up perfectly.
Later, Dave, Billy and Linus stopped by to help me get the
wings off. Thanks gentlemen, you are all right in my book.
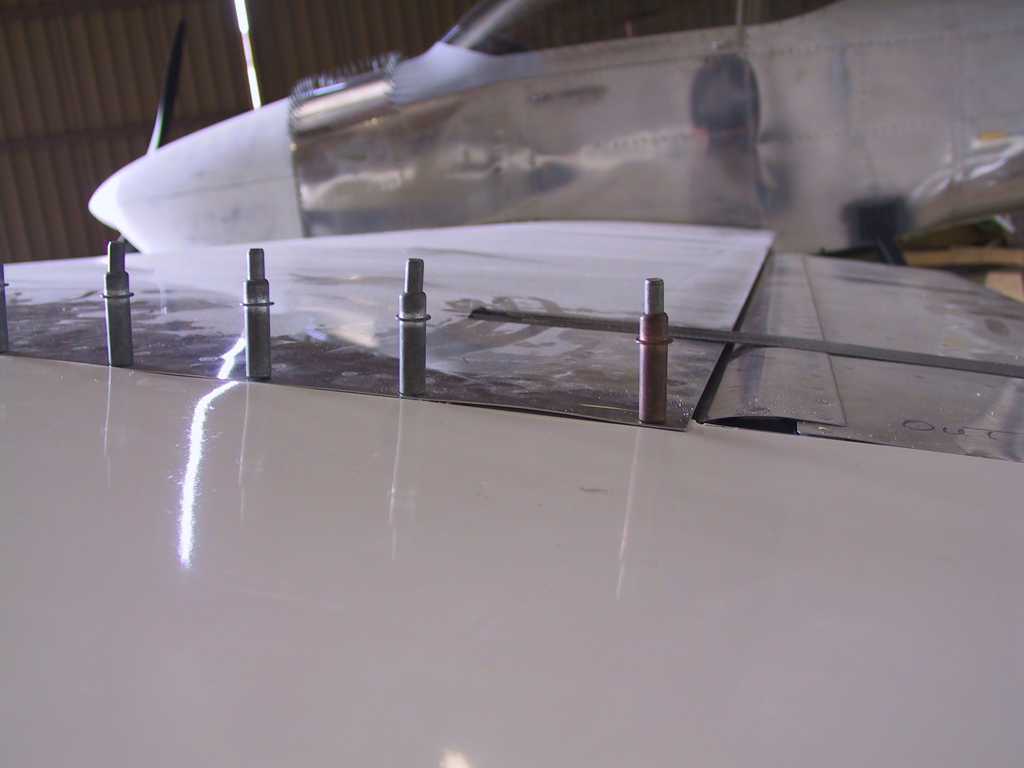
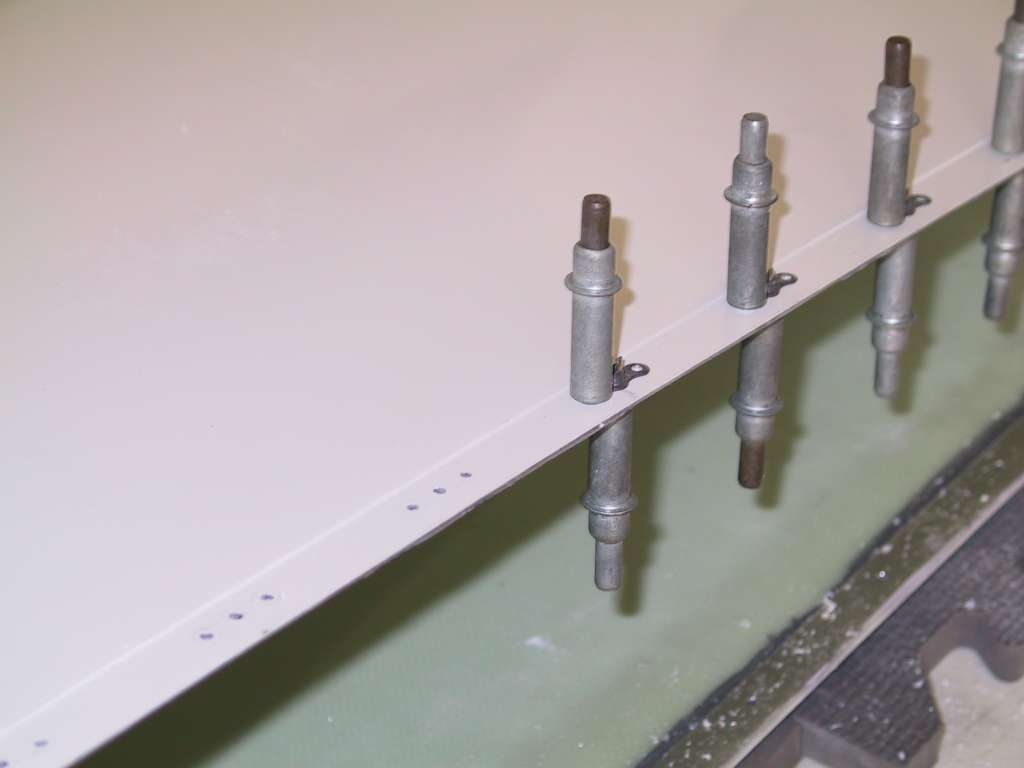
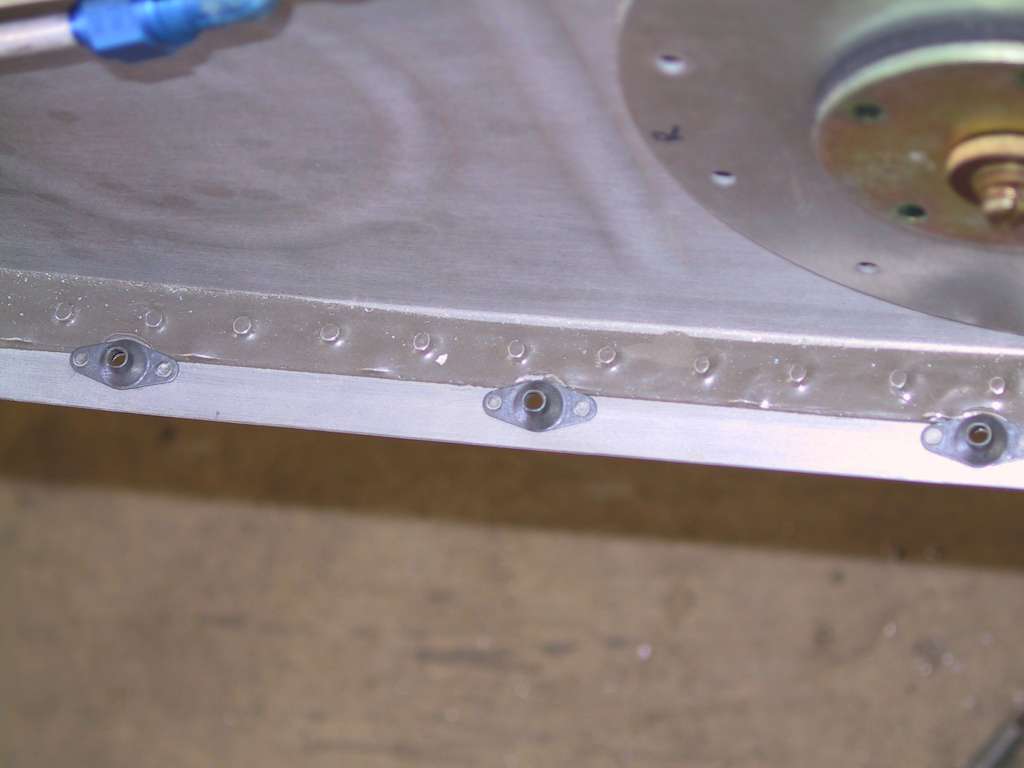
I proceeded to install the nutplates on the wings for the wing
fairing.

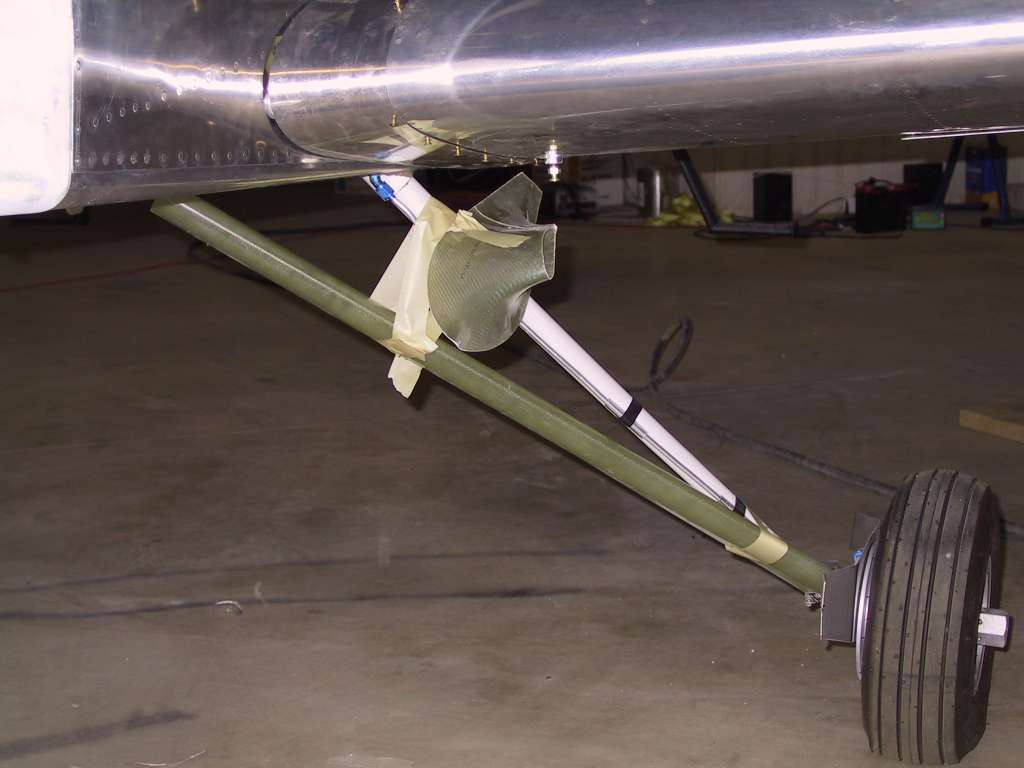
Later I worked on getting the fit of the front and rear halves
of the wheelpants to perfection.
 |
|
5/15/05 |
Putzed around and did a bunch of little things,
nothing worth mentioning. Then Billy came over to help me get the wing out
of the cradle and onto the saw horses so I can finish the nutplates for the wing
root fairing. Thanks Billy.
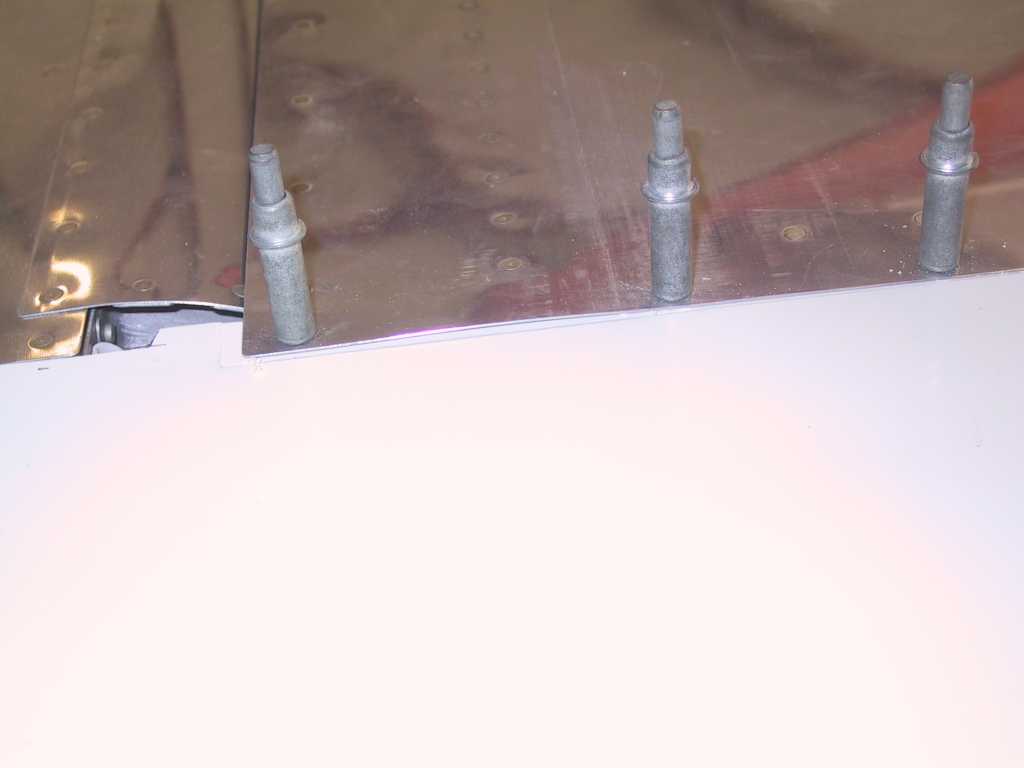
One thing to note is that these nutplates can interfere with
the outer tank rib flange. There isn't much you can do about this.
Just don't go crazy with the proseal.
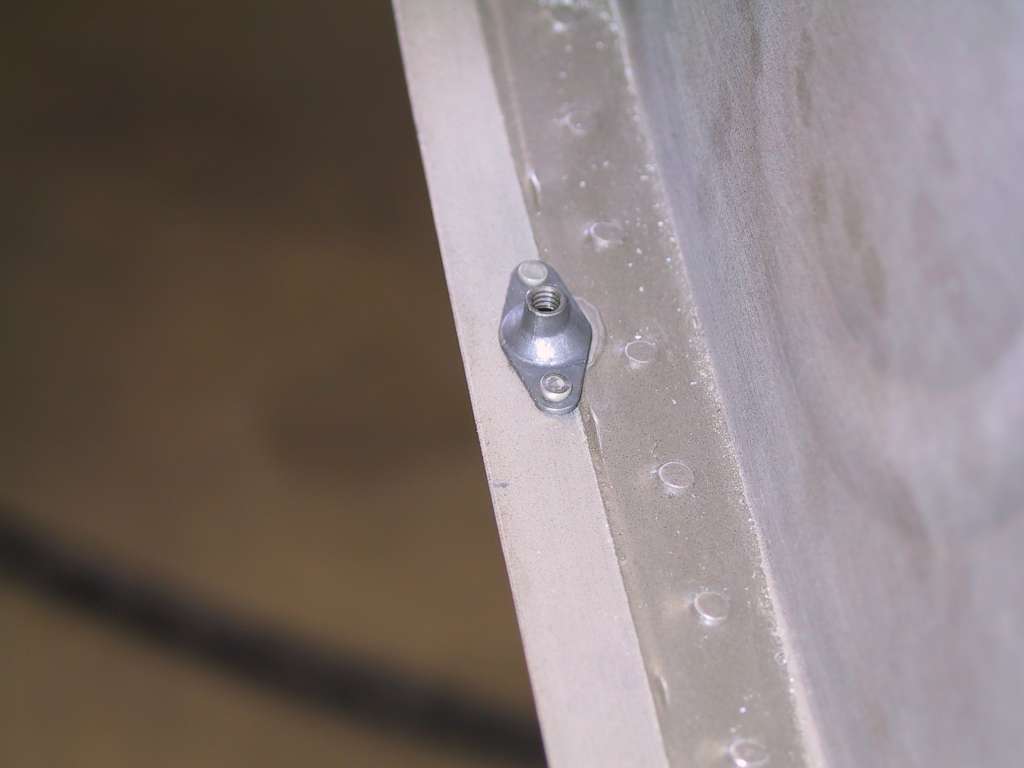
Finally I installed the platenut on the tank attach bracket.
It's getting hot. I need to get a small fridge to keep
the water cool. Off to Costco I go. |
|
5/20/05 |
Time to get the last few items finished and get
the wings on permanently. First I had to remount the wings to get the wing
to fuselage holes drilled on the bottom of the wing. I had neglected to do
this both times that I had the wings on before. Sheesh, you think I would
have remembered. I got help from Dan and David and one of Dan's friends
(sorry, can't remember name at this time) and got the wings on, off, and on
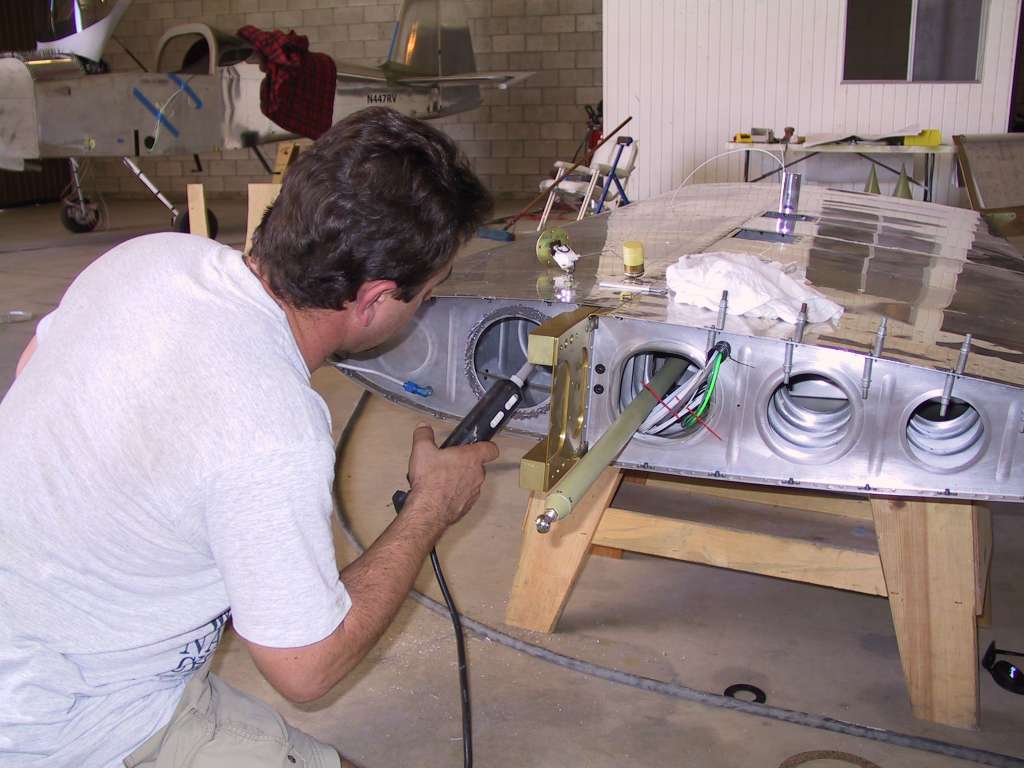
again. Before the wings were placed on for the last time I placed the
nutplates in place, prosealed the tank cover and fuel sender cover.
Now the wings are on for good. I'll place the permanent
bolts in next weekend. And I'll tidy up these wires and get the controls
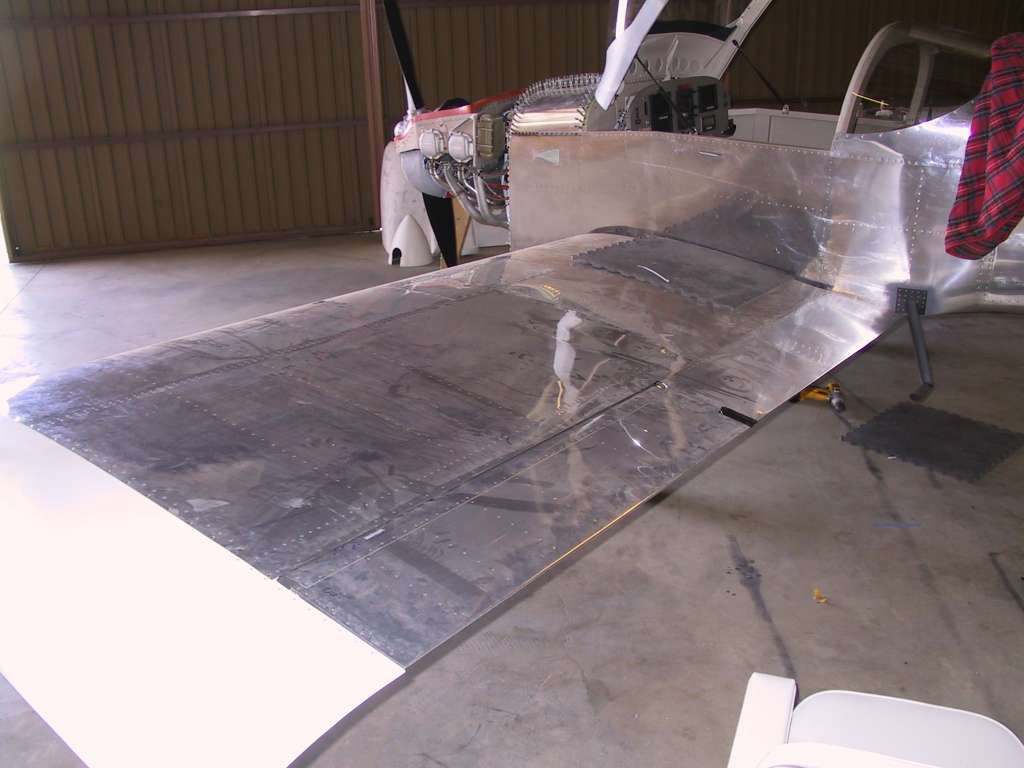
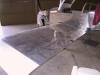
in place. It will be engine start pretty soon.

Here's David, hard at work.
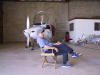
And I'm pretty happy that these wings aren't coming off again,
Ever.
 |
|
5/23/05 |
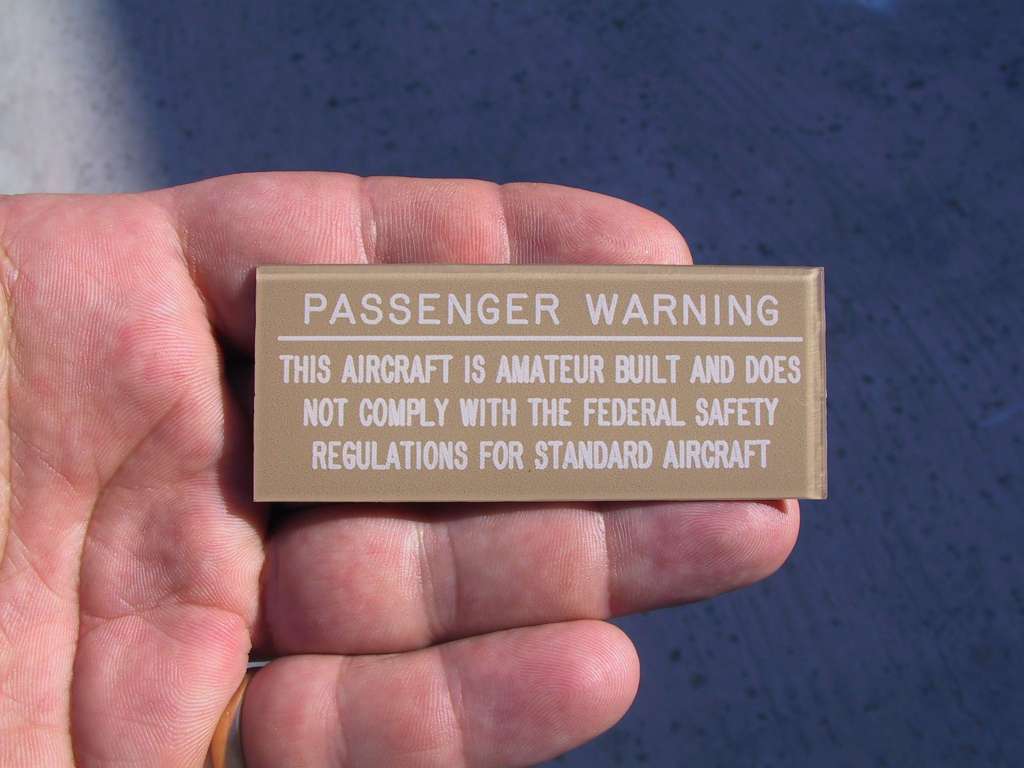
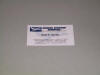
I had a local engraver do this little warning
placard.
 |
|
5/28/05 |
Making some progress now. Everything I'm
doing at this point is for the last time, hopefully. I
held the wingtips as close to the wing as possible, sitting on a tall sawhorse
and made all the connections/fitting for the strobe, nav, and antenna
connections on each side.
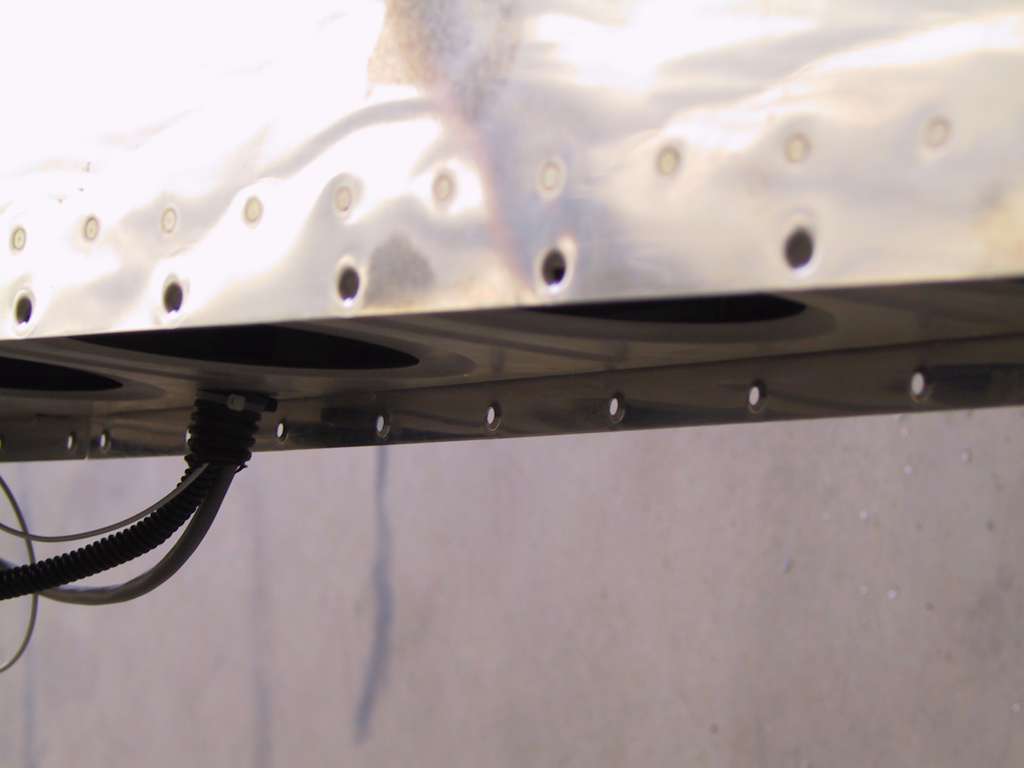
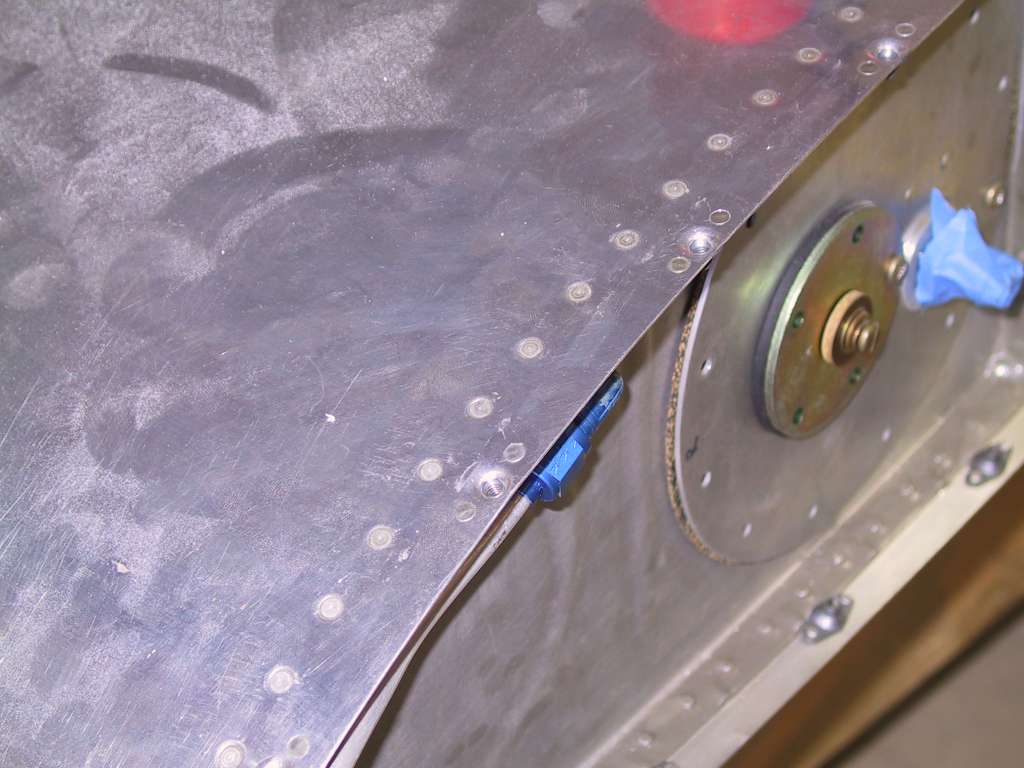
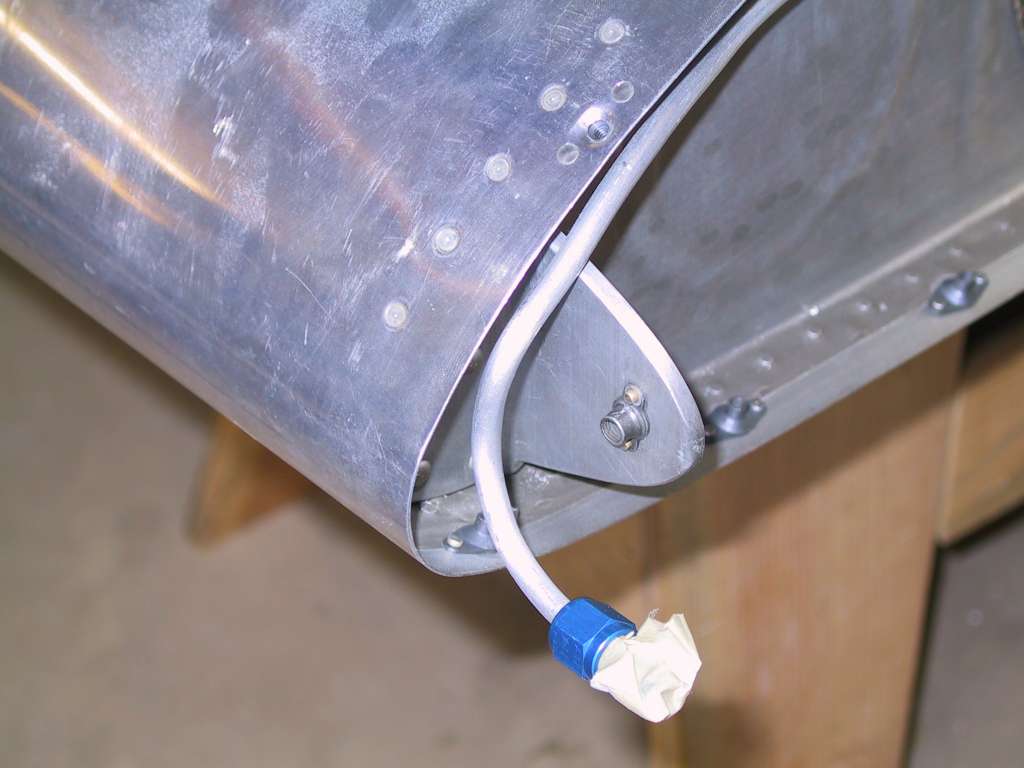
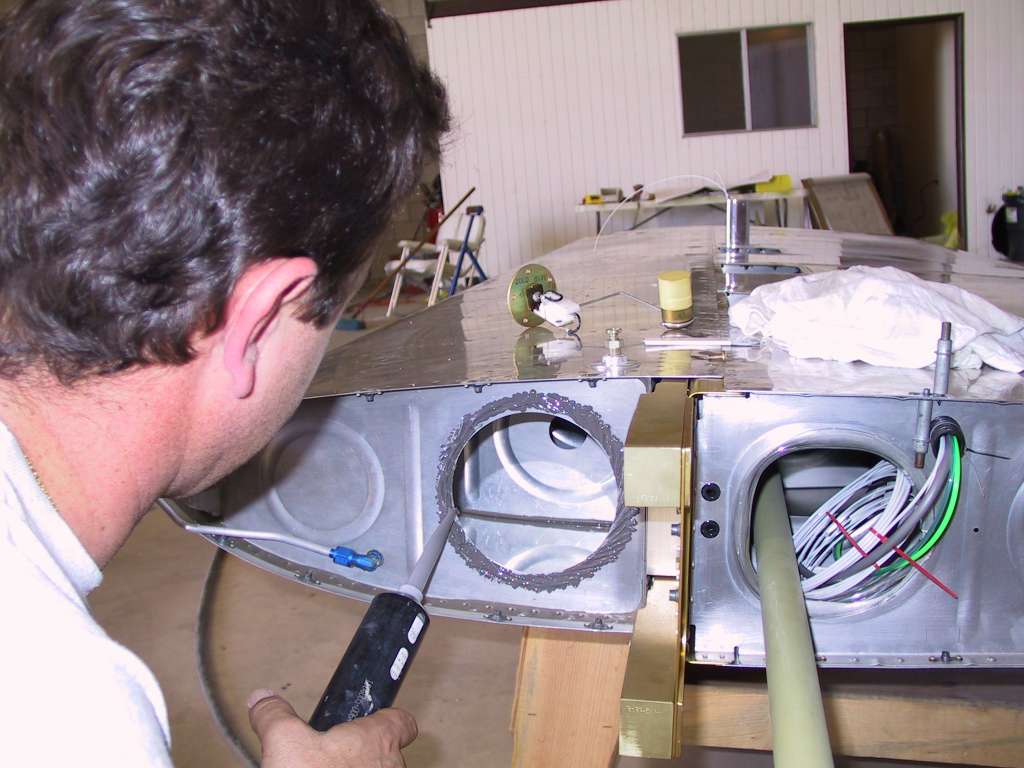
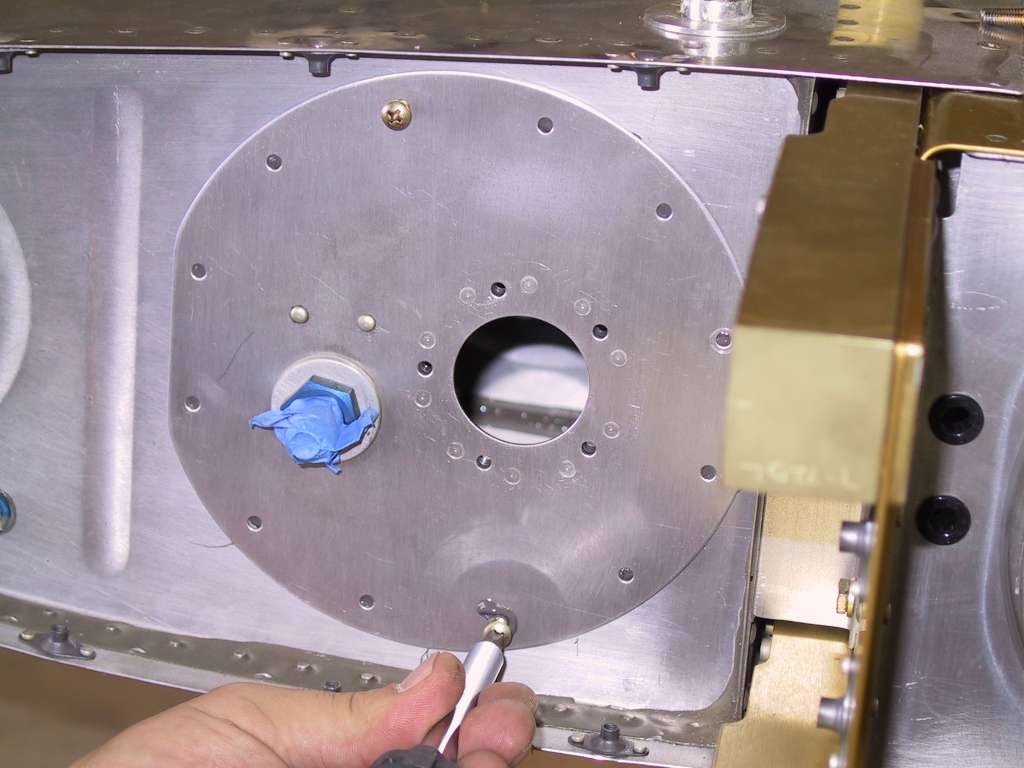
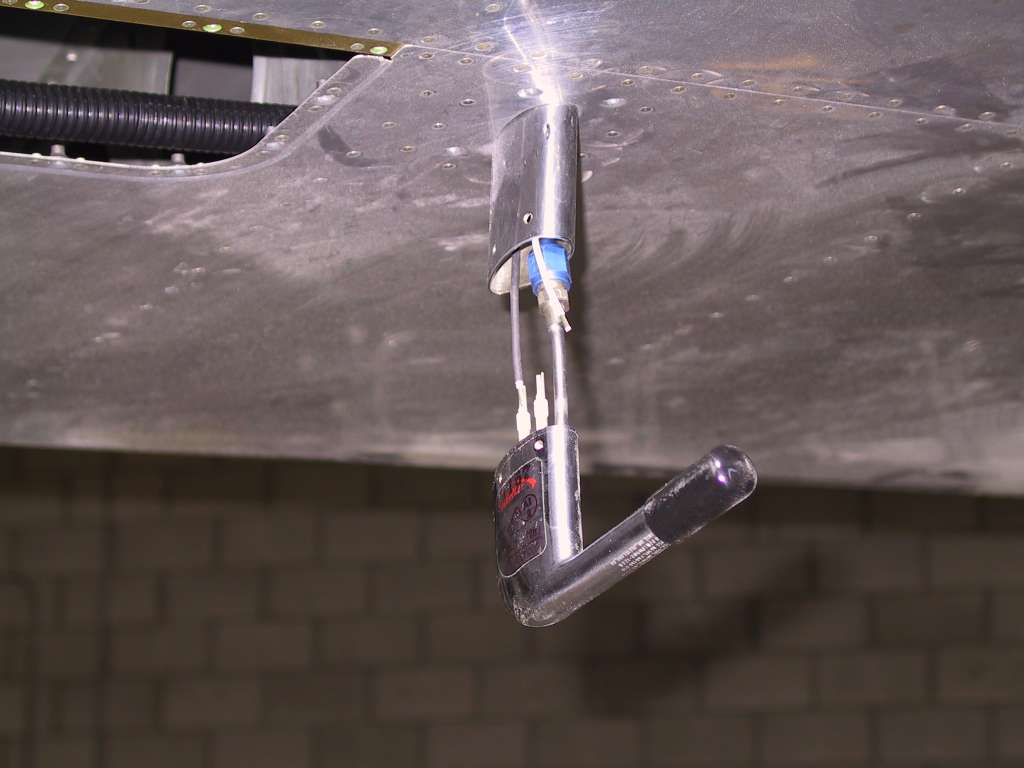
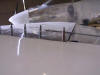
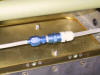
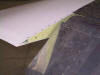
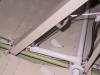
I forgot to bring my soldering iron to the hangar or I would
have finished the pitot installation as well. I'll nail that tomorrow.
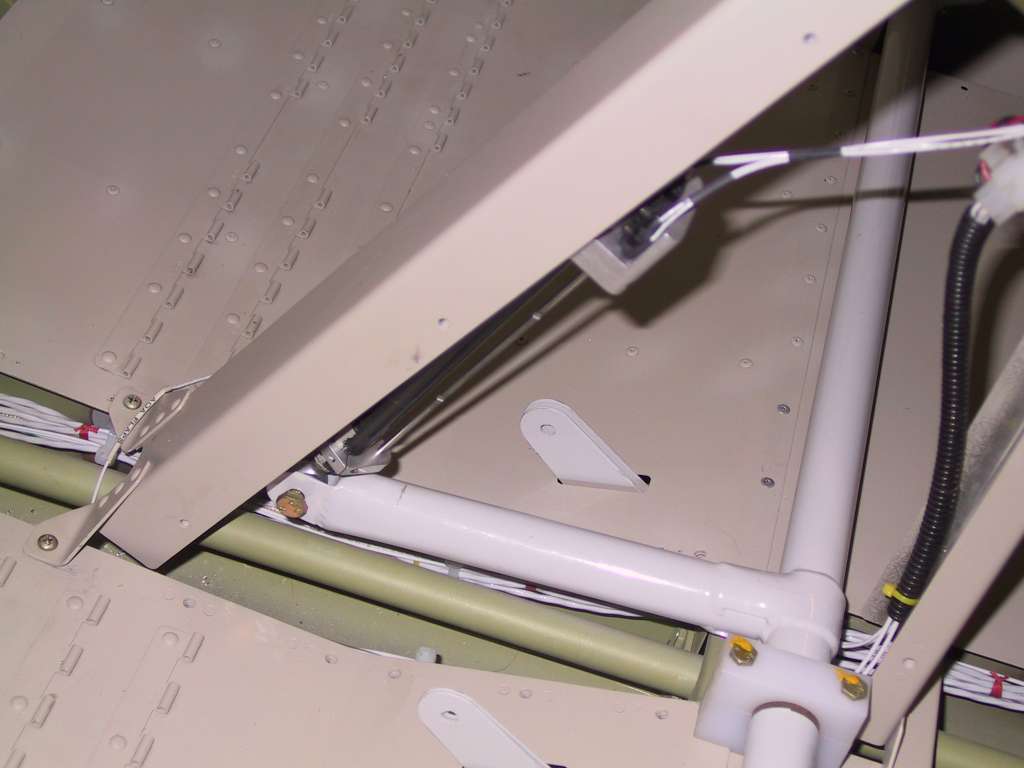
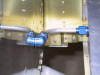
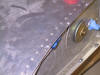
Here's how I connect the aluminum tubing to the tygon tubing at the first
inboard inspection panel.
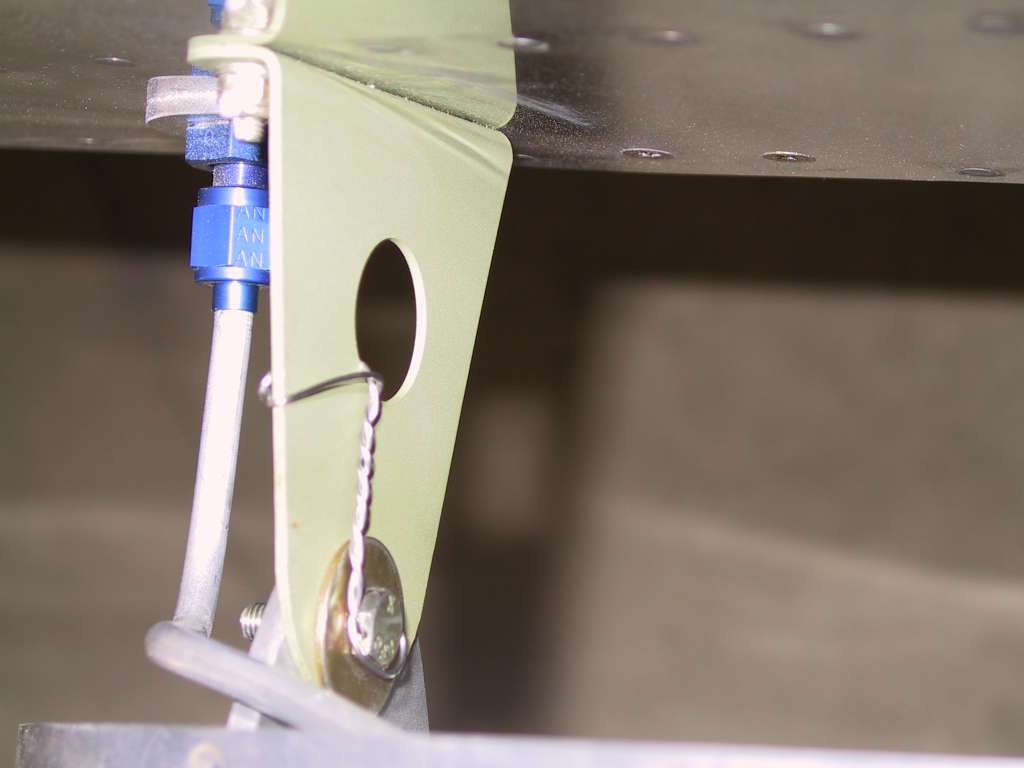
Front tank attach bracket and rear spar are installed, wire
tied and cotterpined.
All top four wing bolts are in place. I began by tapping
them into place with a rubber mallet. It was going well but it wasn't
nearly as effective as the big fricken hammer I brought out later :) I'll
finish the bottom PITA bolts tomorrow.
I'm really really hoping I can get this puppy finished this
long Memorial weekend so I can shoot for an engine start next weekend.
That would be Great! |
|
5/29/05 |
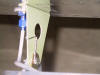
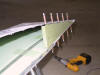
Today was the day for the wing tips. Plans
call for the internal wing tip brace to be positioned so that the 'wall' of the
brace is outboard of the wing, well I decided to do it differently. I
turned the brace so that the flat side is inboard. Like this.
Why have an air gap? You have to position the brace so
that it isn't too tall where it fits into the wing tip skins.. I think
mine were 2 & 1/4" forward from the tip of the wingtip. After drilling the
holes and countersinking the fiberglass, this is what they look like. I
used Torx screws for the final install.
Stuck the passenger warning placard in place.
I did a ton of other little tiny stuff not worth taking a
picture of. It's starting to look like a flyable machine.
 |
|
5/30/05 |
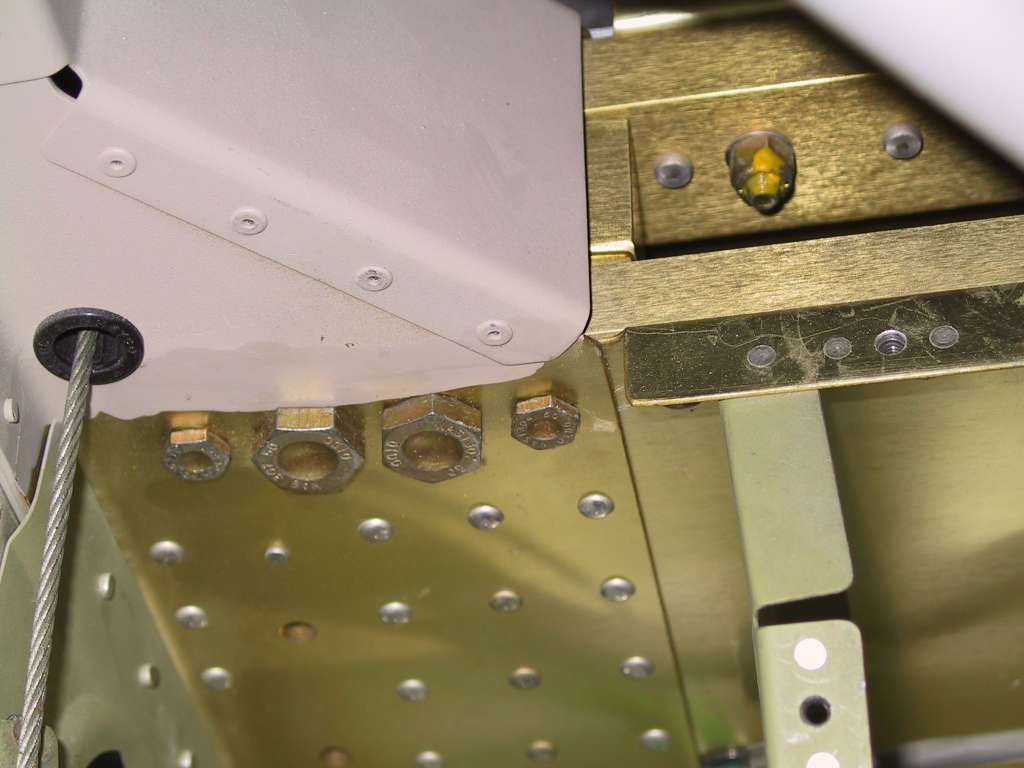
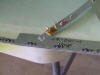
Ok, well I procrastinated enough, time to place
the bottom bolts in place once and for all. If you are building an 'A'
model, you are in for a real treat. This is nothing short of a pain in the
behind. The one outboard larger bolt require you to get just the heads of
the bolts through the gear weldments before you need to get the nuts in place.
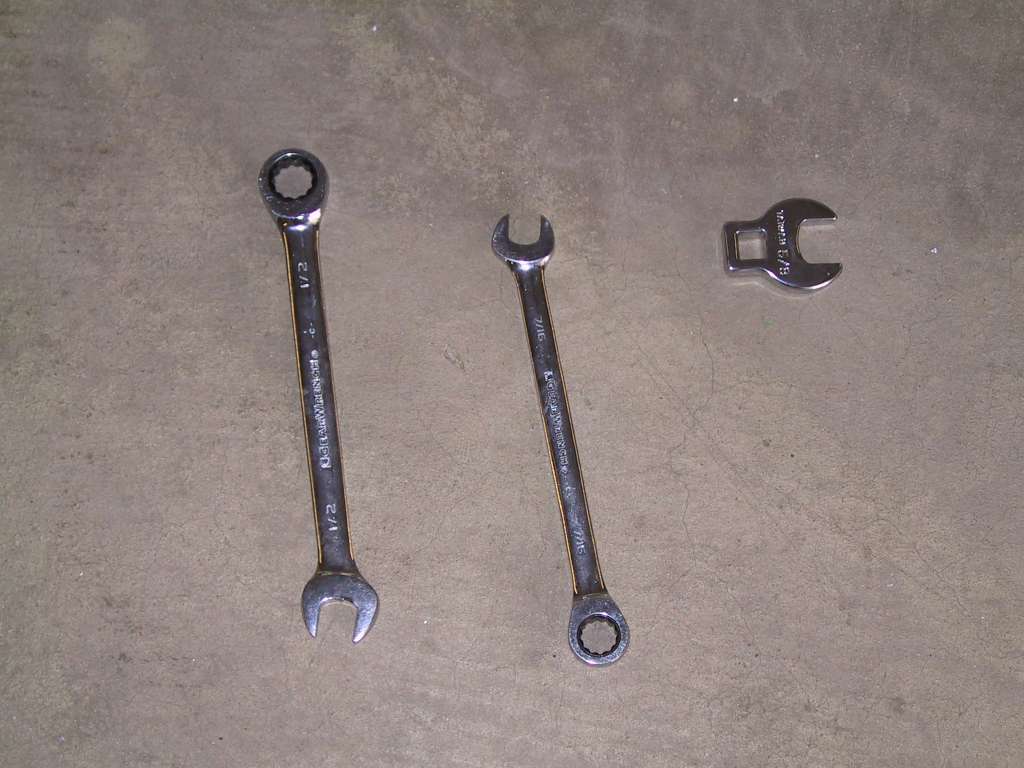
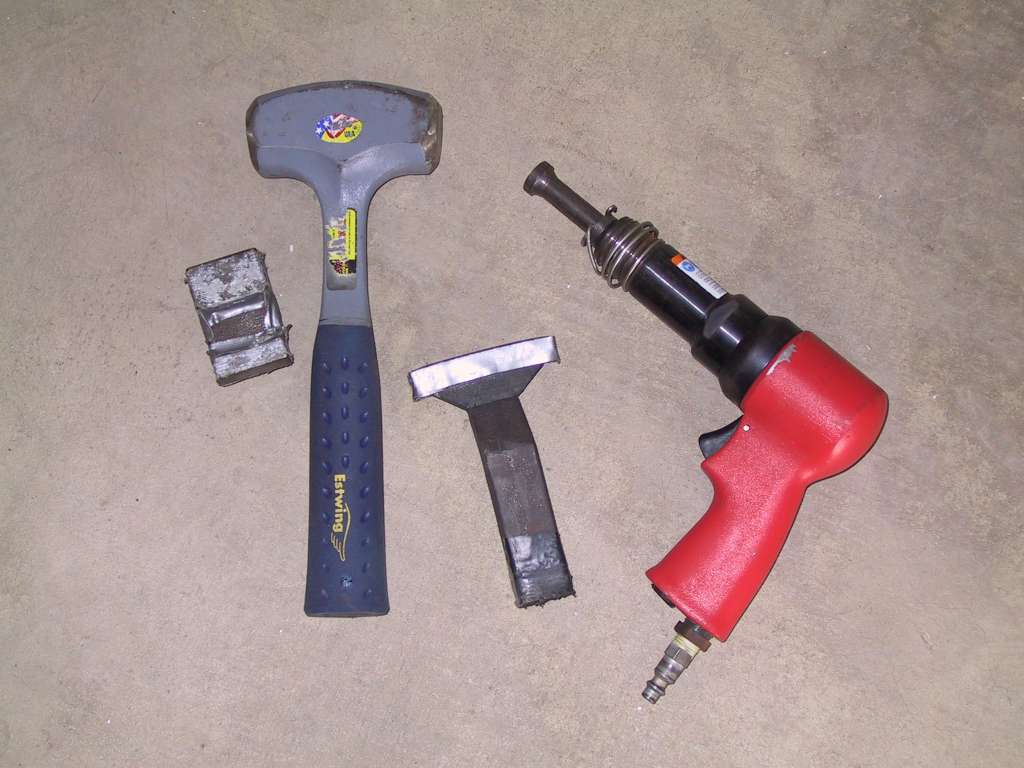
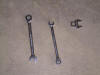
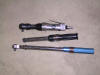
But I did learn some tricks. Here's all the tools I used and their
purpose. You can get a small wrench on the outboard
small nut, the inboard small nut and the inboard large nut. Not enough to
move the nut but enough to hold them while you turn the bold. On the
outboard large bolt I used the small box head you see on the right. It
gets wedged in there pretty good. Once the bolt is tight you have to back
it out just a smidgen to get the box head out.
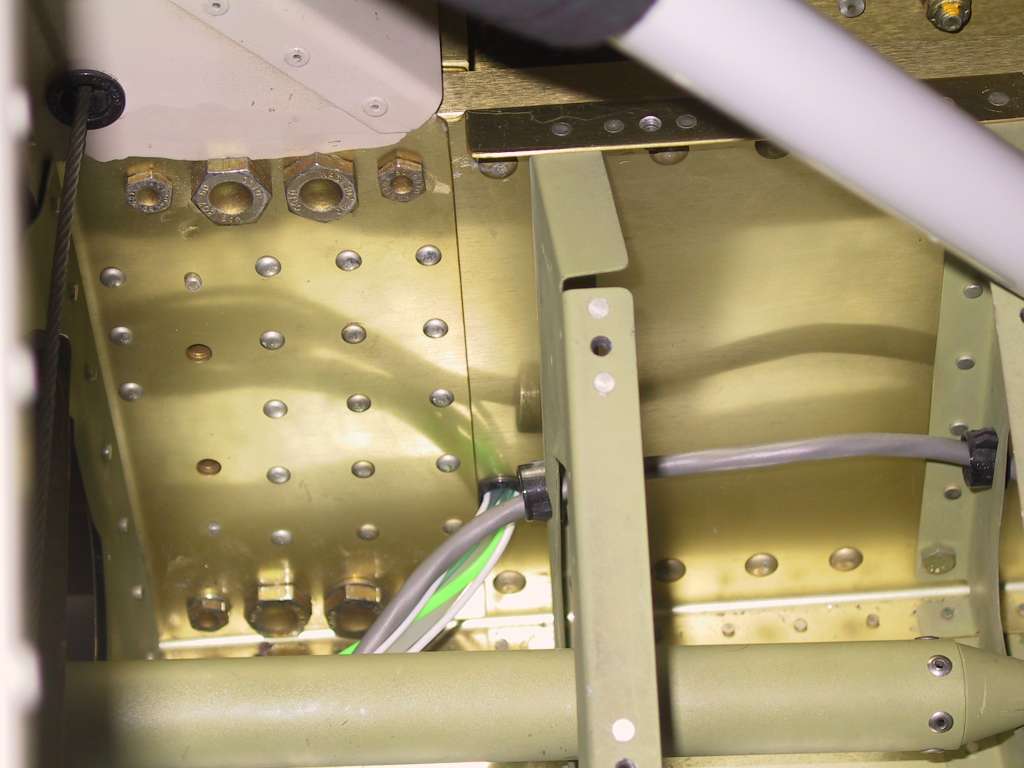
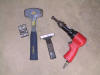
To insert the bolts I started by using a large hammer.
When the bolt gets close to the spar and is under your wire run and aileron
torque tube I started using a bucking bar for leverage so I wouldn't smack my
wires. Don't even bother. Once you get the bolt in place enough, use
your 3X rivet gun with the flush set and bang it into place. Trust me,
this is the absolute best way. BTW, I had my bolts in the freezer and they
were cold as hell before installing. But I did help Mike Holland this
weekend attach his wings and his bolts were room temperature. His bolts
went in needing the same amount of oomph. So I'm not really a believer of
freezing the bolts. Plus, you're gonna have to turn the lower bolts from
the front anyway. And the resistance felt the same.
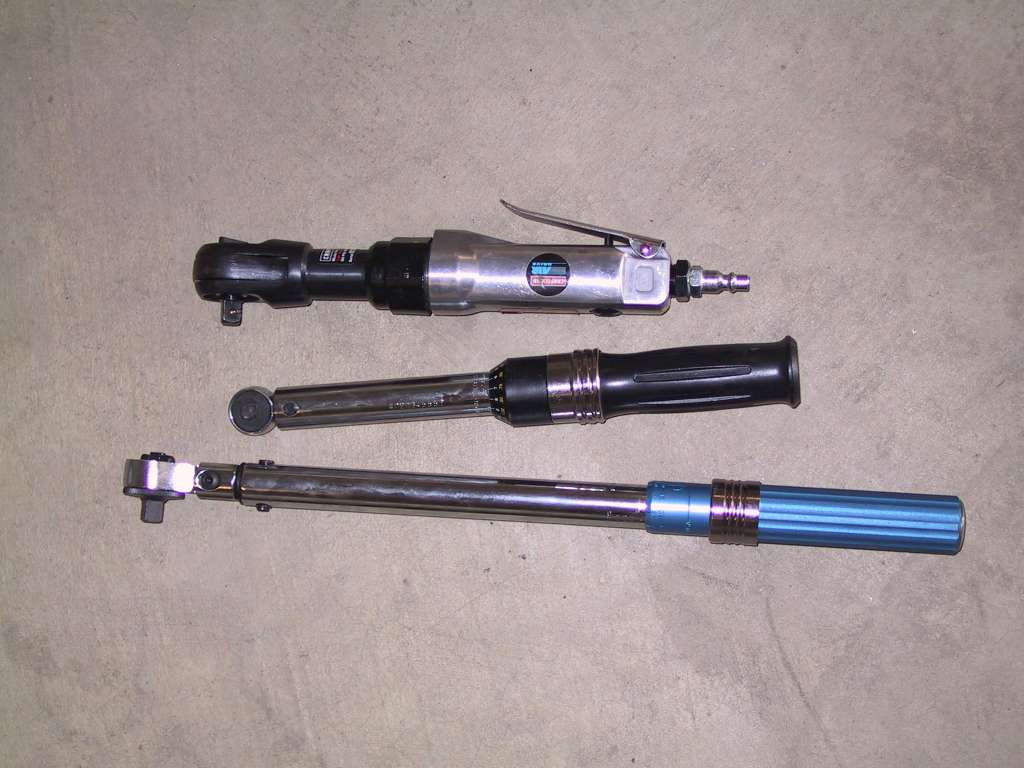
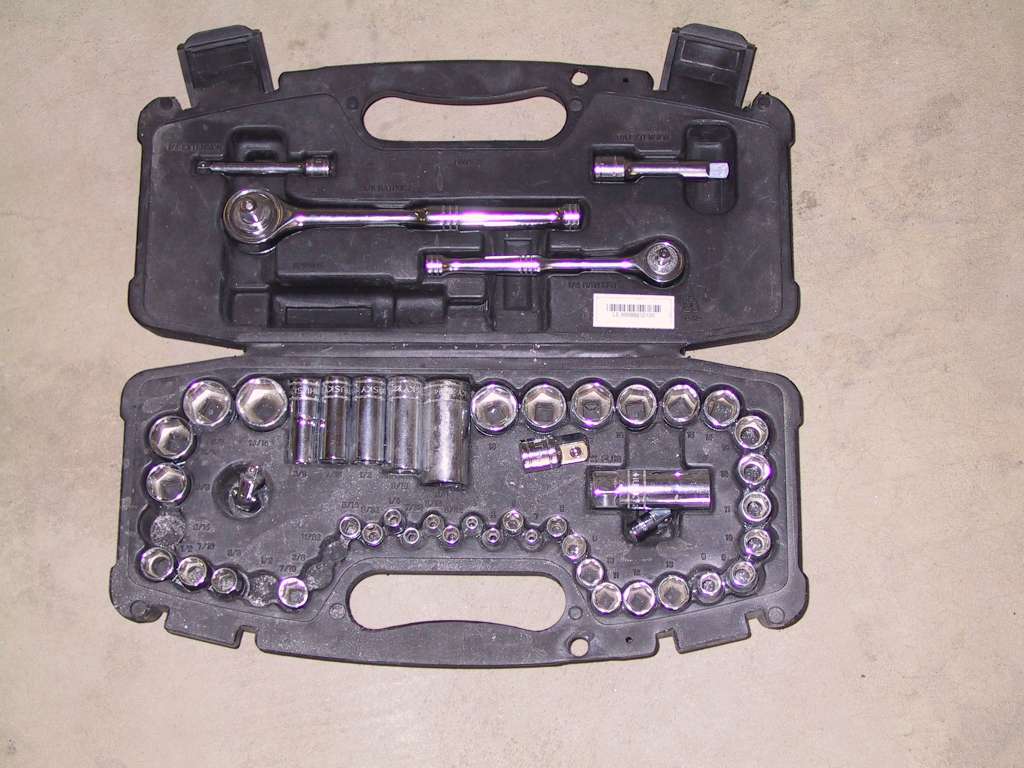
Now how are you going to get the nut on there??? I used
a 6" thin metal ruler with duct tape on the end to hold the nut in place over
the bolt end and either used the ratchet set or the pneumatic ratchet. A
pneumatic set works very well, especially if the air pressure is above 60-80
psi.
Of course you will need a multitude of these.
In the end, it's a rite of passage for an 'A' builder.
You'll do it your way for sure. Just be prepared to spend a considerable
amount of time doing it. Once you have torqued one of the main "larger"
bolts, then the second, you'll have to come back to the first, and then again to
the second to re-torque. It's not pretty. Don't forget to re-torque
all the small bolts too when the big bolts are in place. Every single
knuckle on my hands is bruised, as are my forearms, and chest, and ego.
But it's done and the wings are "on" for good.
Last weekend I met a very very good airplane builder. I
really admired his work and wanted him to tell me what it was going to take to
get my plane painted by him. He talked and talked and everything sounded
good until he said "... and you'll need to take the wings off to be painted...".
I said, "Are you kidding?" and he said "No". I said I would look for
another painter with a larger paint booth. Seriously, and you can quote
me, these wings aren't coming off until the FAA does the wreckage inspection.

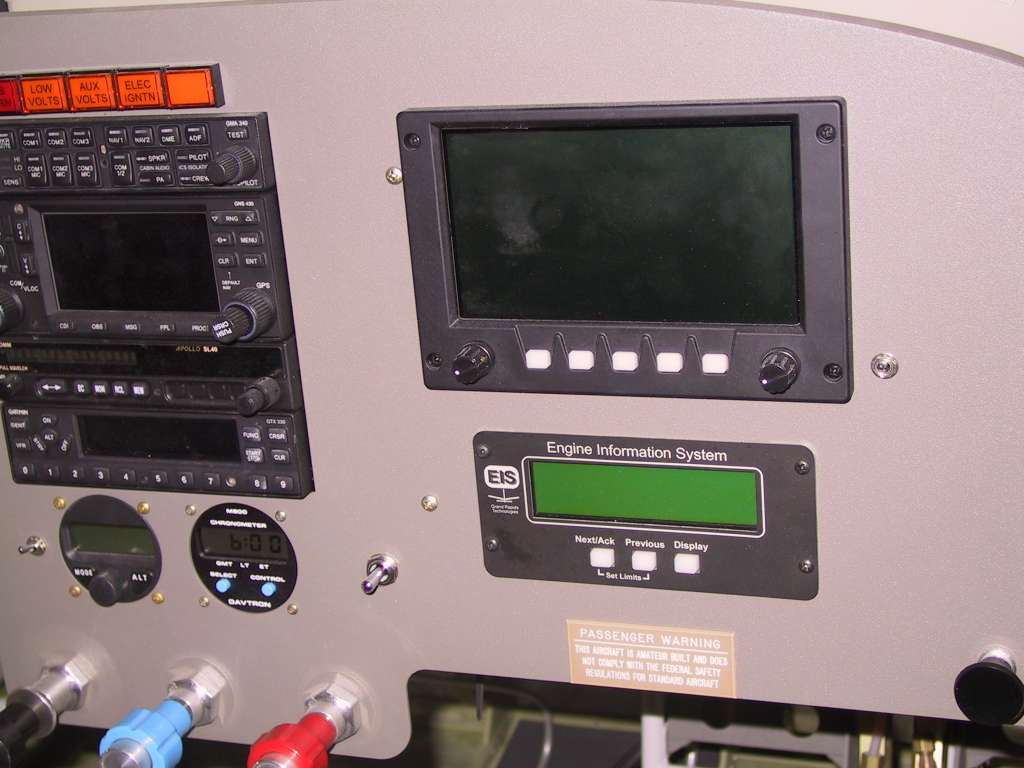
Flaps are on and the FPS is installed and working perfectly,
after I realized that the positive and negative wires were crossed :(
Ailerons are on but not fastened to the control column yet.
I doubt that I'll get first engine start next weekend due to
some missing parts. But I think It's an definitely on for the following
weekend. |
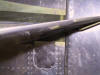
| 6/2/05 |
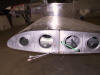
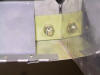
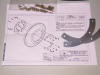
I just spoke with Guy at Whirlwind Props day
before yesterday about the new backing plates and boom, the parts are already
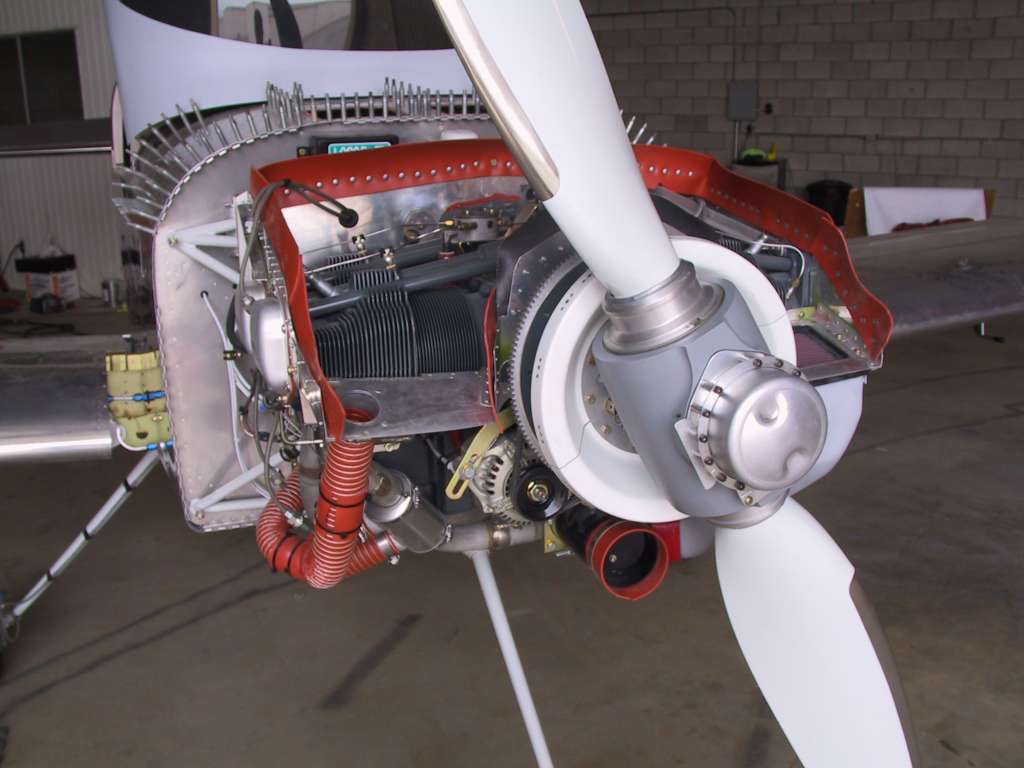
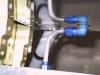
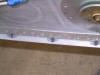
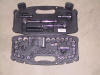
here. Excellent service. The backing plates are
steel of some sort and go on the opposite side of the bulkhead bracket and
sandwich the spinner bulkhead in between. The doublers should be installed
so that they overlap the bulkhead bracket splits. Check out the pic, it's
easier to understand.
 |
| 6/4/05 |
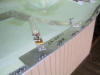
I'm trying to get all the items out of the way
for engine start next weekend and that includes Weight and Balance. I
found some scales courtesy of Chris Kleen. Thank you Chris.
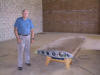
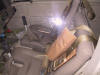
I put in all One Bazillion screws and placed every cover,
panel, seat, seatbelts, fiberglass part, etc on the airplane. Wheel pants
were laid on top of the wing just above the wheels. I even hung the data
plate in the rear with tape to make sure that I got absolutely everything on the
plane in order not to fudge the empty weight. There are so many screws
that I ran out and had to beg and borrow a whole mess load from Dan.
Thanks Dan.
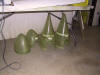
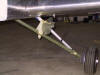
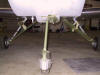
In order to level the plane fore and aft the mains had to be
about 1.75 inches higher than the nose gear. This was accomplished by
placing the rear scales on 2x4 platform and letting some air out of the main
gear tires. Unfortunately, I was so busy making sure everything was
on/in the plane that I forgot to take any pictures until after the fact.
And... drum roll please...
The total empty weight: 1121 lbs.
Nose gear: 294 or 26.7%
Right Main: 423 or 37.3%
Left Main: 404 or 36.0%
The extra weight on the right side is due to two wingtip
antennas and associated RG400 coax, HID landing light and power supply and AP
servo. If I had done better planning I would have moved one or both
antenna runs to the left wingtip instead of the right side. Oh well, it is
what it is.
    |
| 6/5/05 |
First thing I did this morning was to take all
them damn screws out. I need to have all the covers off for the DAR
inspection so might as well do it now. During this process Dan stopped by
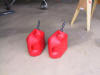
early and asked me what else was left. I must have had that dumb ass look
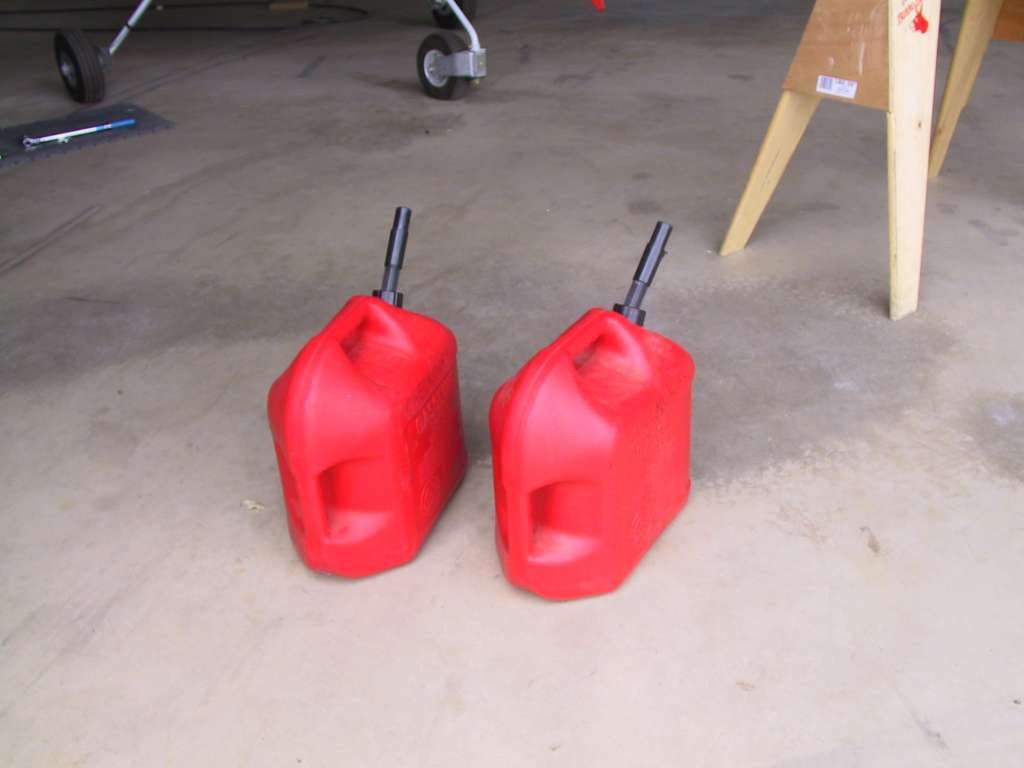
on my face because he asked me If I need the gas cans. Well, hell yeah,
lets get some fuel in this puppy and fire it up!!!! To Hell with waiting
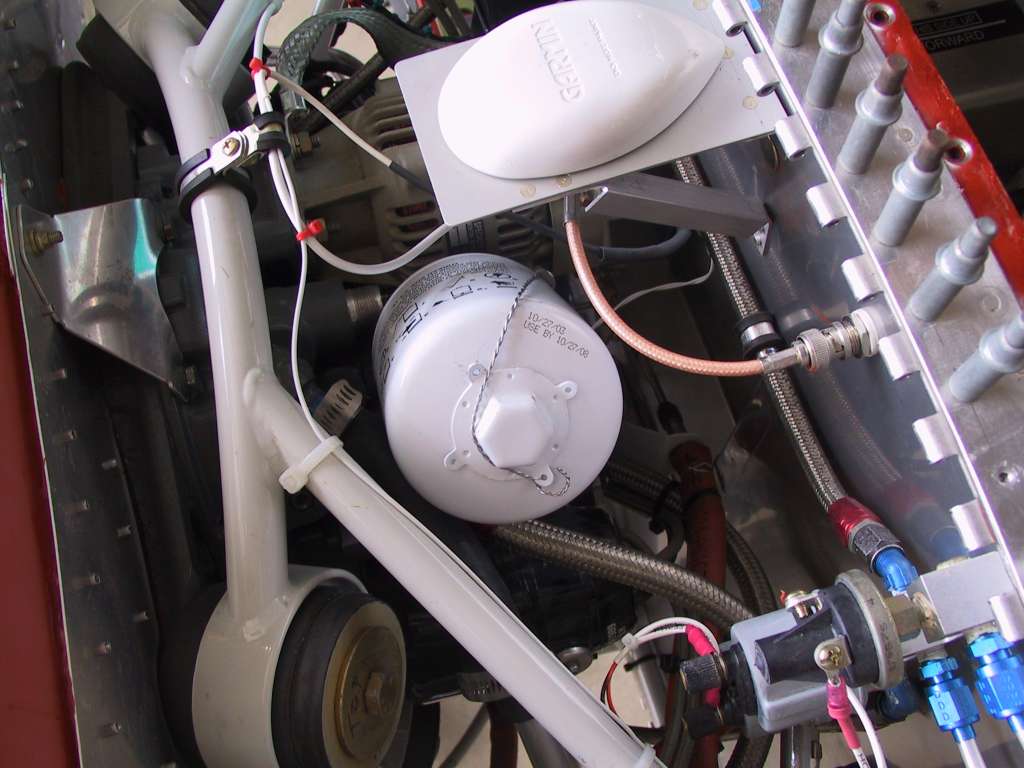
till next weekend! I began going through my check list
of items; fuel filter safetied, plugs gapped and torqued, remove spinner, go
over everything one last time. Then run to the self serve pump and pay $35
for 10 gallons of gas into two 5 gallon containers. I put 5 gallons into
each tank then waited for 5 to 10 minutes. Hey, no leaks so far,
excellent.
Now here's where Dan helped out again. He sent me an
email with a checklist of sorts for preparing for first engine start. I
condensed it for my needs and made a checklist out of it.
Here it is in
MS Word format.
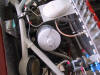
So after going through the motions it was time to pressurize
the fuel system and check for leaks. Throttle IDLE, Mixture CUTOFF, Master
ON, EIS and EFIS ON, Fuel Selector Right, Fuel Boost Pump ON. Pump
starts to make noise, Fuel flow steadily gets closer to zero and fuel pressure
is, what the hell? Zero? Turn everything off. I let the pump
run for a couple of minutes, then tried it again, and again, and again.
Zero fuel pressure.
Ok I'm not happy at this time. I pull the fuel line at
the fuel servo, nada. Frustrated, I get back in the execute the procedure
again. This time I can hear fuel getting sucked into the pump and sure
enough the Fuel pressure goes to 40. Great. Now turn everything off
and check for fuel leaks. None found. Hop back in and do the same
for the Left tank. Turn on Fuel boost pump, Hey, how come it's so quiet in
here? Damn fuel pump would not turn on. Check fuse, it's good.
Shit. Check voltage at the pump, it's fine.
Yep, the same pump that I had all the problems with earlier
has again decided to be a real thorn in my ass. Pull the pump assembly,
get fuel everywhere. I had removed the pressure in the line earlier by
removing the fuel line at the fuel servo, but fuel is still in the lines and
filter and pump.
I tested the pump on two different batteries to see if it
would run. Nope!
So much for an engine start today.
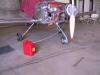
Since the next step is to measure fuel flow, as soon as I get
another pump, I went ahead and placed a union at the fuel servo and some length
of 3/8" tubing into a gas can. At least I'll be ready when the new pump
arrives.
 |
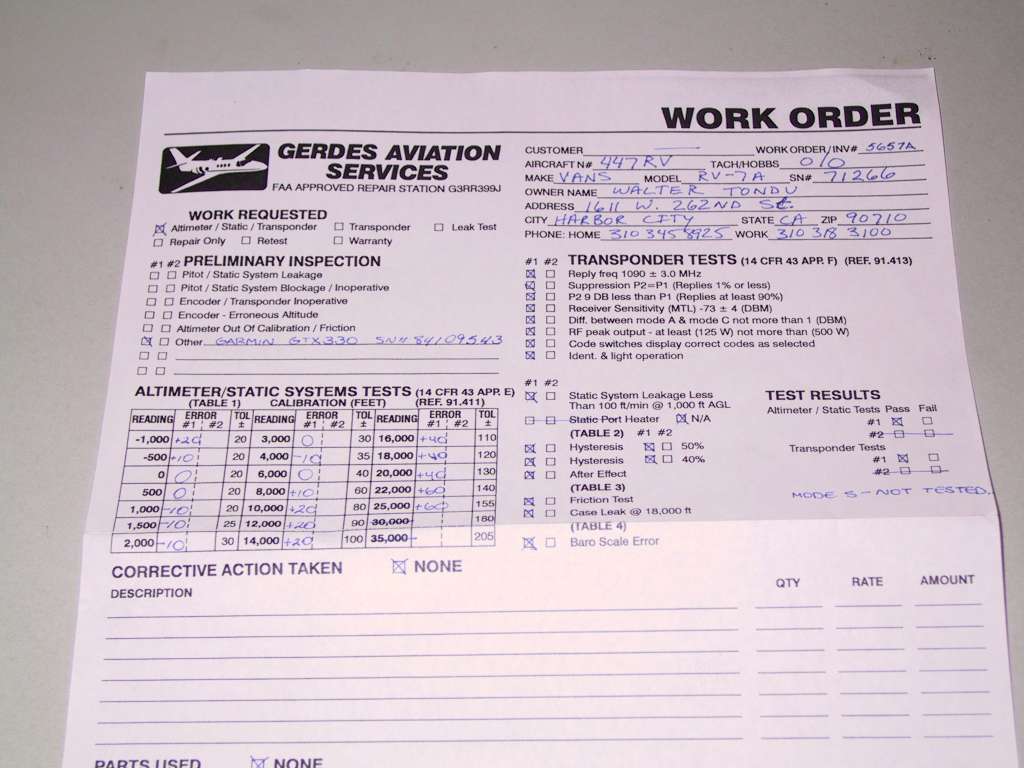
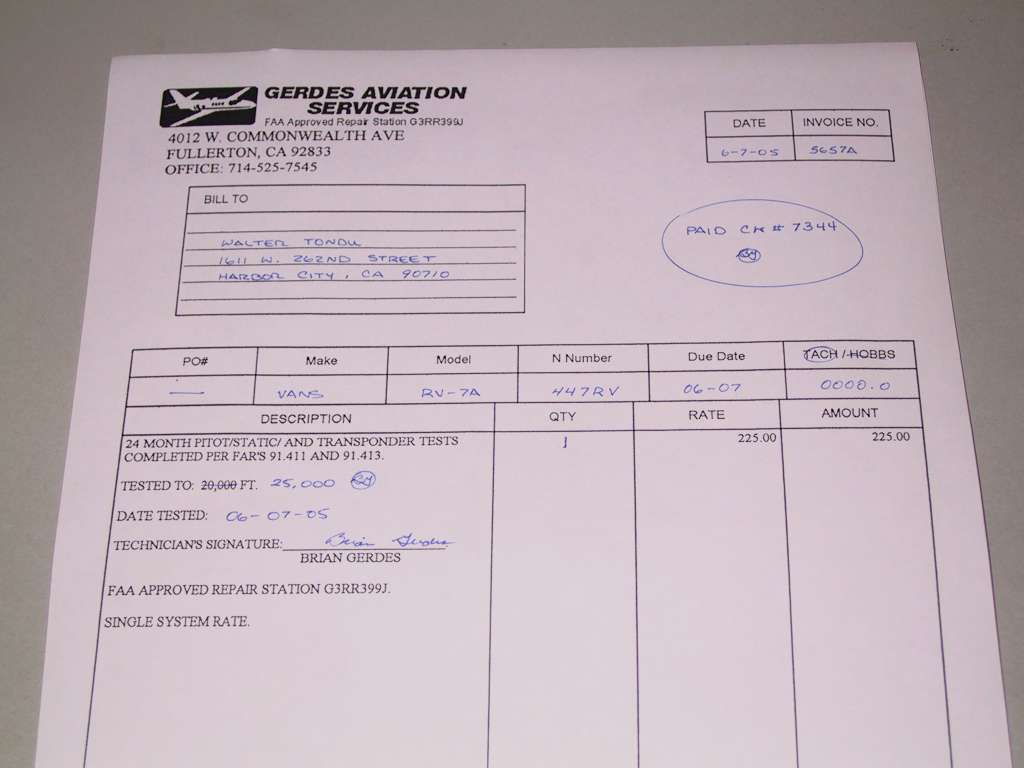
| 6/7/05 |
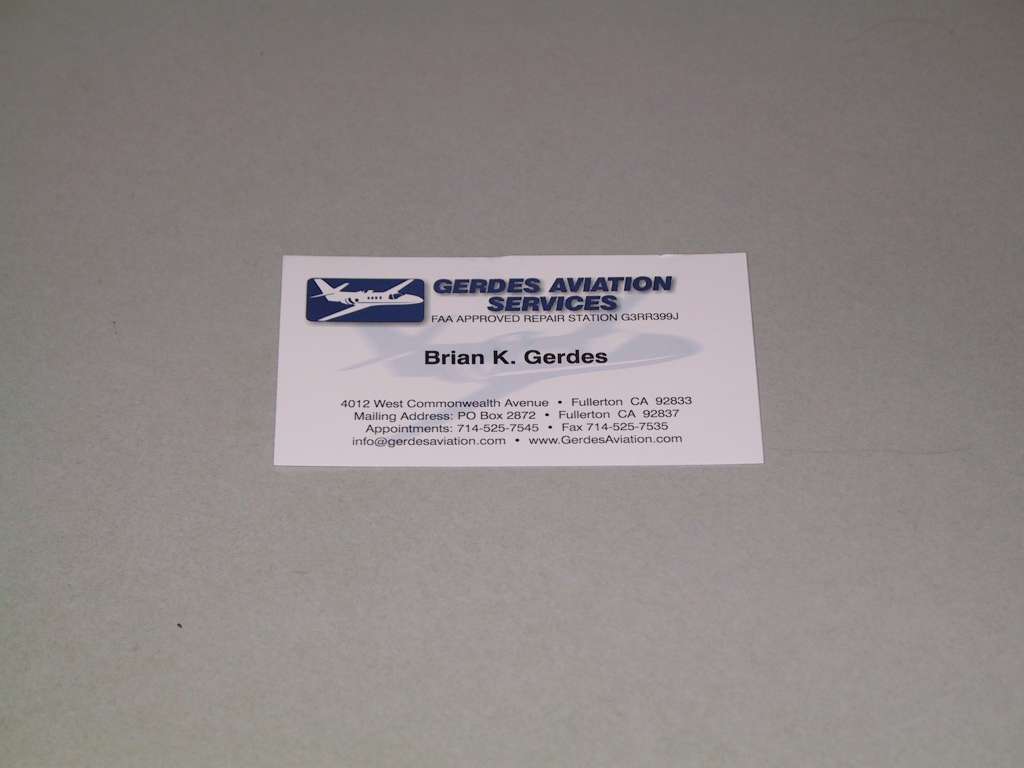
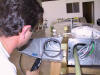
Today I got my Pitot/Static inspection done by
Brian Gerdes of Gerdes Aviation Services.
Pretty painless to say the least. Brian is a very
likeable character and knows what he's doing. Unfortunately, I forgot my
camera so no pics, so I'll just ramble on, if you don't mind. He started
by connecting all the hoses and doodads to the static port and pitot tube.
He immediately saw that I had a leak. Fortunately, I had left the front
top skin only clecoed on so I pulled back the left side where my pitot and
static lines come into view. He narrowed the leak to the pitot line.
Further investigation revealed that the leak was at the pitot tube itself.
Turns out that I probably didn't seat the connection to the pitot tube mast
itself properly. A quick turn of a wrench and the leak was solved.
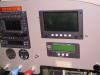
Brian had never done a PS test on a GRT EFIS display and
Garmin 330 transponder combo. The initial 29.92 setting revealed a 60 ft.
discrepancy, which was eliminated by using the maintenance page to eliminate
that. We tested the PS system all the way to 25,000 feet, because, you
never know... Everything was basically dead nuts. The largest error
was 60ft. at 25,000 feet. Everything else was within 10 ft. I'm a
happy camper. Airspeed differences were within 1 to 2 mph all the way to
250 mph.
I think I've scheduled my DAR inspection for July 10th.
I'll send all the documents in the mail in the next day or so.
On another note, I created two spreadsheets which can
calculate your Weight and Balance for you.
Have a look. They both graphically represent your W&B at the beginning
of flight and end of flight. Very handy. |
|