|
Home
Why an RV?
Choices
Search
Empennage
Empennage Attach
QB Wings
Bulkheads
Aft/Center Fuselage
Forward Fuselage
Cockpit 1
Cockpit 2
Cockpit 3
Tip up Canopy 1
Tip up Canopy 2
Tip up Canopy 3
Avionics/Panel 1
Avionics/Panel 2
Avionics/Panel 3
Avionics/Panel 4
Firewall
Tricycle Gear
Engine/Prop 1
Engine/Prop 2
Cowling 1
Cowling 2
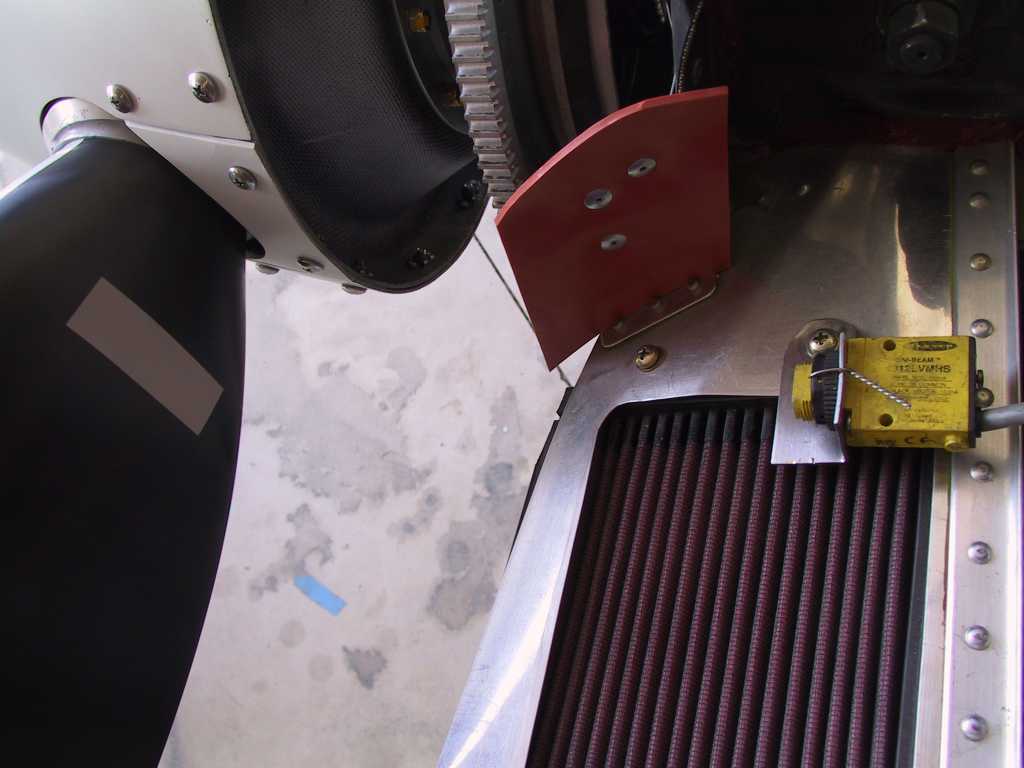
Baffling
Ram Air
Last 10 Percent
Last 5 Percent
Last 3 Percent
Last 1 Percent
Phase 1
Phase 1 pg. 2
Phase 2
P-Mag Install
Videos
EFIS Flight Logs
Tips & Mods
Links
Fine Living
Avionics Manuals
N447RV Documents
Helpful Builder Docs
FAA Documents
Contact Information


The Boo
| |
Last 1 Percent
|
6/11/05 |
Last 1 percent, I guess you can say this after
engine start. And today was the day. Unfortunately, with me in the
cockpit, I didn't get many pictures, in fact I drew a total blank and didn't
take any pictures of the event except the mounting of the data plate just prior
to engine start.
Drained all the fuel from both tanks and found that my
unusable fuel is .02 gallons on the right tank and .03 gallons on the right, not
bad.
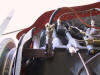
The engine start began with a pre oiling session. I
removed the stop fitting from the manifold and inserted an pipe threaded fitting
with a compression fitting on the opposite end, mated to a 3 ft. length of
aluminum tubing, ending with a clear plastic water bottle. I removed the
bottom four spark plugs and tried the starter for the first time. It
works! It spun over for about 15 seconds and then I stopped, giving the
starter time to cool off. Just before beginning to swing the prop again I
noticed a stream of oil going into the cup. Voila!
Removed the cup/wire/fitting contraption and reinstalled the
stop plug and installed and torqued the spark plugs. Then I installed the
ignition wires to all plugs.
David was gracious to spend the day out with me and film the
engine start and help. Thanks David. Can't wait to see the video.
We towed the plane out in front of the hangar, placed chocks under the tires and
tied the tail tie-down to my truck. Had a couple of fire extinguishers
outside the plane at each wing tip and one in the cockpit too, just in case.
David was using my hand held and everything looked good so let's see if this
thing will work.
It only took a few revolutions after following my engine start
check list for this puppy to fire. Sounds and feels great. But there
was one little issue; for some reason I'm not getting RPM readings on the
EIS/EFIS, it indicates zero. Well that precluded me from accomplishing an
increasing RPM check but I did verify that everything else worked properly.
I didn't know exactly what my RPM was but I wanted to cycle
the prop anyhow. On the first cycle (5 seconds) nothing. On the
second attempt, the prop cycled nicely, as well on the third attempt.
Damn, so far everything is working as expected. CHT and EGT numbers were
very close for all cylinders too. Time for shutdown. What a great
feeling. 2 years almost exactly and this thing is singing. |
|
6/12/05 |
Duh. Another day when I forget to take
pictures. Spent the entire day just fitting and futzing with minor details
here and there, nothing to speak of really. It's all in the plans. I
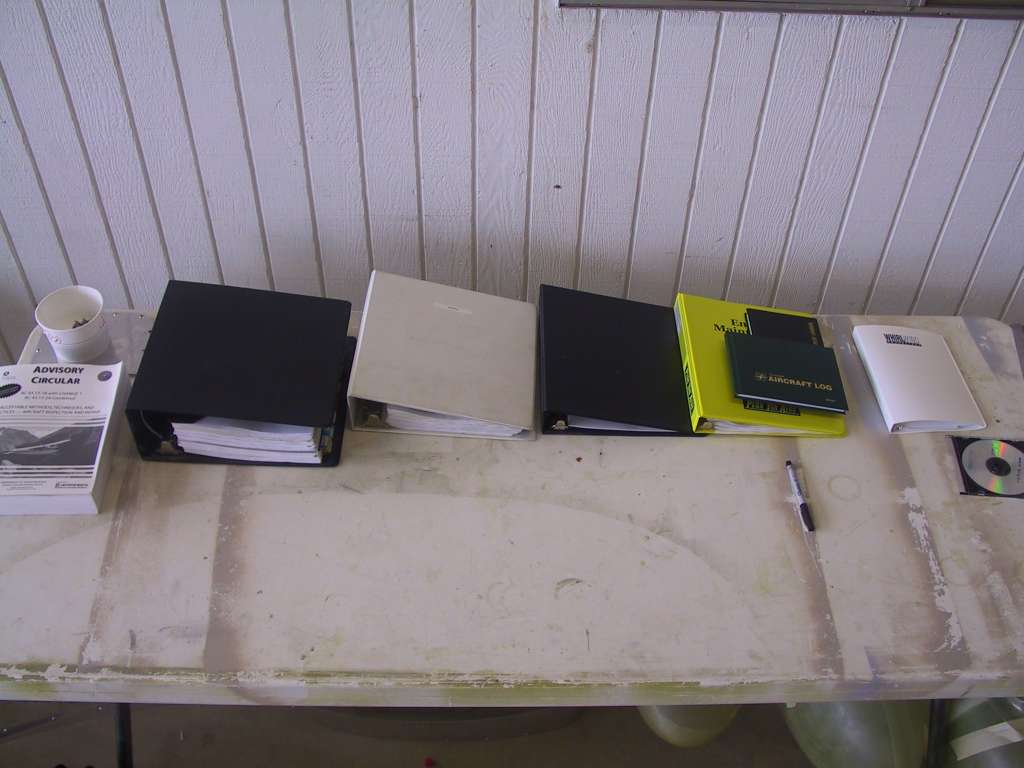
have been spending a great deal of time on paperwork for the POH and other
items. When they're completed I'll provide links.
Sent an email to GRT asking about the LASAR/EIS connection and what is necessary
to get the RPM's working. I checked the wiring and it seems fine.
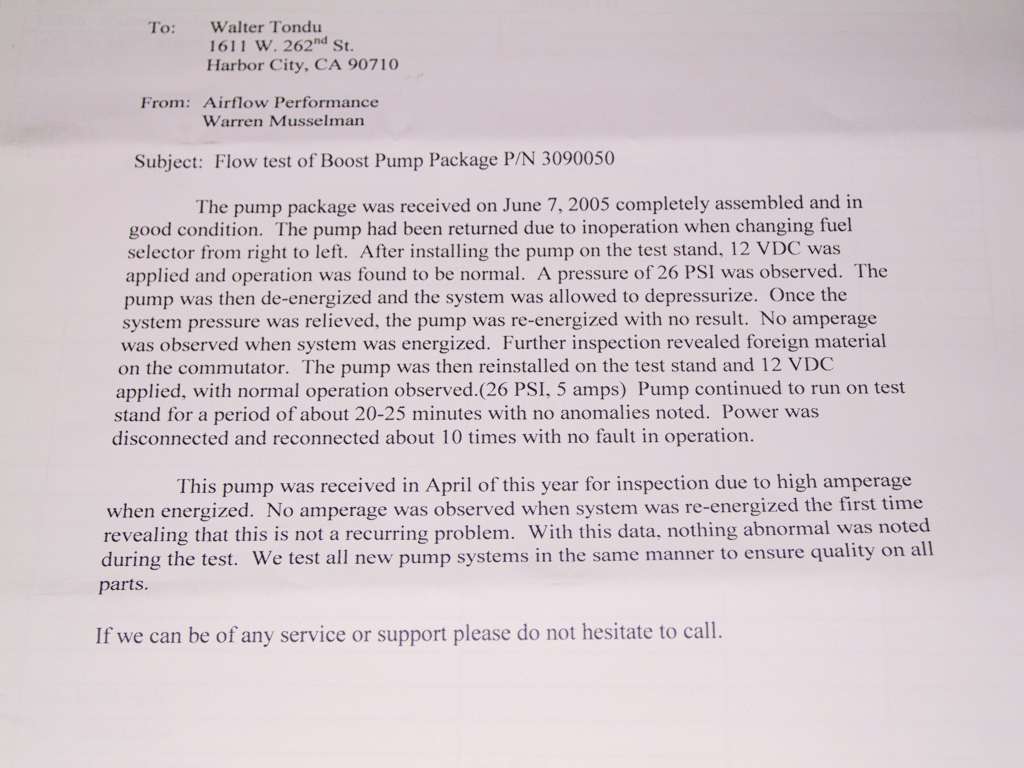
One more thing about the pump situation. As you will
recall, I had to send the electric boost pump back to AFP twice. When I
got it back the last time they had indeed noticed the same stopping situation
that I had on their test bench. They basically told me that there was
nothing wrong with the pump. Well what I forgot to write yesterday is that
the pump died on me three times, AGAIN!!! I got it to work by tapping it
with a small hammer. I will call them this week to sort this mess out.
But needless to say, I'm really pissed. I've already spent
more money on shipping/freight charges than a new pump would have cost.
And this is a Safety of Flight issue to me. You would think that they
would understand this! More to come. |
| 6/18/05 |
I must be really brain dead. I've forgotten
to bring the camera again to the hangar. In actuality, there's not much to see happening
on the plane anyhow. I'm just getting it ready for the DAR inspection and
fixing minor issues.
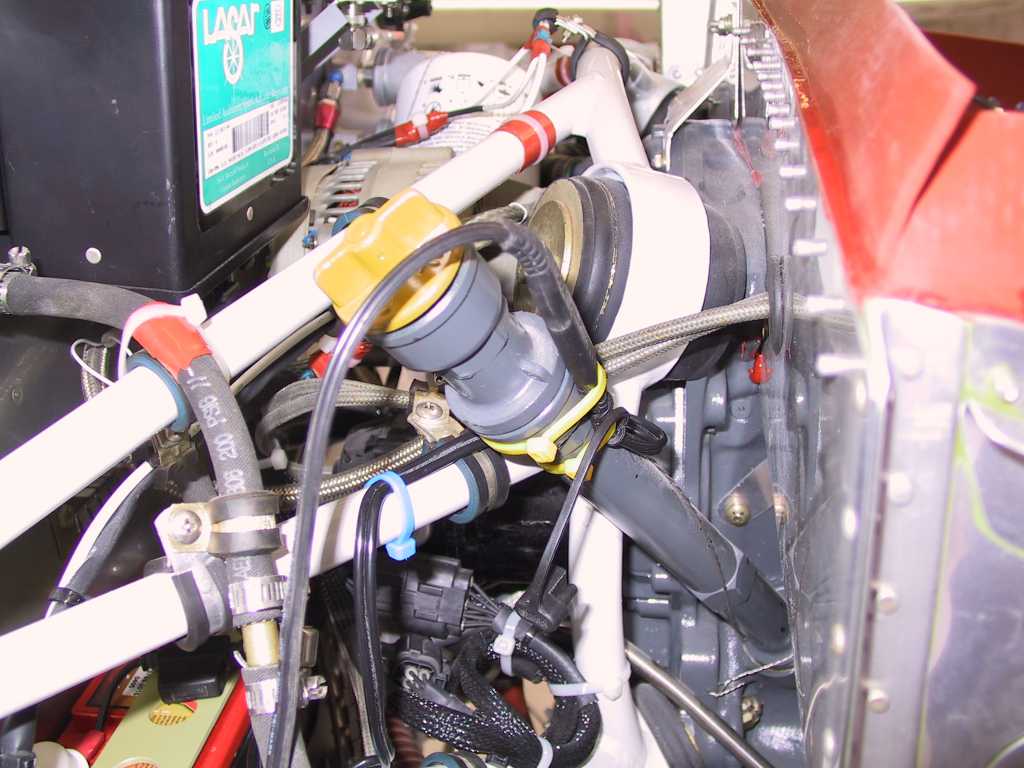
I redid all of the Adel clamps in the engine compartment with
all-metal nuts instead of nylock nuts. I don't know why I did them that
way in the first place. The engine came with the fuel injection spider
Adel clamps with nylock nuts so I just assumed that it was copasetic to do so
with other mounts/clamps. But, I replaced them all anyhow. It can't
hurt. Again, no pics, just use your imagination.
So, let's get back to the fuel pump issue. As you recall
I sent the fuel pump back to Airflow Performance for the second time and they
tested it on June 7th. Now I must preface this with my notions of what a
fuel boost pump means to me on a low wing aircraft. It means that "I need
it". It's a safety of flight
issue. What would you do if you were happily flying along when
the selected tank runs dry. Yes, it can happen, and does. First
thing is too turn the fuel selector to the other tank and turn on the fuel boost
pump. There are many scenarios where you will depend on the fuel pump,
this is just one example. How about takeoff. How about Landing.
Remember this point.
So, in early June, I sent the fuel pump back to API because it
was *again* not turning on when instructed to do so. It just did nothing.
This did not happen all the time, just whenever it wanted too. I could not
guarantee that it would or wouldn't work. It had a mind of it's own and it
was unacceptable for flight.
After it was sent back the second time I was contacted by
Warren of API. I had about a 20 minute conversation with him. He
indicated that this problem was usually caused by boogers or some other sediment
on the contactors. Well since the pump seems to be a sealed system I was
dubious. He indicated that he ran it on the test bed and indeed, the pump
did stop at least once.
He said that he ran it for 20-25 minutes and was unable to
reproduce the problem. Well, since this is a safety of flight issue I
discussed with him at length about the possibility of the reoccurrence of the
problem. He said that they had seen this before and that by running the
pump it would *probably* clear the problem. So obviously this has happened
before and maybe, just maybe, running the pump clears the boogers. But do
you want to depend on that?
To date I had sent the pump back
twice, paying for freight there and back, overnight. I have more than paid
for a new pump in shipping charges alone. And I *did not* want to have to
pay any more for a defective pump. Would you?
So I get the pump back and place it into the plane.
Guess what. Yep, it refused to start on the first try. So, I guess
I'm a bit amused at this point and call Warren back and eventually speak to
Colleen Rivera (VP). She indicates that she will send a new pump. I
insist that the pump is sent two day mail. After all, I need it by the
weekend as I can only get to the plane on the weekends and the DAR inspection is
looming in the near distance, this being one of the major issues to resolve.
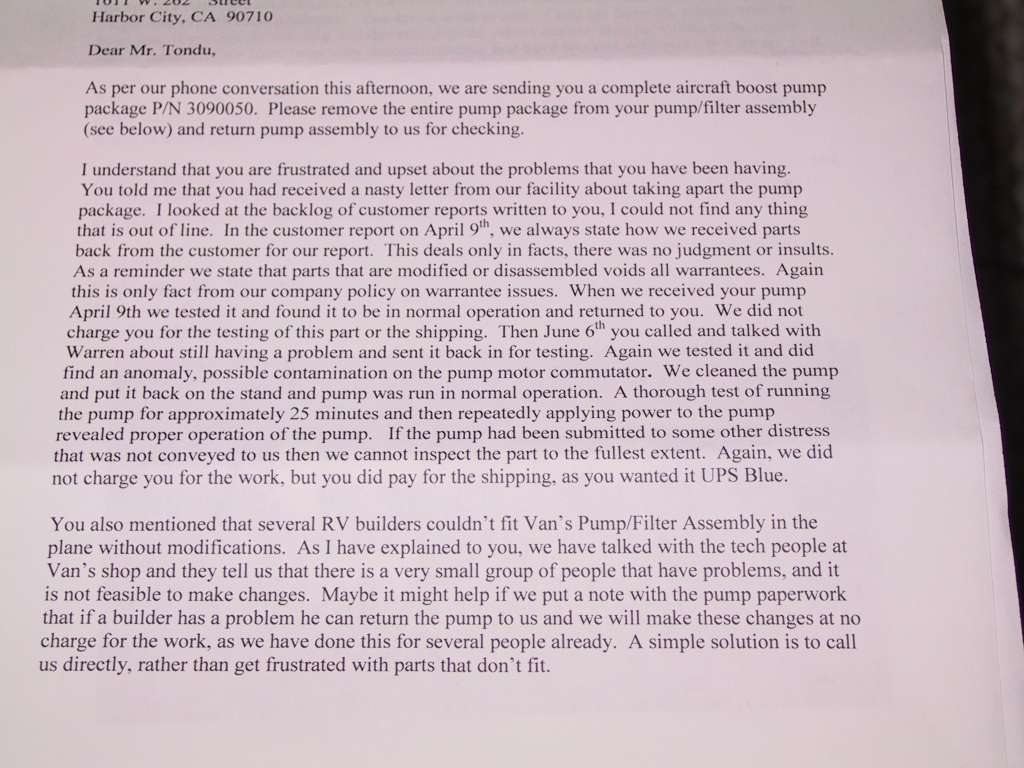
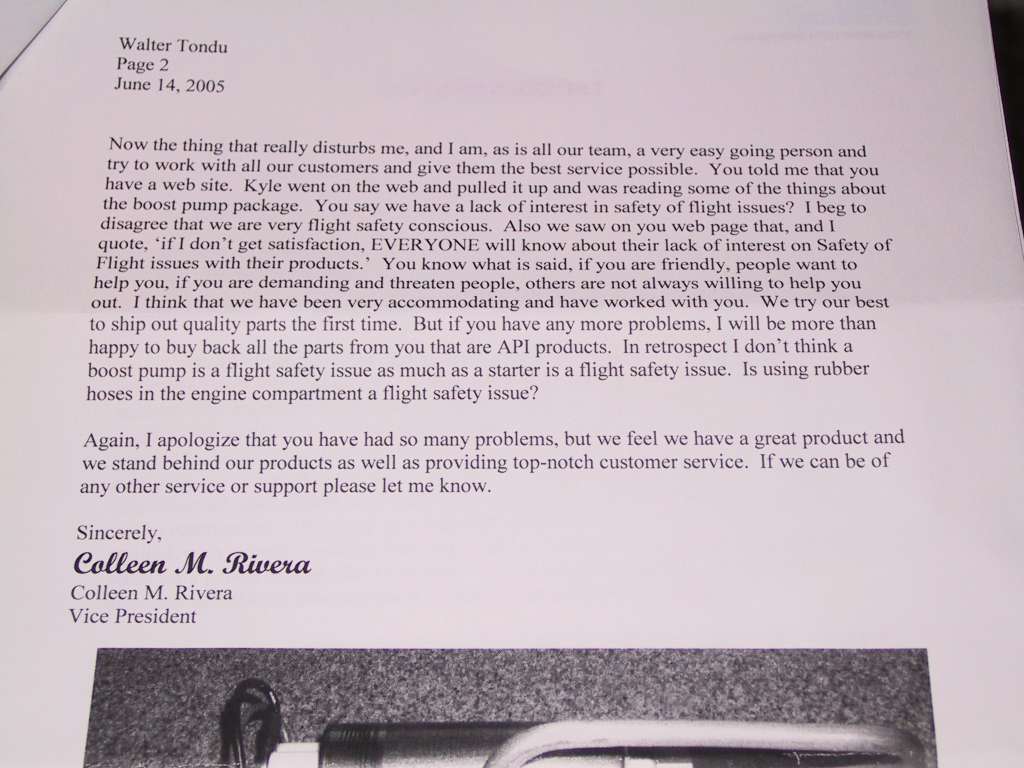
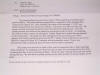
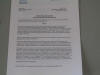
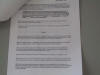
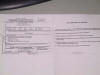
This is the letter I got from Coleen with the new pump (two
pages). Read it in it's entirety and make a decision for yourself about
some of the statements she makes. I doubt that she's a pilot. I
doubt she's ever built an airplane. She probably hasn't even heard of
AC43.13. Rubber hoses in the engine compartment. Boost pump not
being a safety of flight issue. Hogwash. She must have been quite
pissed at me to write some of this garbage. I certainly hope that I never
have to deal with them ever again. Satisfied customer? Nope.
Your mileage may vary.
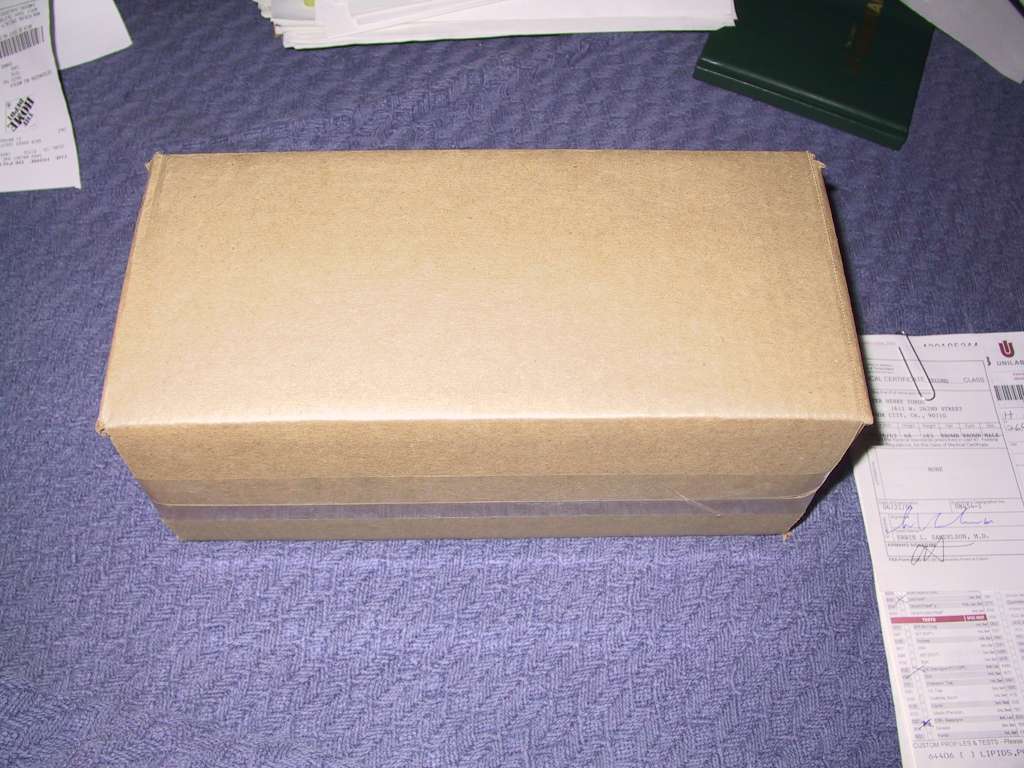
BTW. I put the new pump in and it's working flawlessly.
When I sent the pump back the second time, and the problem was
known then; the pump failed on their test stand, proper customer service would
have been to send me a new pump right then and there. Not make me have to
jump through hoops to get a part that works. Not to mention that I've
taken the pump in and out of the plane 6 times now.
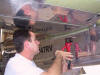
Here's the defective pump, ready to be sent back to API. I have half a
mind to send them a check for $150 and keep it. The less I have to do with
them, the better. Plus, I would love to tear this thing down and find
those elusive contactor boogers.
 |
|
6/21/05 |
Airman medical completed. |
| 6/22/05 |
Today Gary Sobek let me know that all of my
paperwork that I send to the FAA LA MIDO is MIA. So I started to re-do the
paperwork. Don't know what happened. Here's a tip. Make sure
you get your paperwork sent by registered mail, return-receipt. I didn't
and have to redo all of it. It's not that big a deal, I did save most of
it on this website. But I did have to get another Notary sig. No
biggie. |
|
6/23/05 |
Today I hand delivered the paperwork to the FAA
LA MIDO. Let's see it get lost now. |
| 6/24/05 |
First
engine start video. Yeah, it's after the fact but I still have a grin
on my face. If you are interested, I've placed a first engine start
checklist of sorts that I used to get me through this process.
You can find it
here. |
|
6/25/05 |
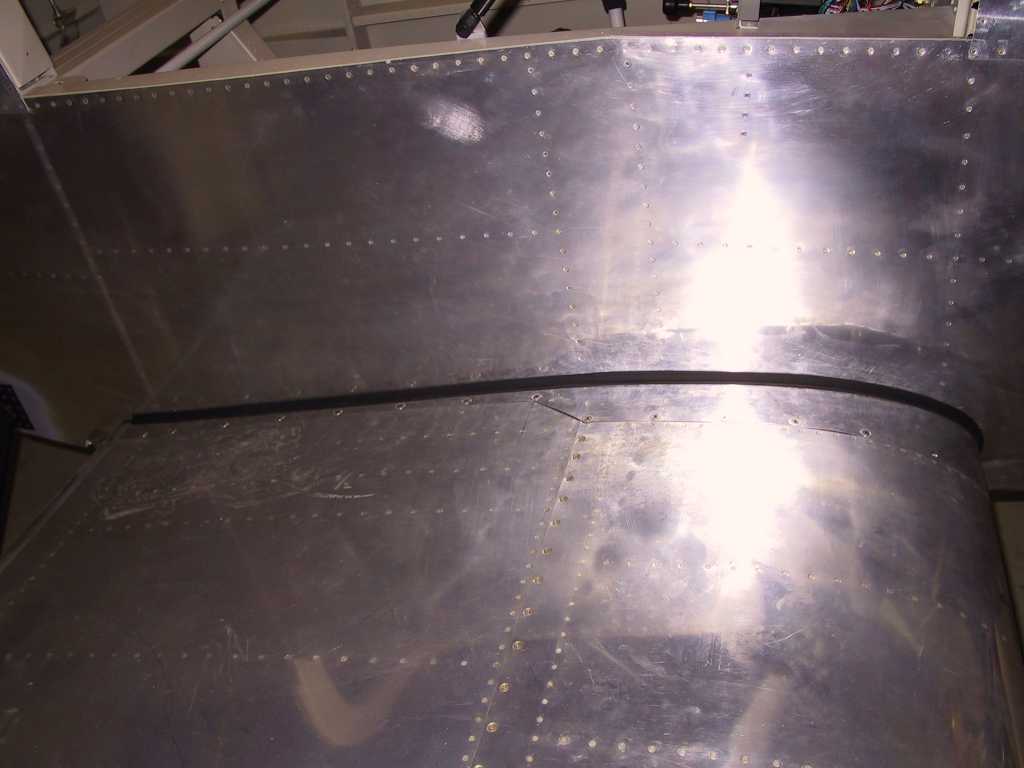
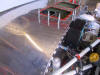
Finally getting around to riveting on the top
deck skin. David shot from the outside while I bent myself into a pretzel
trying to get a bucking bar into the tight spots under the hood. So far
we've managed to get most of the rivets. I'll finish up this task
tomorrow.
Looks like if Gary Sobek gets my paperwork by the 6/30 then
the DAR inspection will happen on 7/2. Just one week away! |
|
6/26/05 |
Forgot to take pictures again. If I had
taken any pictues they would have been pictures of my sore neck and back.
Trust me, as much as possible, place ALL of your avionics as far away from the
top skin holes as possible. I managed to get solid rivets in all of the
holes except 5 which now have *temporary* pop rivets in them. Yes, someday
I'm going to come back and put solid rivets in them, just as soon as my aching
neck stop hurting. Thanks David for bucking, you did an excellent job.
Later in the day I tended to the myriad of small things left to
do before the inspection, hopefully next Saturday afternoon or Sunday.
Things like install all the seatbelts, clean the plane, double and triple
checking everything, etc. I did find a few nuts without torque seal and I
found three nuts which had not been secured properly. I had also forgotten
to safety wire the retainer nut on the flap pushrod. Several folks from
the area came by for a little impromptu "look it over" session. The flap
to steps gap was a bit small, found by Dave, and I took care of that too.
Thanks Dave and Todd for the once over. |
|
6/27/05 |
Today I'm concentrating on paperwork, getting
everything together and in a logical state for Gary. Worked on the POH and
logbooks especially. Making entries on labels which I'll affix into the
logbook and sign at the appropriate time. I intend to take off a half day
on friday as there are three items left to do; fuel guage calibration, EFIS
airspeed markings and placing the batteries into the ELT and appropriate logbook
entries. Other than that, I feel very good about this puppy.
Thanks again for all of you that helped me to get this far,
especially my Dad. Thanks Pops! Could not have done it without you.
I can't wait to get current, do my transition training and start my phase 1
program. All in due time. There's no rush and I've got a lot of
recurrent training to do. The last thing I want to do is screw the pooch
because my emotions took over my brain. So if you are asking me if I'm
going to fly this thing right away, all I can say is "nope". |
| 6/29/05 |
DAR inspection with Gary now confirmed for Sunday
July 3rd. This gives me one more day for the once over. |
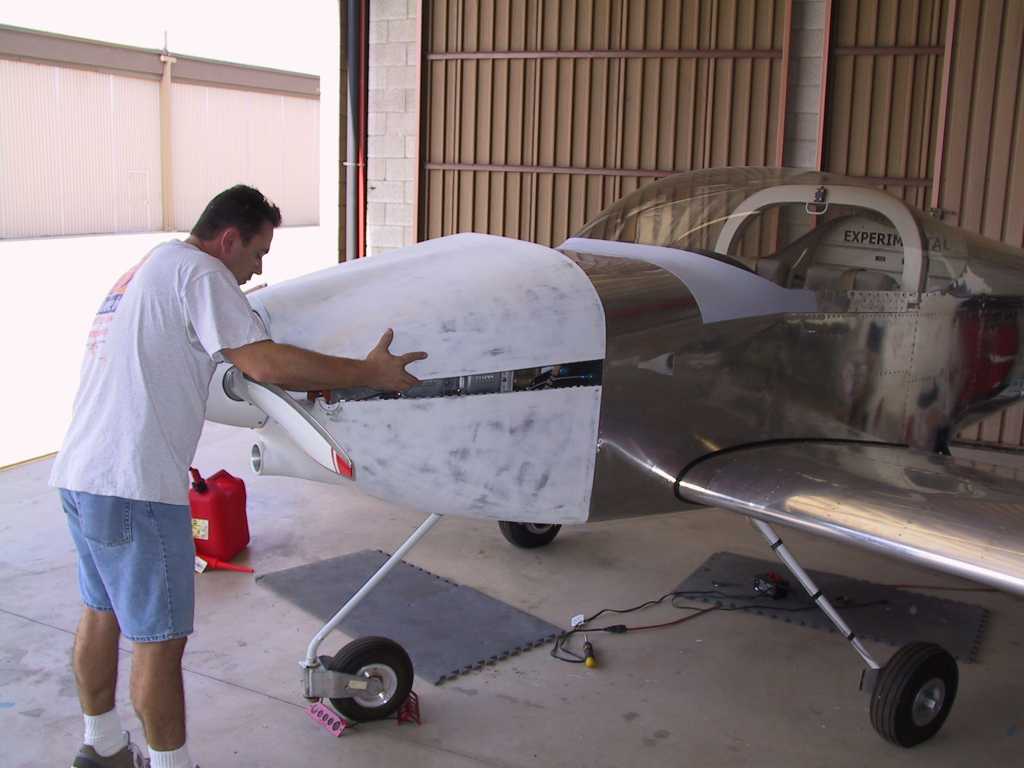
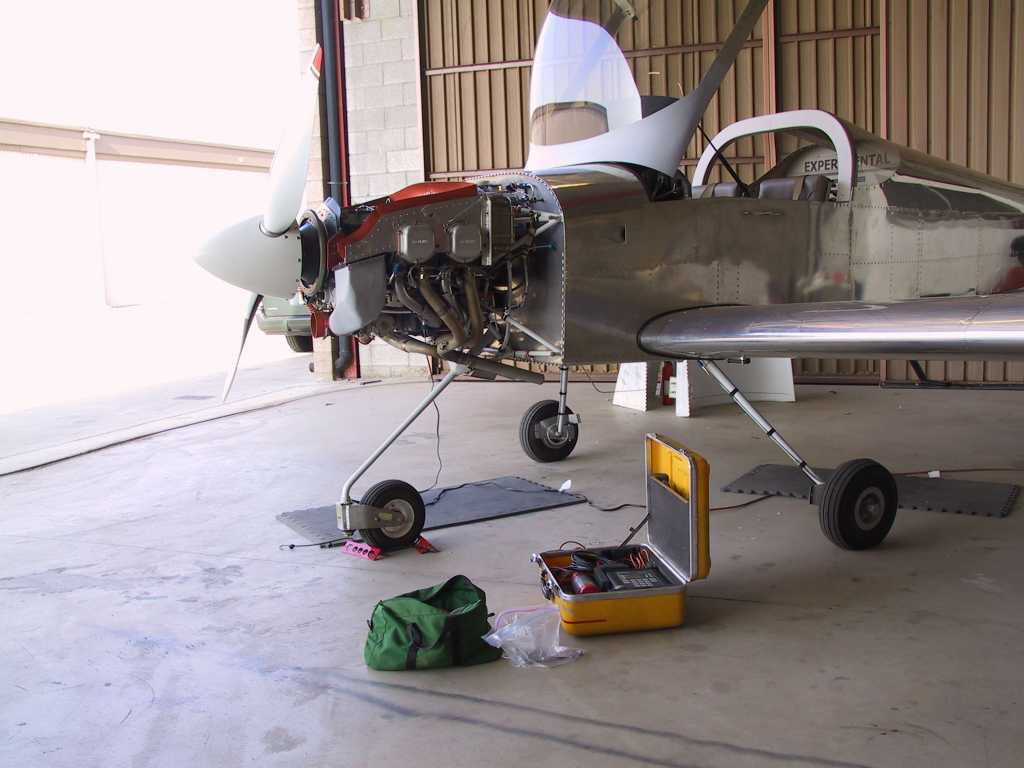
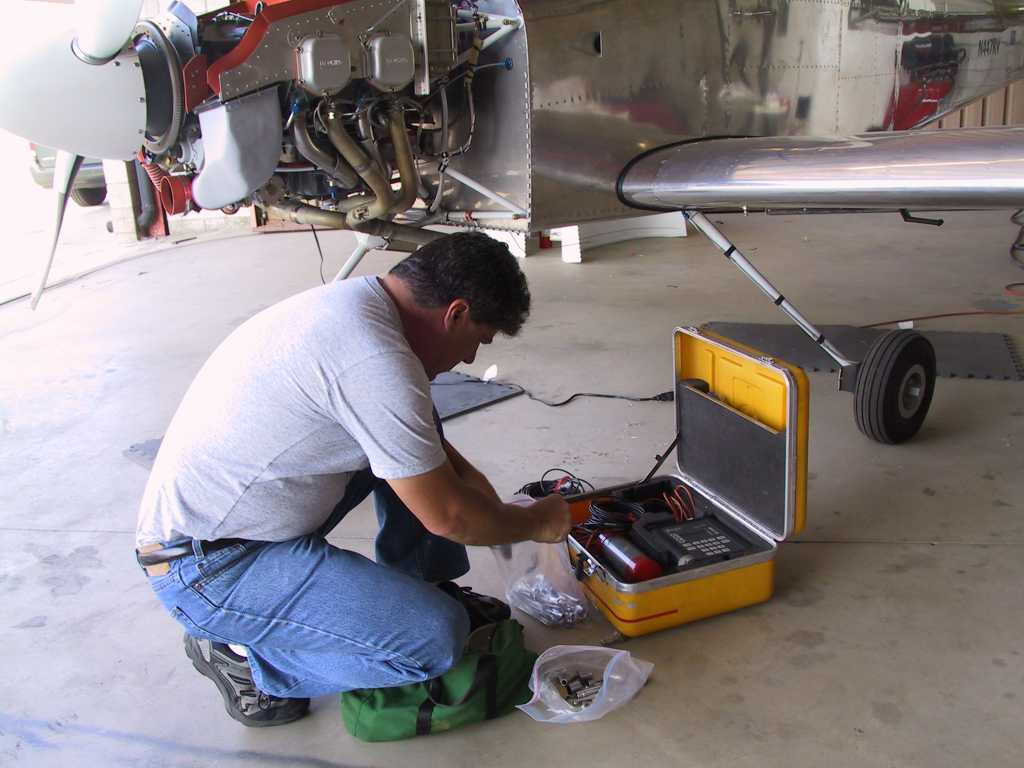
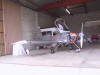
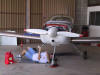
| 7/3/04 |
The BIG DAY has arrived. Time to see
whether this ship sinks or swims. Yesterday, I did a few final little
things like place the batteries into the ELT, etc. Minor stuff. I
still have an issue with the fuel guage readings on the EIS. I'll work
that out later. 447RV is as ready as she'll ever be.
Trying to grow up from a big erector set to a flying airplane in one fell swoop
today.
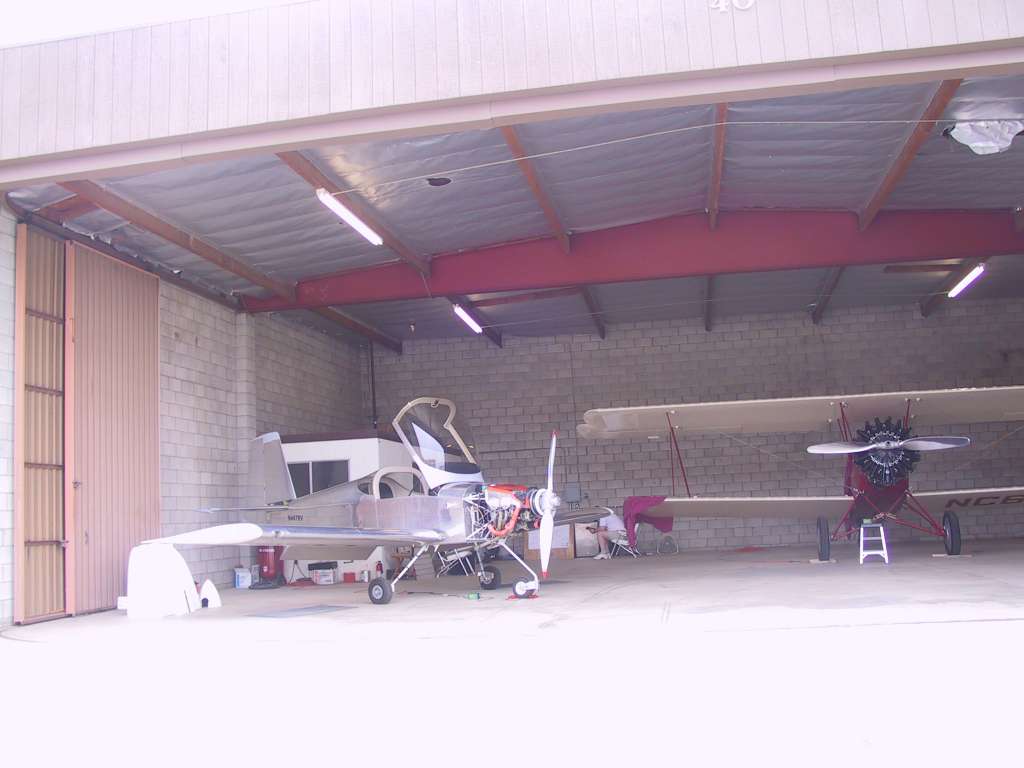
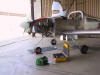
This is her with her stablemate.
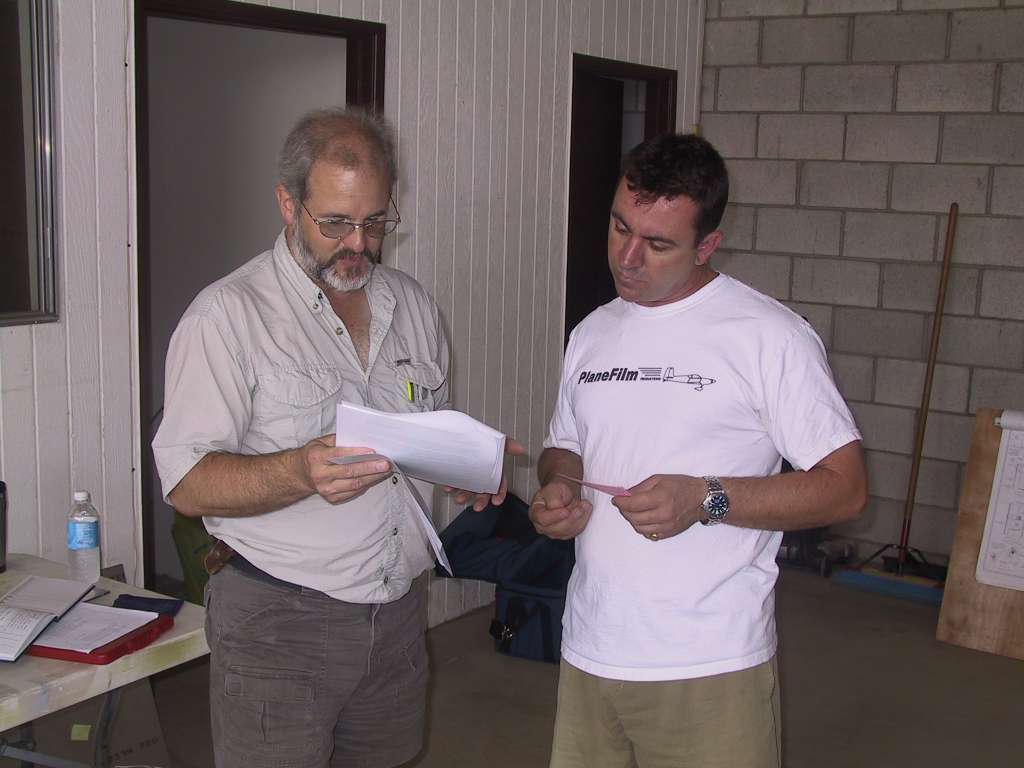
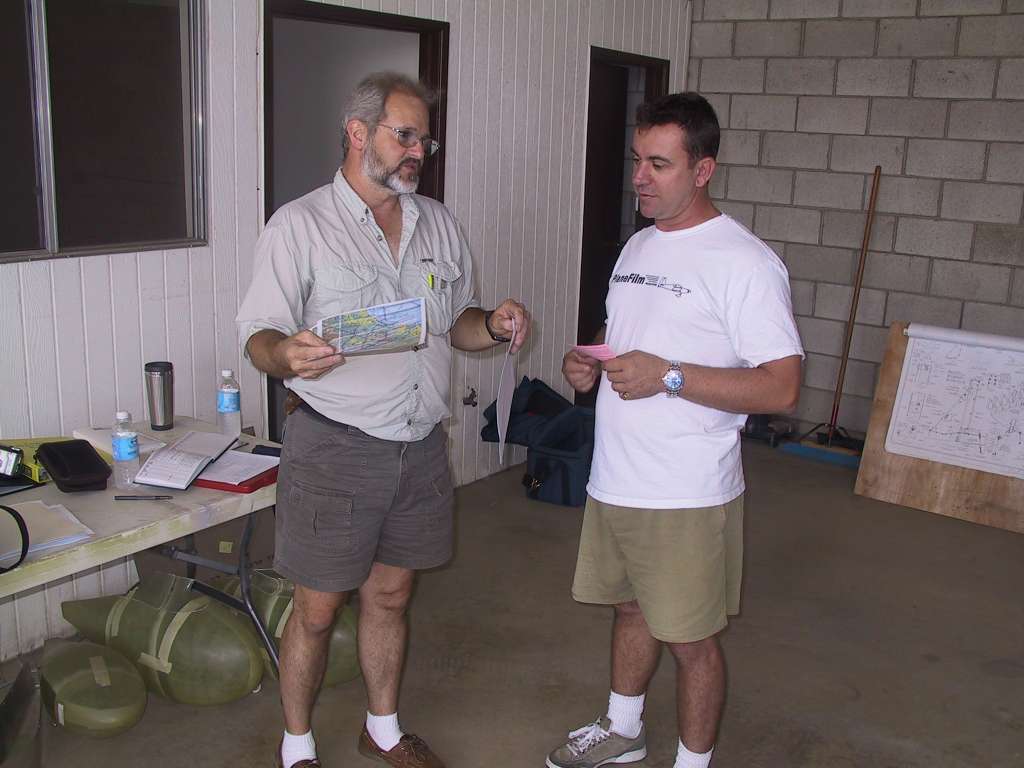
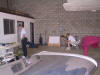
Gary Sobek showed up at the hangar at 8 AM and he proceeded to
tear into my documents.

Snapping pictures too of placards and data plates too.
And basically checking out every nook and cranny, nut, bolt,
cotter pin, screw, yada yada yada. He is very thorough, and a heck of a
nice guy. I highly recommend Gary.

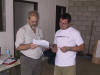
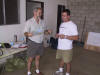
During this highly anticipated event, my friend Jon couldn't
curb his enthusiasm.
David did his usual excellent camera work too. As soon
as I get the video edited I'll stick it on the site.
After about thirty minutes into the inspection Gary said that
this was only going to take an hour or so. Surprised by this comment and
knowing that Gary said it would take around three hours earlier when we traded
emails, I asked him if that was good or bad. "Good" he said.
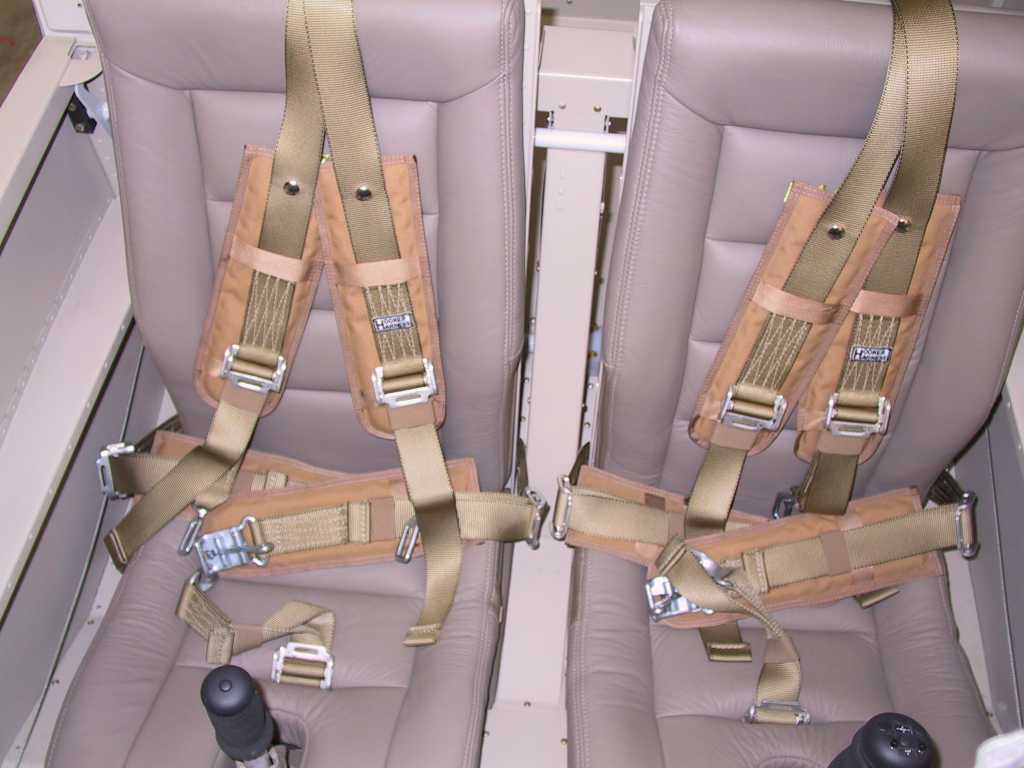
Gary found that the passenger right seatbelt harness was on
backwards so I spun it around and fixed it. Other than that, there were no
issues whatsoever. I was surprised. I was sure that something would
be found.
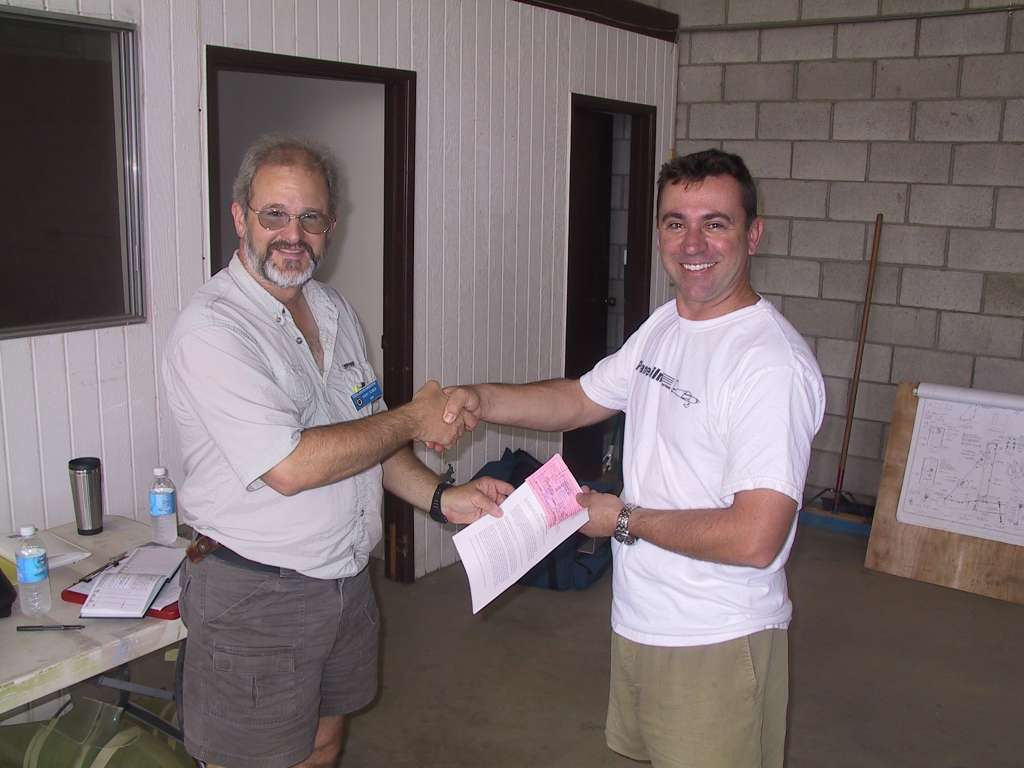
Sure enough just over an hour later, Gary turns to me and says
"Congratulations!".
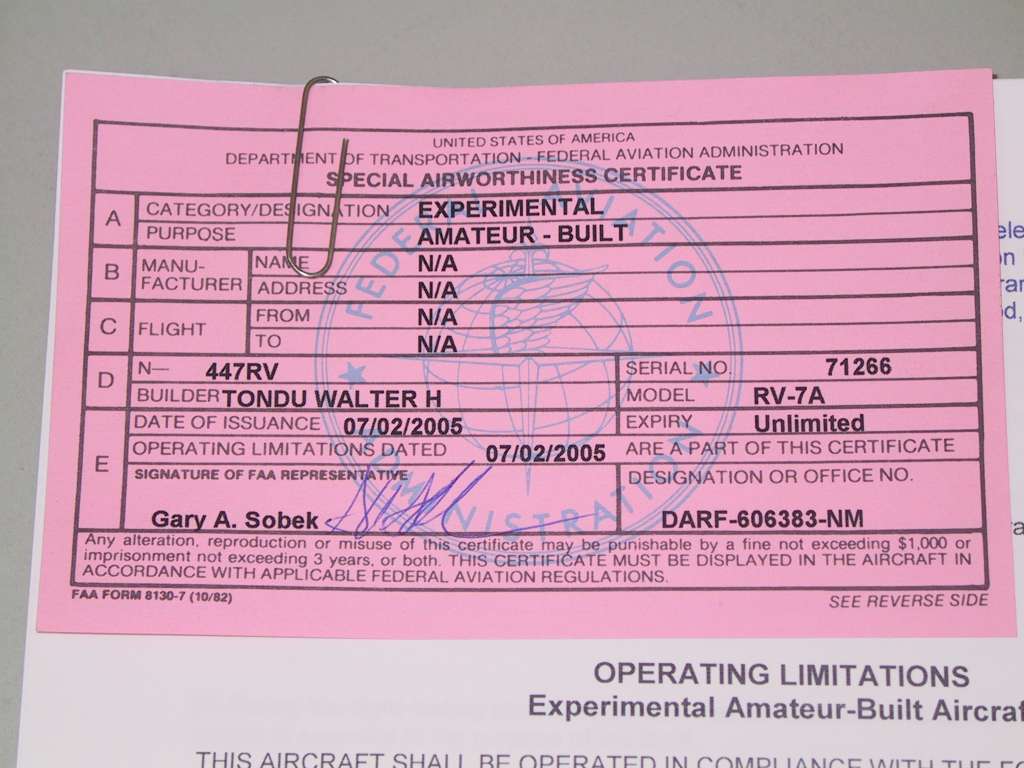
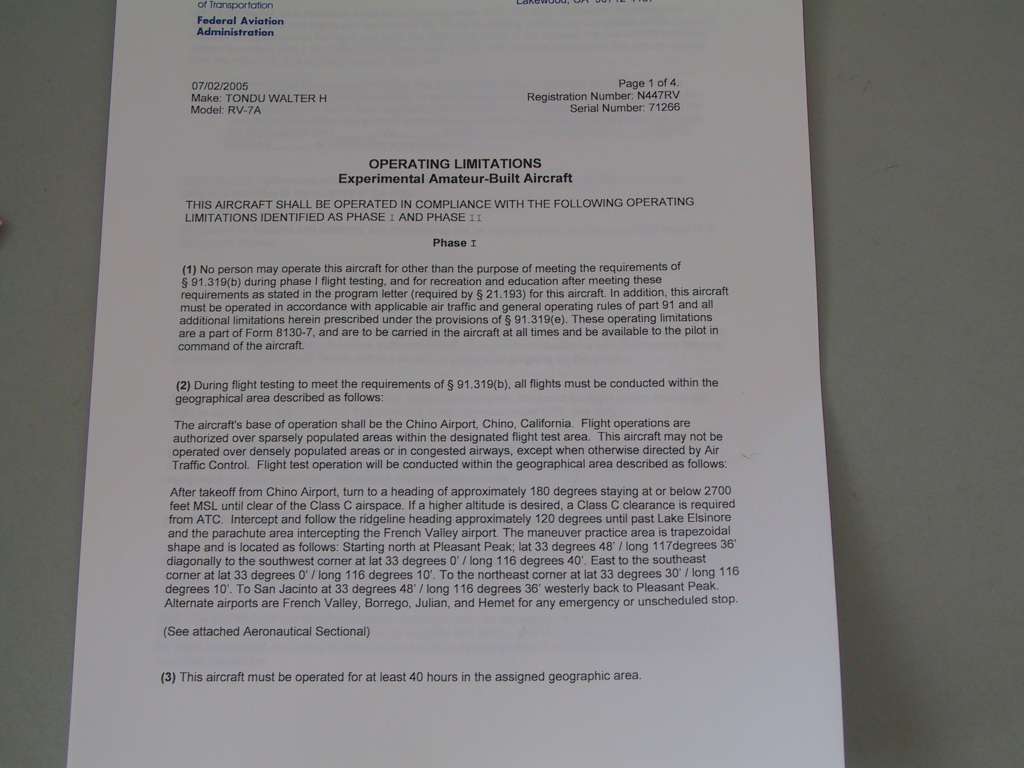
Boy am I happy right about then. You can't imagine the
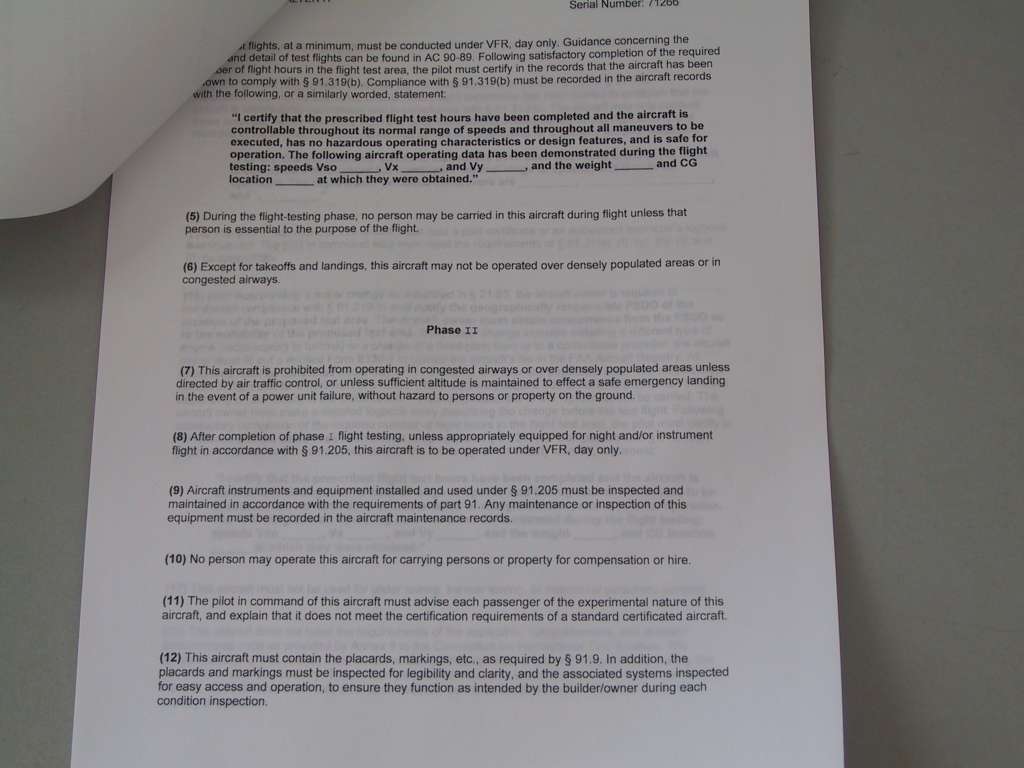
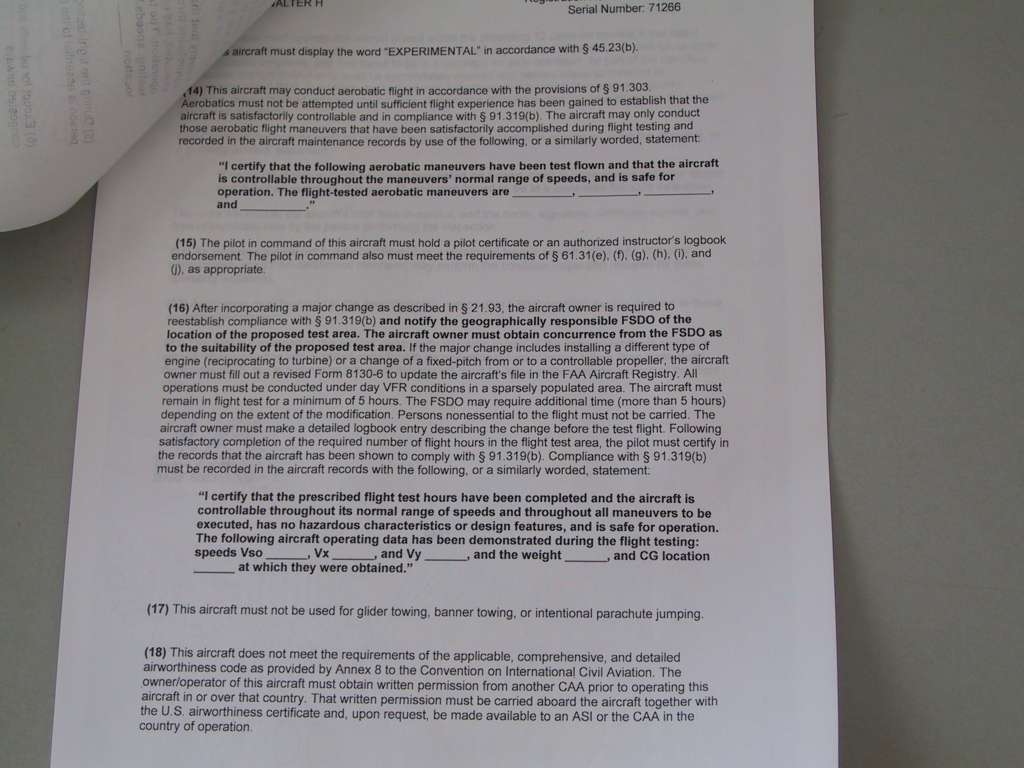
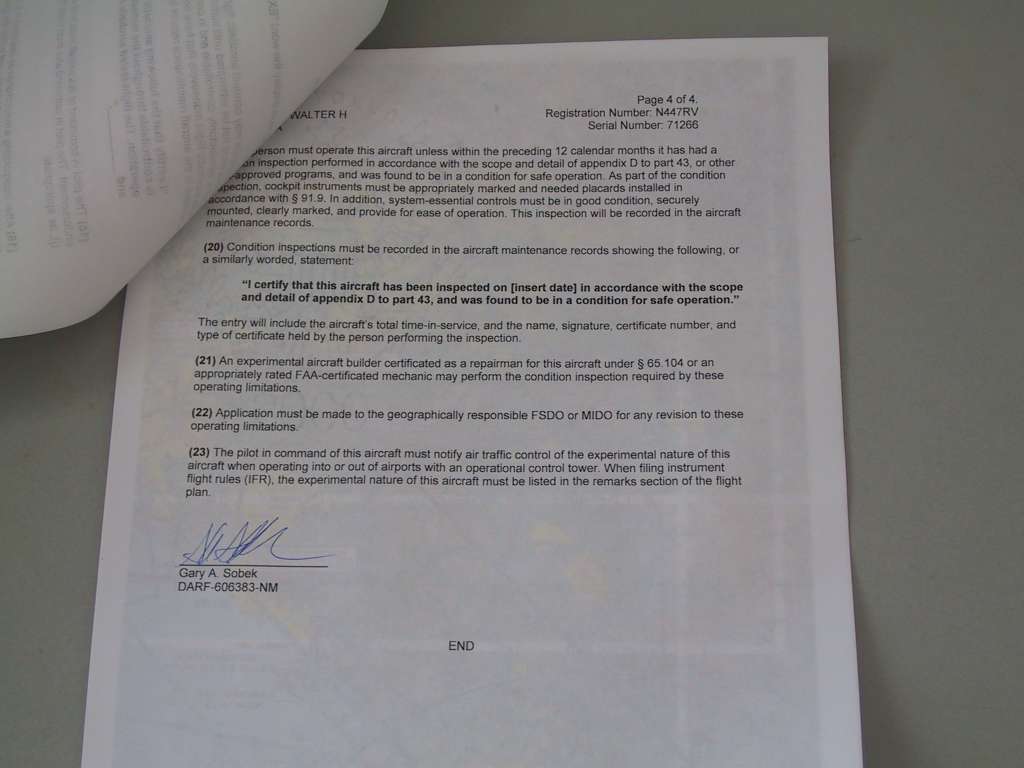
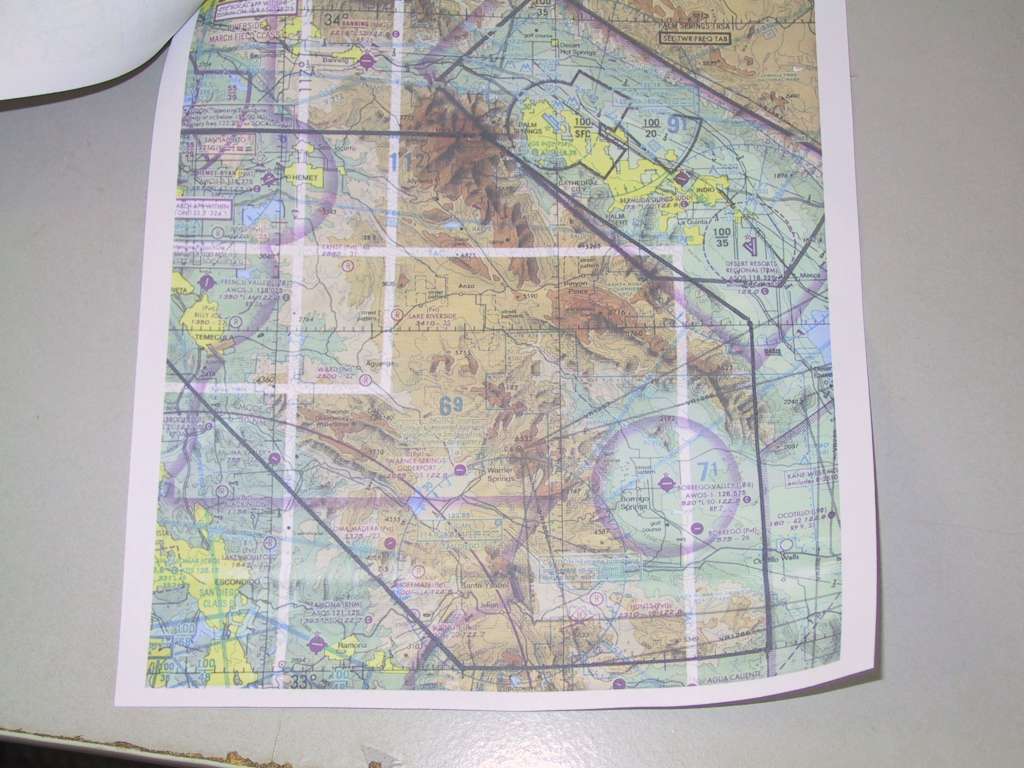
feeling. And here is my phase I & II limitations and 40 hour fly off area.
It's fricken huge.
Time to get ready to fly... |
| 7/5/05 |
Video of the DAR Inspection. Thanks Gary and David.
You guys make me look good, well almost.
Video of the DAR
Inspection |
| 7/9/05 |
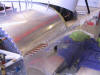
Time to get all the panels installed for the last
time. After you are done installing the 200+ screws your arms will
definitely look like Popeye's, I guarantee it. Baggage
panels in place, floors in place, baggage area panels and flap tunnel covers in
place.
Next on the agenda was the wing root fairings.
Fortunately, the gap between fairing and fuselage skin was perfect all around.
I decided to use tinnerman washers under the screw heads because without them
the fairing was puckering a bit. Looks nice with the washers too.
Fiddled around with a bunch of other stuff too, like the
empennage fairing. |
|
7/10/05 |
Got the fuel gauges (EIS 4000) working finally.
Turns out that I did not attach the fuel wires to a 470 Ohm, 4.8V feed line like
the instructions tell you. I must have spaced out. The fuel level
lines (float) were the last to be installed and I must have had a brain fart.
So I spliced the 4.8V feed line and installed two taps, one for each line.
Recalibrated the tanks by moving a full tanks worth of gass to each tank and
voila, it's all done. There are officially no more electrical jobs to work
on. I've also decided not to install the AOA voice enunciator until later.
I don't want bitchin betting on my nerves during the first few flights.
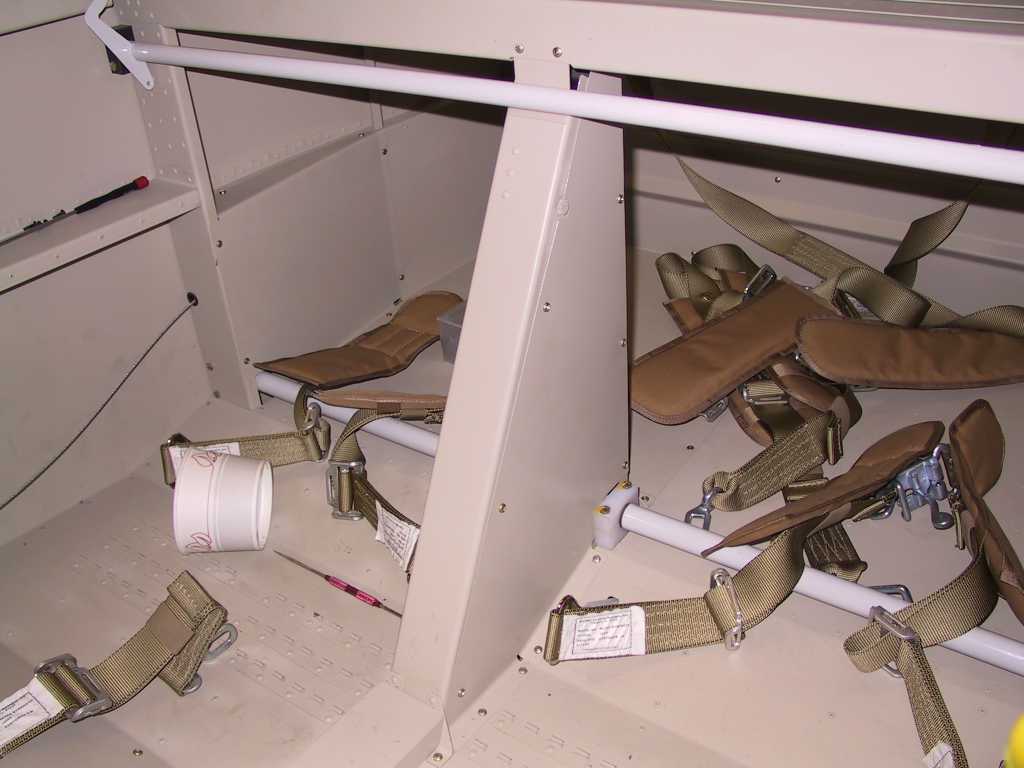
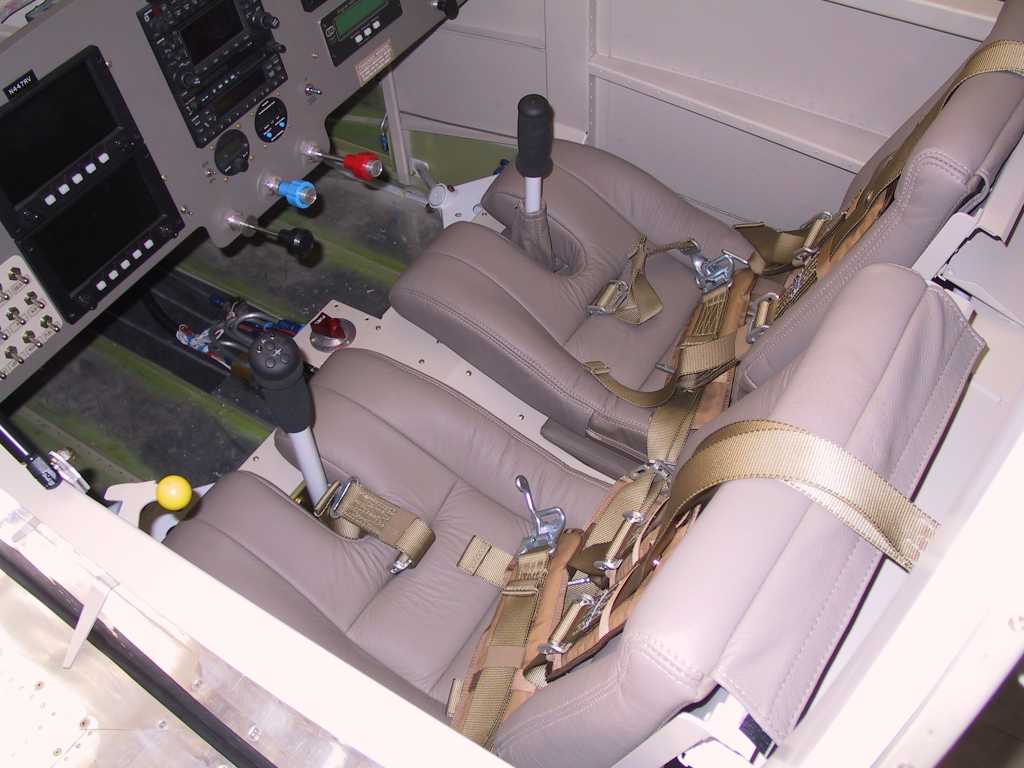
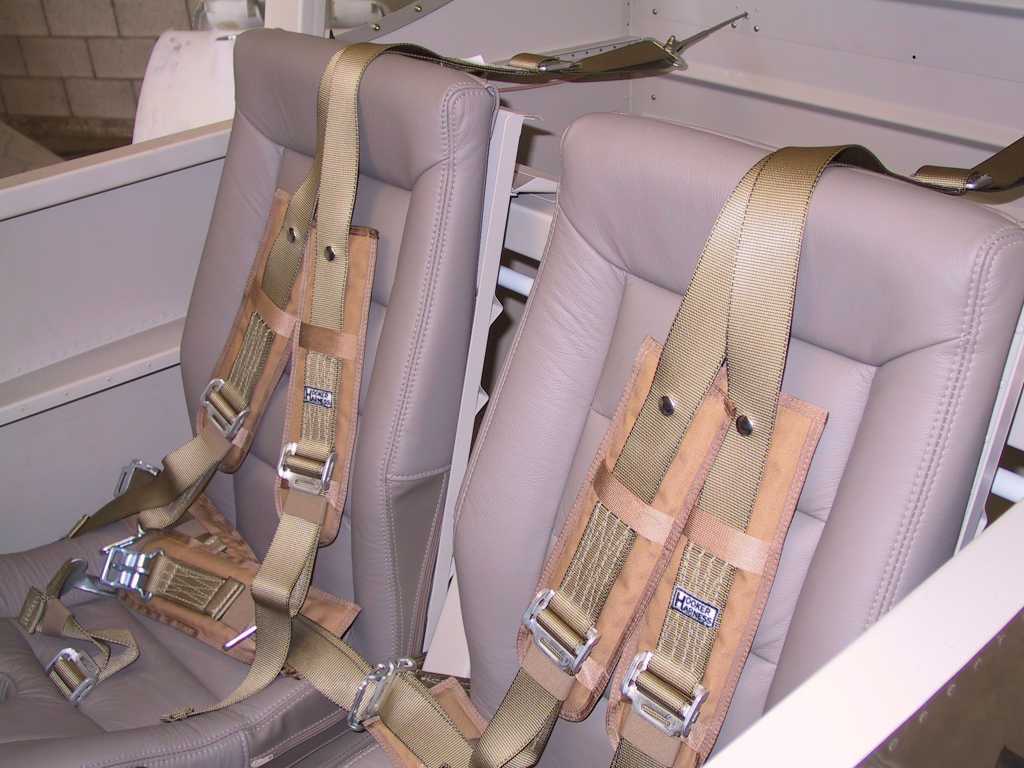
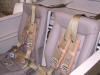
Installed the seat backs and seats and connected all the
seatbelts and adjusted them. I like the look of the leather and belts,
turned out just like I had hoped for.
Not much left to do, in fact, I really can't think of
anything, except fly. |
|
7/16/05 |
Today I wanted to taxi the plane a bit and make
sure the brakes work and that I have full throttle response and that all the
instruments are working together. So I closed up everything before the
taxi test.
The taxi test went just fine. I taxied over to the fuel
dock and got some gas. I did notice that the MP on the EFIS and the fuel
level indicators on the EFIS were not working. Must be a software setting
I did not pay attention too. I'll fix it tomorrow.
Made a stupid little
video of the
taxi test. I guess you could say I'm mucho bored. I've been
doing some flying lately and it's just like old hat. No problemo.
Getting excited to do the transition training this coming weekend in Dallas, and
even more excited to get this thing into the air. It's been way too long
building. |
|
7/17/05 |
I found out what the problem was with the MP and
fuel levels, as I suspected, it was a setup issue, solved in two minutes.
I installed the wing walks. First I trimmed the square
edges with a two inch radius. This will help to keep the edges from coming
unstuck.
Since I don't want to have to remove the cowl to keep the
battery tender on it after every flight I installed the battery tender cables
permanently to the battery posts and ran the connection point up to the oil
filler tube so I can access it via the oil filler door.

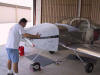
Lastly I stuck some of the shiny heat shield onto the bottom
of the cowl. Ohhhhh, shiny. I did cut out the section where my nose
gear leg comes through later.
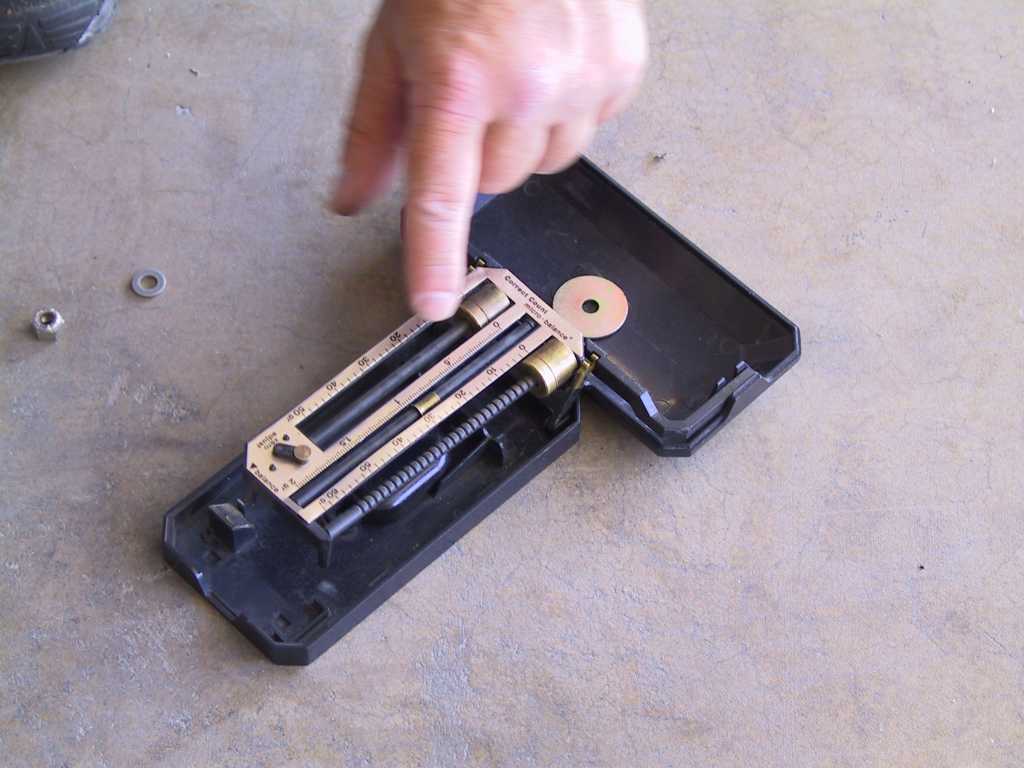
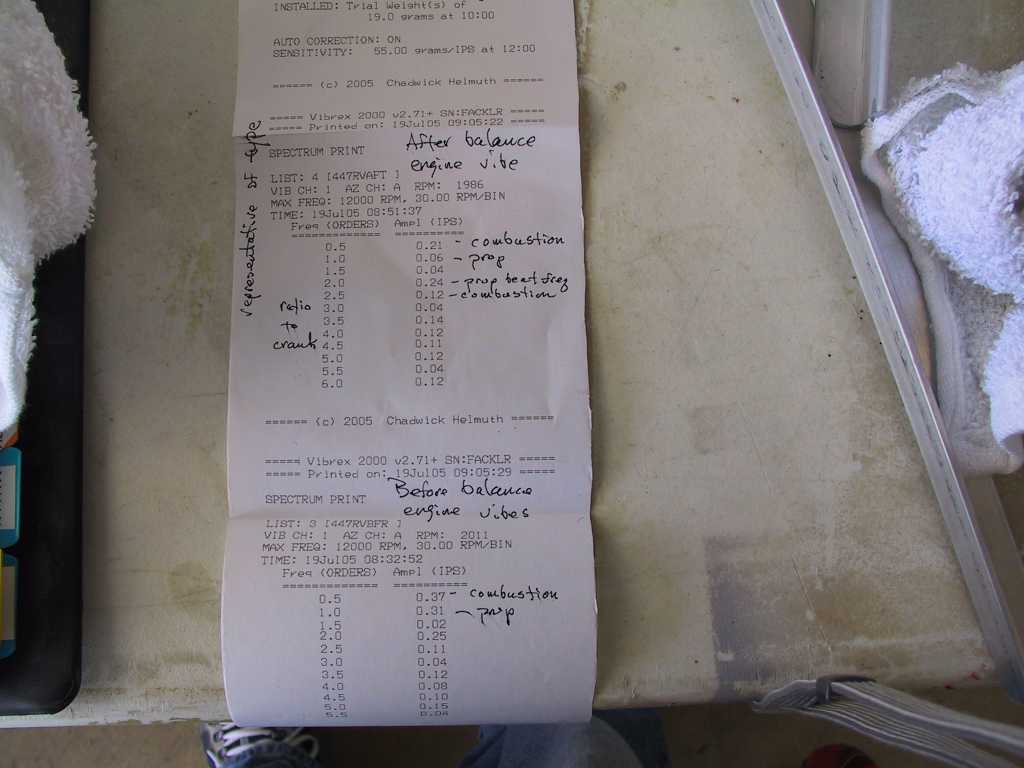
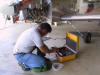
The prop balancing will take place this Tuesday at 8:00 am.
It's not a requirement but it's certainly good insurance. The WW manual
specifies that this be done as well, so I'm just following orders.
Jim Fackler will be doing the work.
I continue to refine my POH as well. |
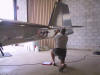
| 7/19/05 |
I met Jim Fackler (626) 358-7568 today at
the hangar at 8:00 AM to get the prop/engine balanced. This is not a
requirement but many agree that this is definitely worth the money ($150) and
Whirlwind recommends that this be accomplished before first flight. Here's
some information written by Jim for your perusing.
http://home.earthlink.net/~yak52driver/balance.html
Jim comes well prepared and has been doing this type of work for a bazillion
years, it's definitely worth the investment. First he gets all of his
stuff in place and begins to hook up some appliances to the plane.
This sensor is some sort of piezo-electric doodad which
monitors the rotation of the earth relative to your propeller, not. He
told me what it was but it's over my head.
Then some reflective tape on the back of the propeller and a
dohickey which measures the rpm, I think.
Ran the engine up at 1000, 1500, and 2000 rpm.
Afterwards he attached a couple of precisely weighed nuts/bolts to the starter
flywheel. When I asked him what the cause of the out-of-balance could be
(it was minimal to start with) he indicated that most likely it was the spinner/backplate.
This is normal, you cannot easily fabricate a composite spinner/backplate which
is perfect in rotational cg (my words, not his), You get the picture, it's
probably the main cause but of course the engine and prop are not perfect
either. In any case, I'm very pleased with the results.
 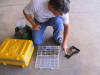 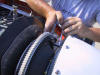
Ran the engine up twice more to 2000 rpm and presto, she's
done. It took about an hour. Then we swapped flying bs for a while.
Hell of a nice guy.

Entry made into the engine logbook and back to work.
Did find one issue today on the runup. The primary
alternator (60A) is not producing power as expected. Must be a wiring
issue. The backup alternator is working as expected. I think I know
what the problem is and will try to fix it after I return from Dallas.
I also had an issue with the low rpm setting. Low was so
low that the engine would sputter and die. I modified the control a bit a
few days ago and now low rpm produces about 800 RPM, perfect.
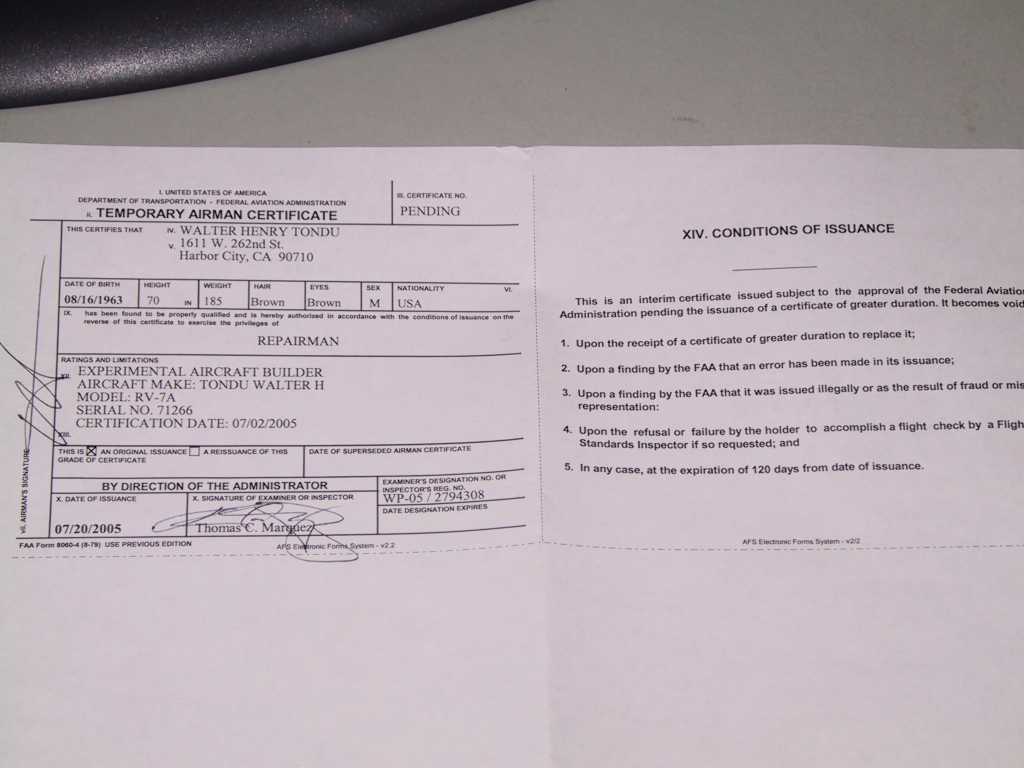
Got a call later in the day from the FAA. They got my
paperwork for the Repairman's certificate. I'm going to meet with them
tomorrow to go over my paperwork and builders log. I was concerned that my
builder log is on the web and asked if they could just use that, "No problem."
was the response. In fact he brought it up right then and said it would
suffice for tomorrow's meeting. One less thing to do. |
|
7/20/05 |
Met with Tom Marquez of the FAA today. He
had already previewed the website and pretty much didn't have any real tough
questions for me. He was very pleasant and I enjoyed our meeting. I
had brought a CD-ROM of the website for him to review. He ended up keeping
it for himself. BTW, if any of you want this site on CD-ROM, just let me
know. Ahhhh, repairman's certificate in hand. The paperwork trail
has ended.
 |
|
7/23/05 |
Transition Training has arrived. I met with
Ben Johnson about 9:00 AM and we went over V speeds and a bunch of other stuff
related to flying the RV. He definitely knows what he's talking about and
immediately I got a good feeling from him. Well, how can you not?
He's a Texan! To be honest, I haven't met a true Texan I didn't like.
I lived there for 10 years before moving to SoCal. I wanna move back
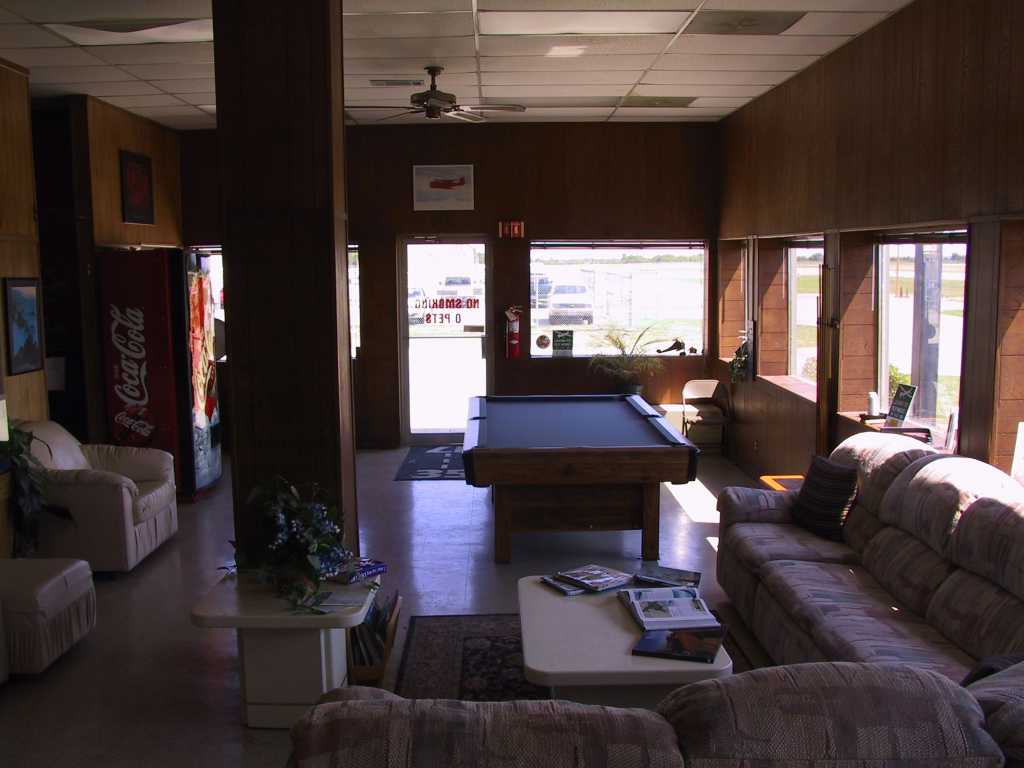
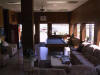
someday (soon?). Ben has a great facility, he's even got
a pool table in the FBO. And he's got a couple of great dogs to round out
the facility too, yep, I'm a dog lover as well.
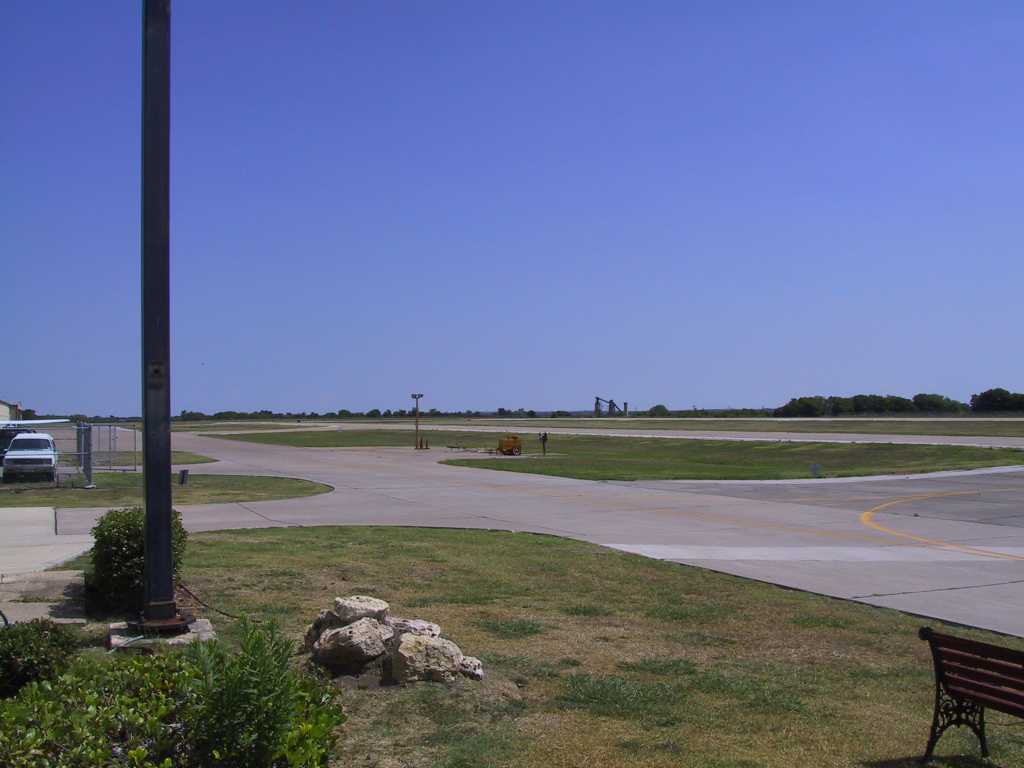
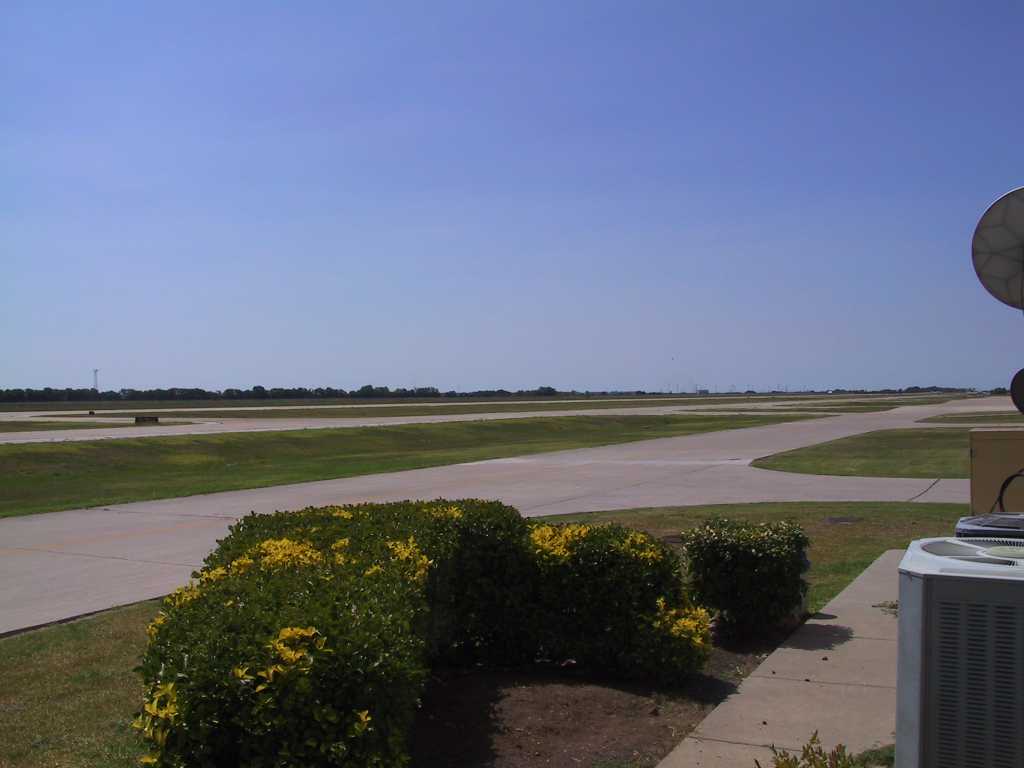
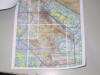
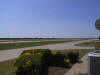
Here's a shot of lovely Mesquite Metro; North and South.
One thing you will notice is that there are no mountains to run into. The
one thing you cannot tell from the photos is the 105 degree temperature outside.
Of course I had to pick the weekend with the highest heat index for the past
three years. But I did find out that the large air vents produce a very
nice blast of air when the prop is spinning. It was actually quite
comfortable even sitting on the ground.
Flew today for 1.9 hours. Did all the usual stuff.
I actually flew pretty well. My first landing seemed like it was made for
a C172 but all the rest were pretty "ok". At least no metal was bent and
no parts left on the runway... |
| 7/24/05 |
Flew again in the morning for another 1.4 hours.
Had another good day and learned a bunch from Ben. If you are considering
getting transition training, Ben gets a big thumbs up!
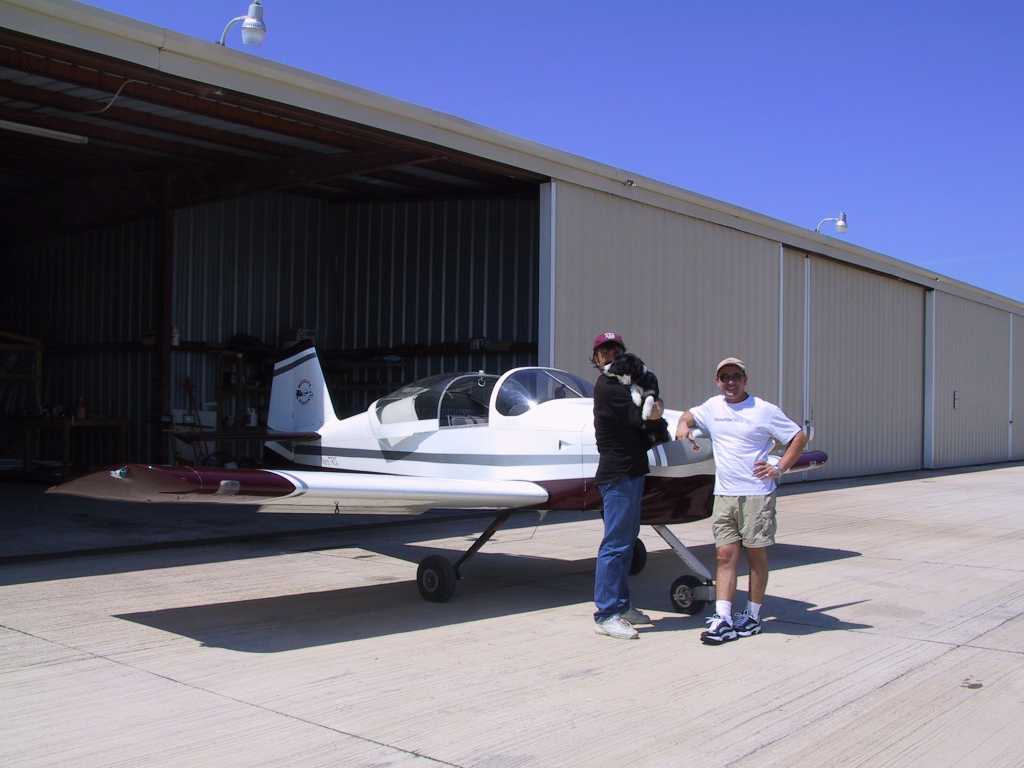
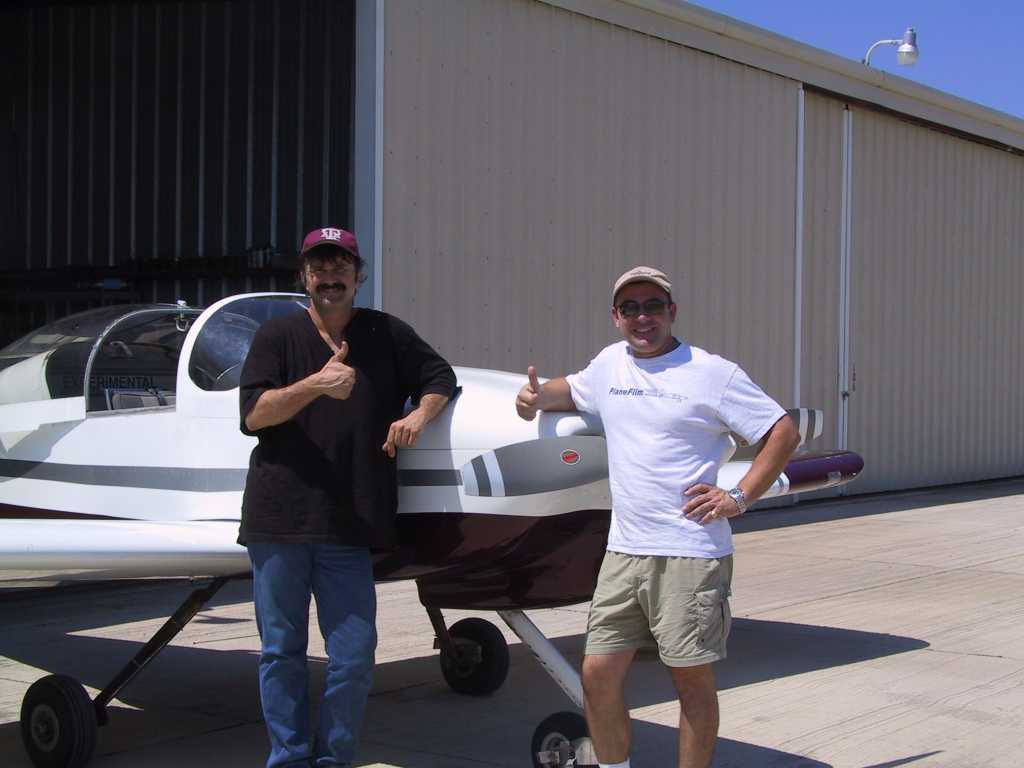
Ben signed all the docs and we got a couple of candid shots.
Thanks Ben for all the great information and training. I definitely feel
ready to fly.
 
When will I fly? I dunno. I've got one wire to fix
for the primary alternator. But I can't get away from work during this
week, too damn busy. On Saturday I leave for Michigan for 9 days.
That leaves the weekend of August 13/14th. I'm afraid the recent
transition training will get rusty by then, maybe not. If I can sneak out
of the office this week then I may just go for it. In any case, this is
the last entry on this page, it's definitely time for
Phase 1. |
|